


In partnership with Cochrane Tree Care and Backyard Harvest Project, we ran a Covid-friendly outdoor fall workshop where participants learned about Cultivate Cochrane, garlic planting, a permaculture approach to growing, and pruning techniques.
Labour day parade

Cochrane’s 2020 Labour Day Parade was adapted for Covid with visitors walking among the stationary “floats”. Cultivate Cochrane engaged many community members in conversation about our initiative and contributed free seed packs, local garlic bulbils and a Cultivate Cochrane postcard to the swag bags handed out to attendees.
Backyard Greenhouse - Part 4: Plants Move In
Welcome to a series of blogs about Cultivate Cochrane president Jackie Skrypnek’s backyard greenhouse building process. The intent is to share a realistic account of one couple’s experience to help inspire and inform other community members in their own season-extending, food-producing ventures.
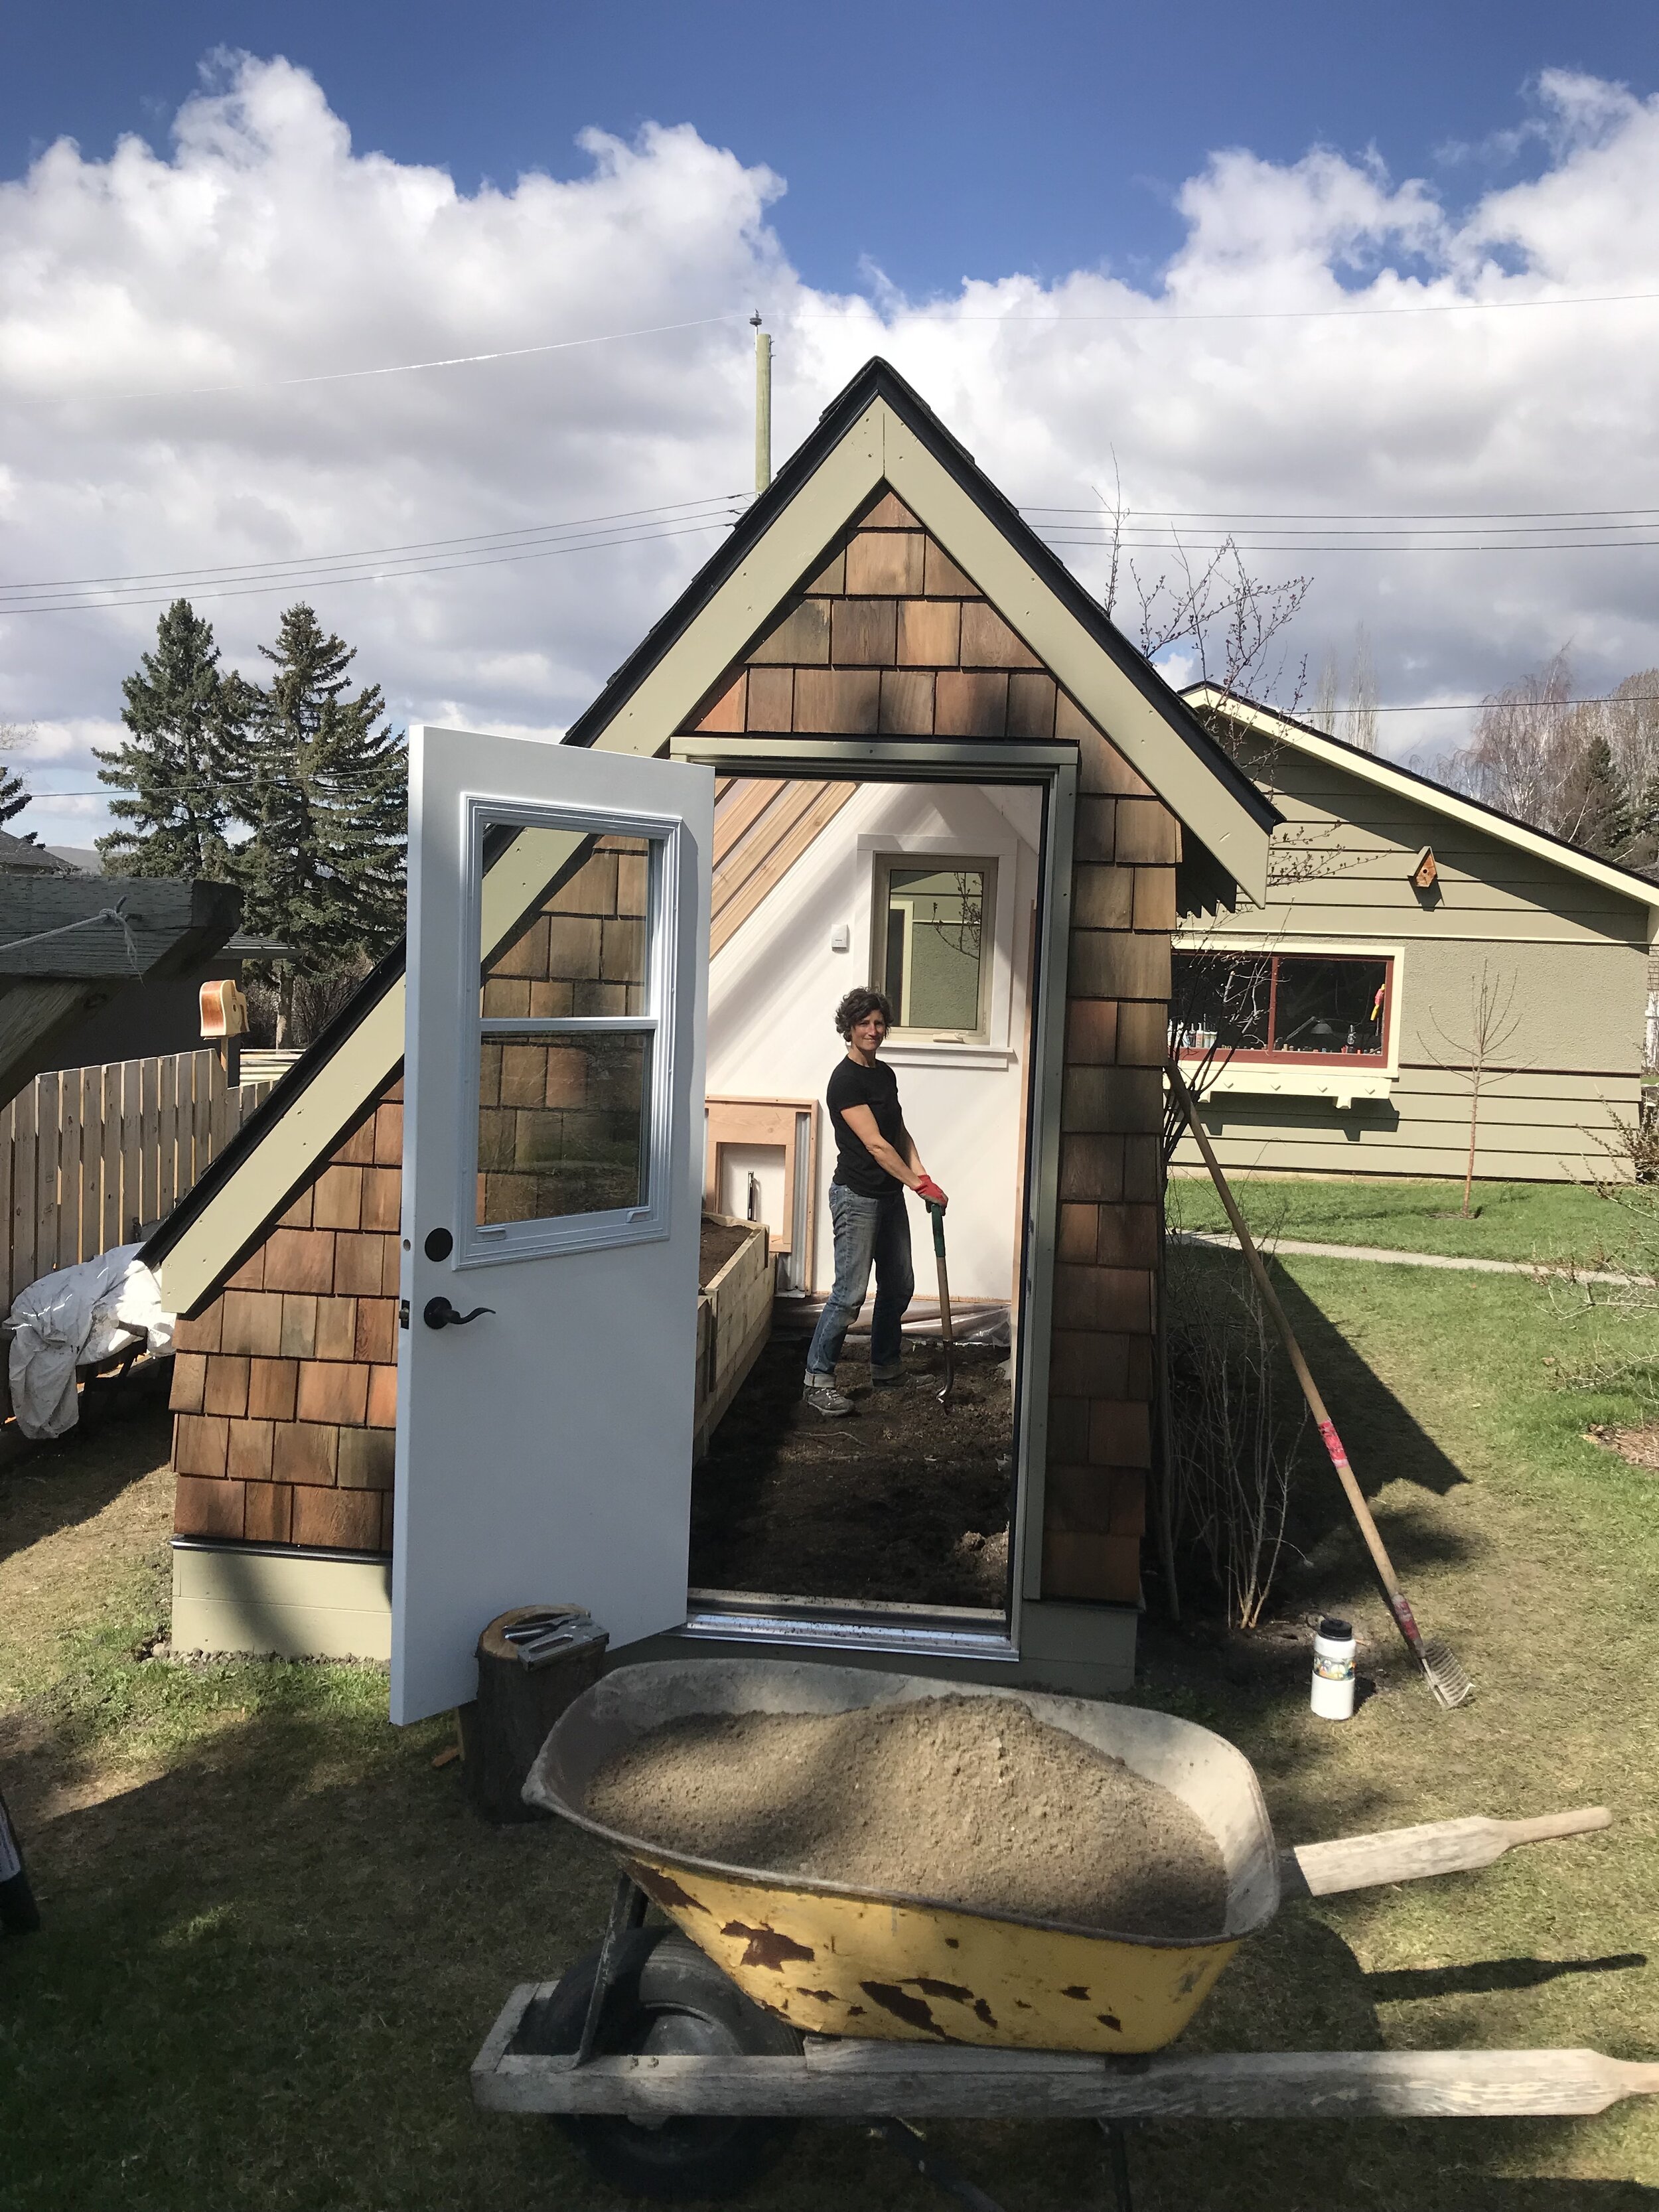
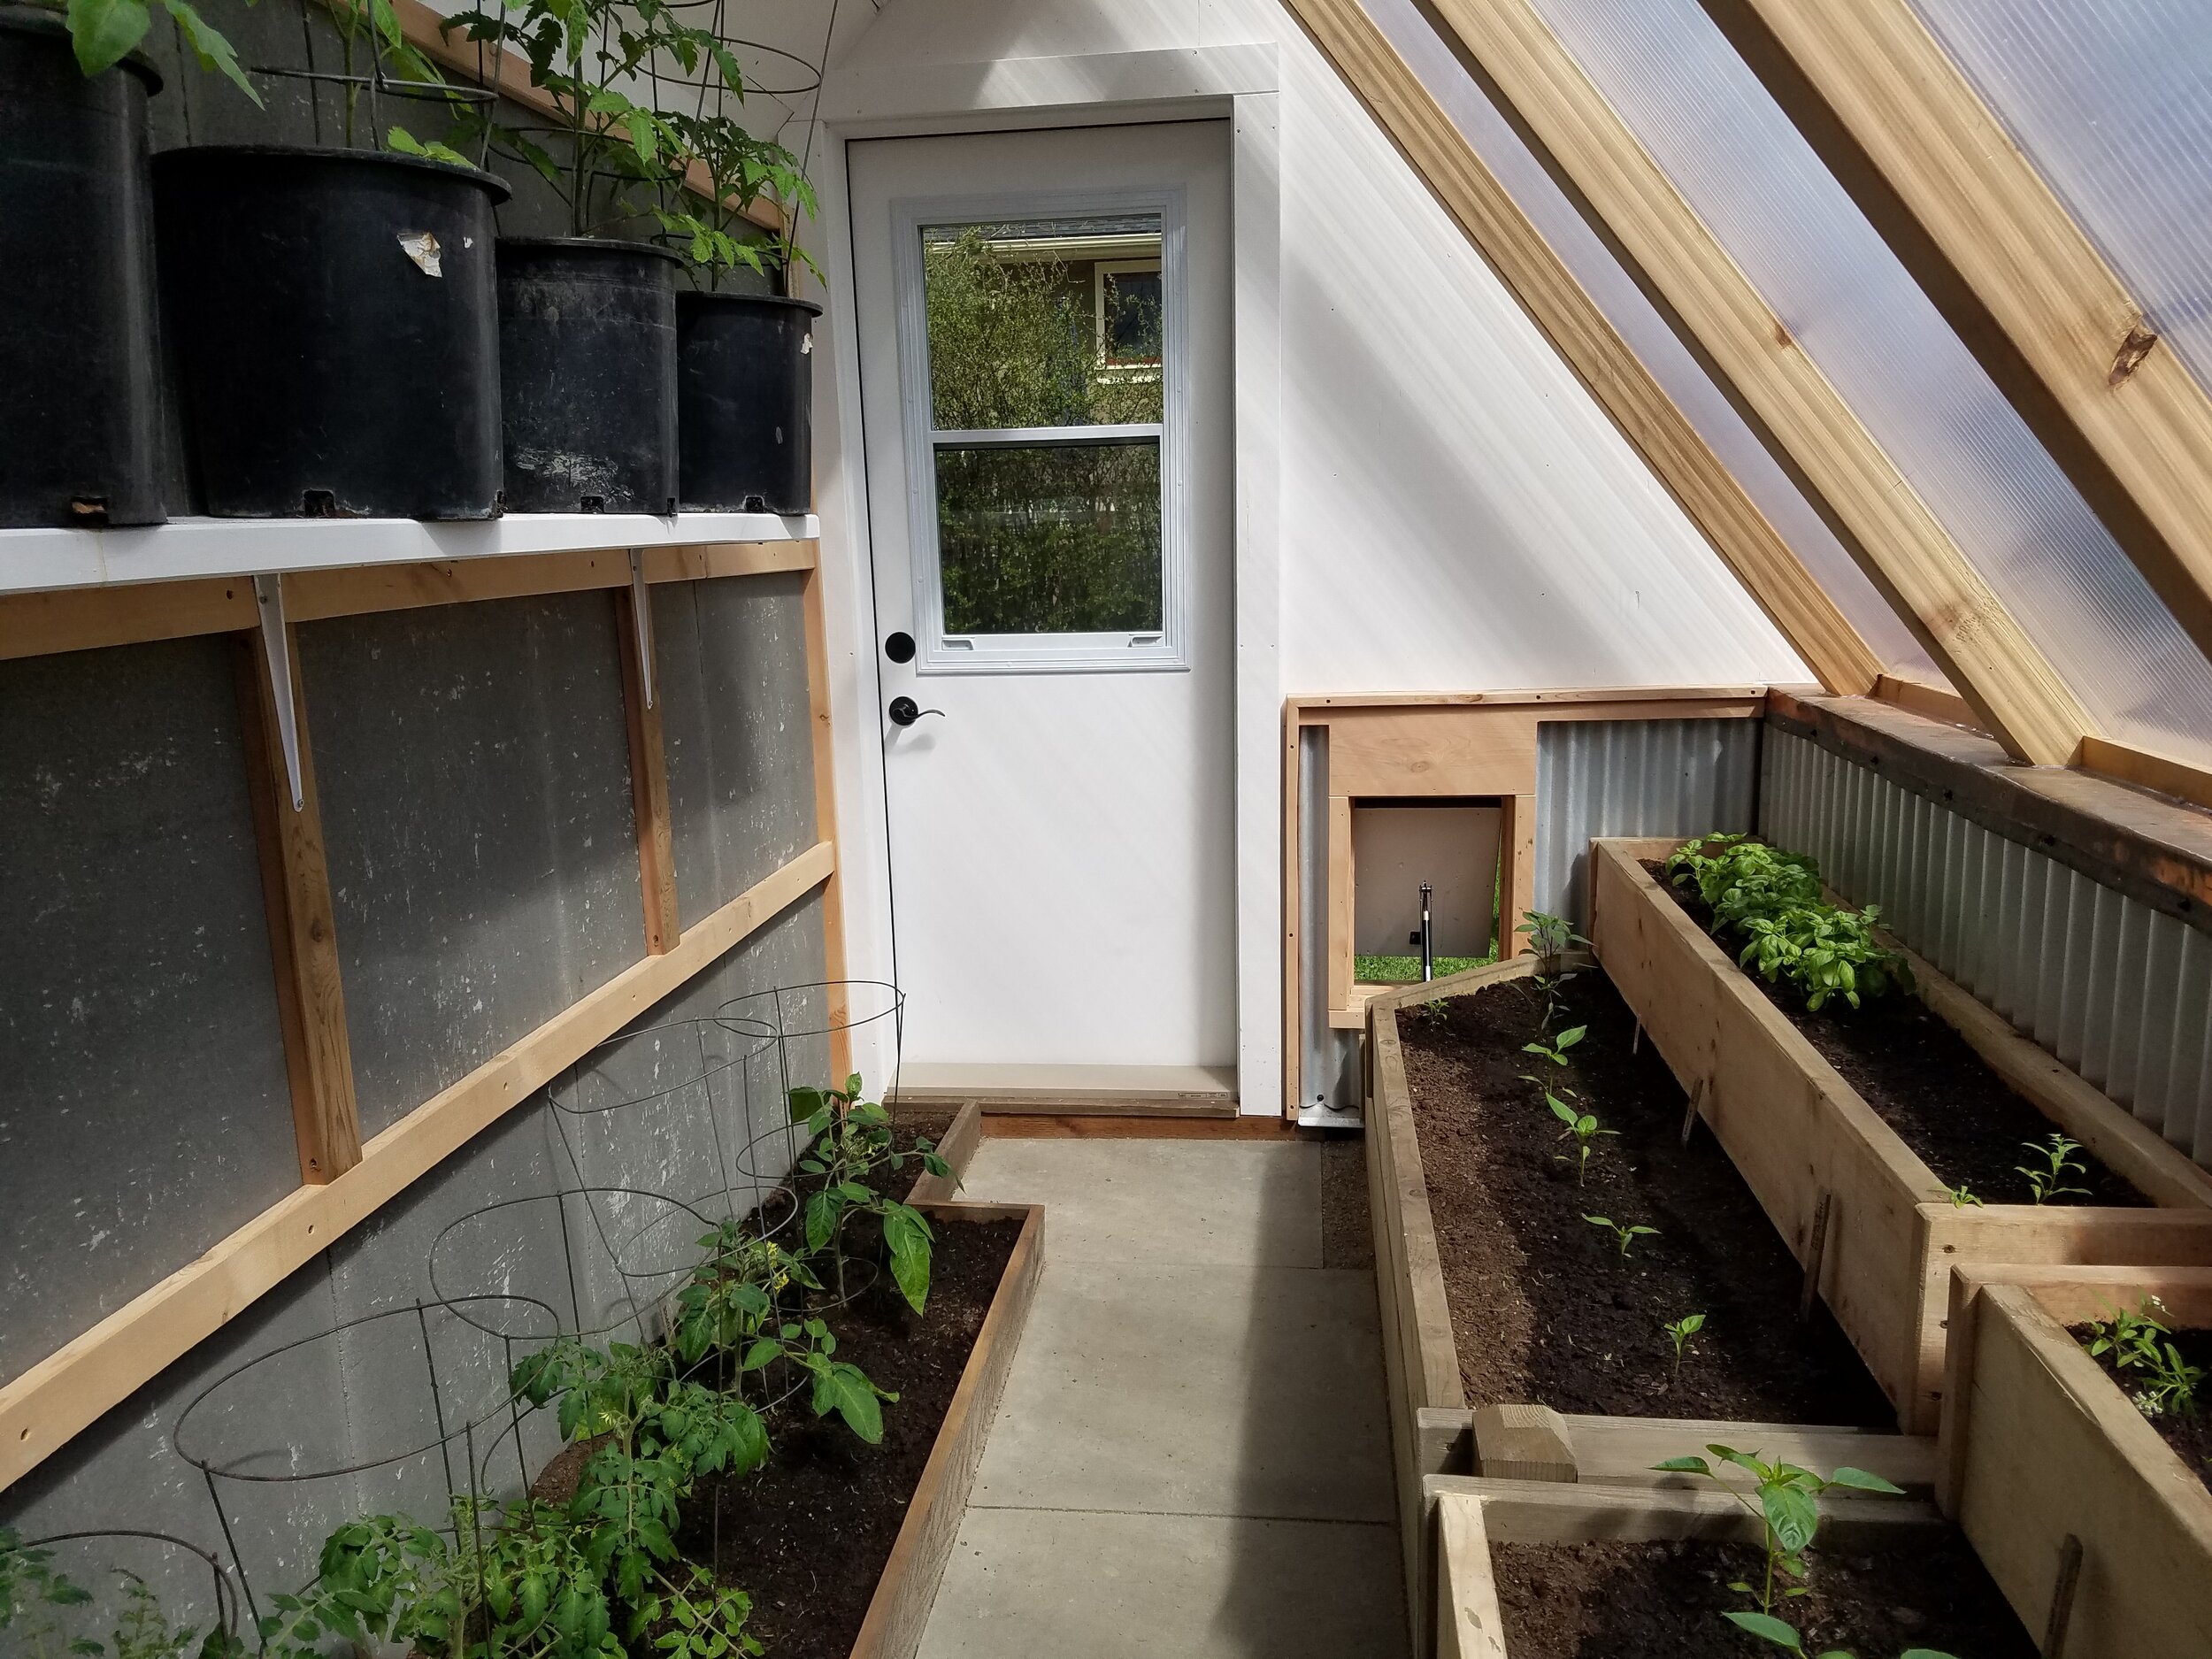
With our little home for plants more or less complete, the only thing left for us to do was furnish it and help them move in!
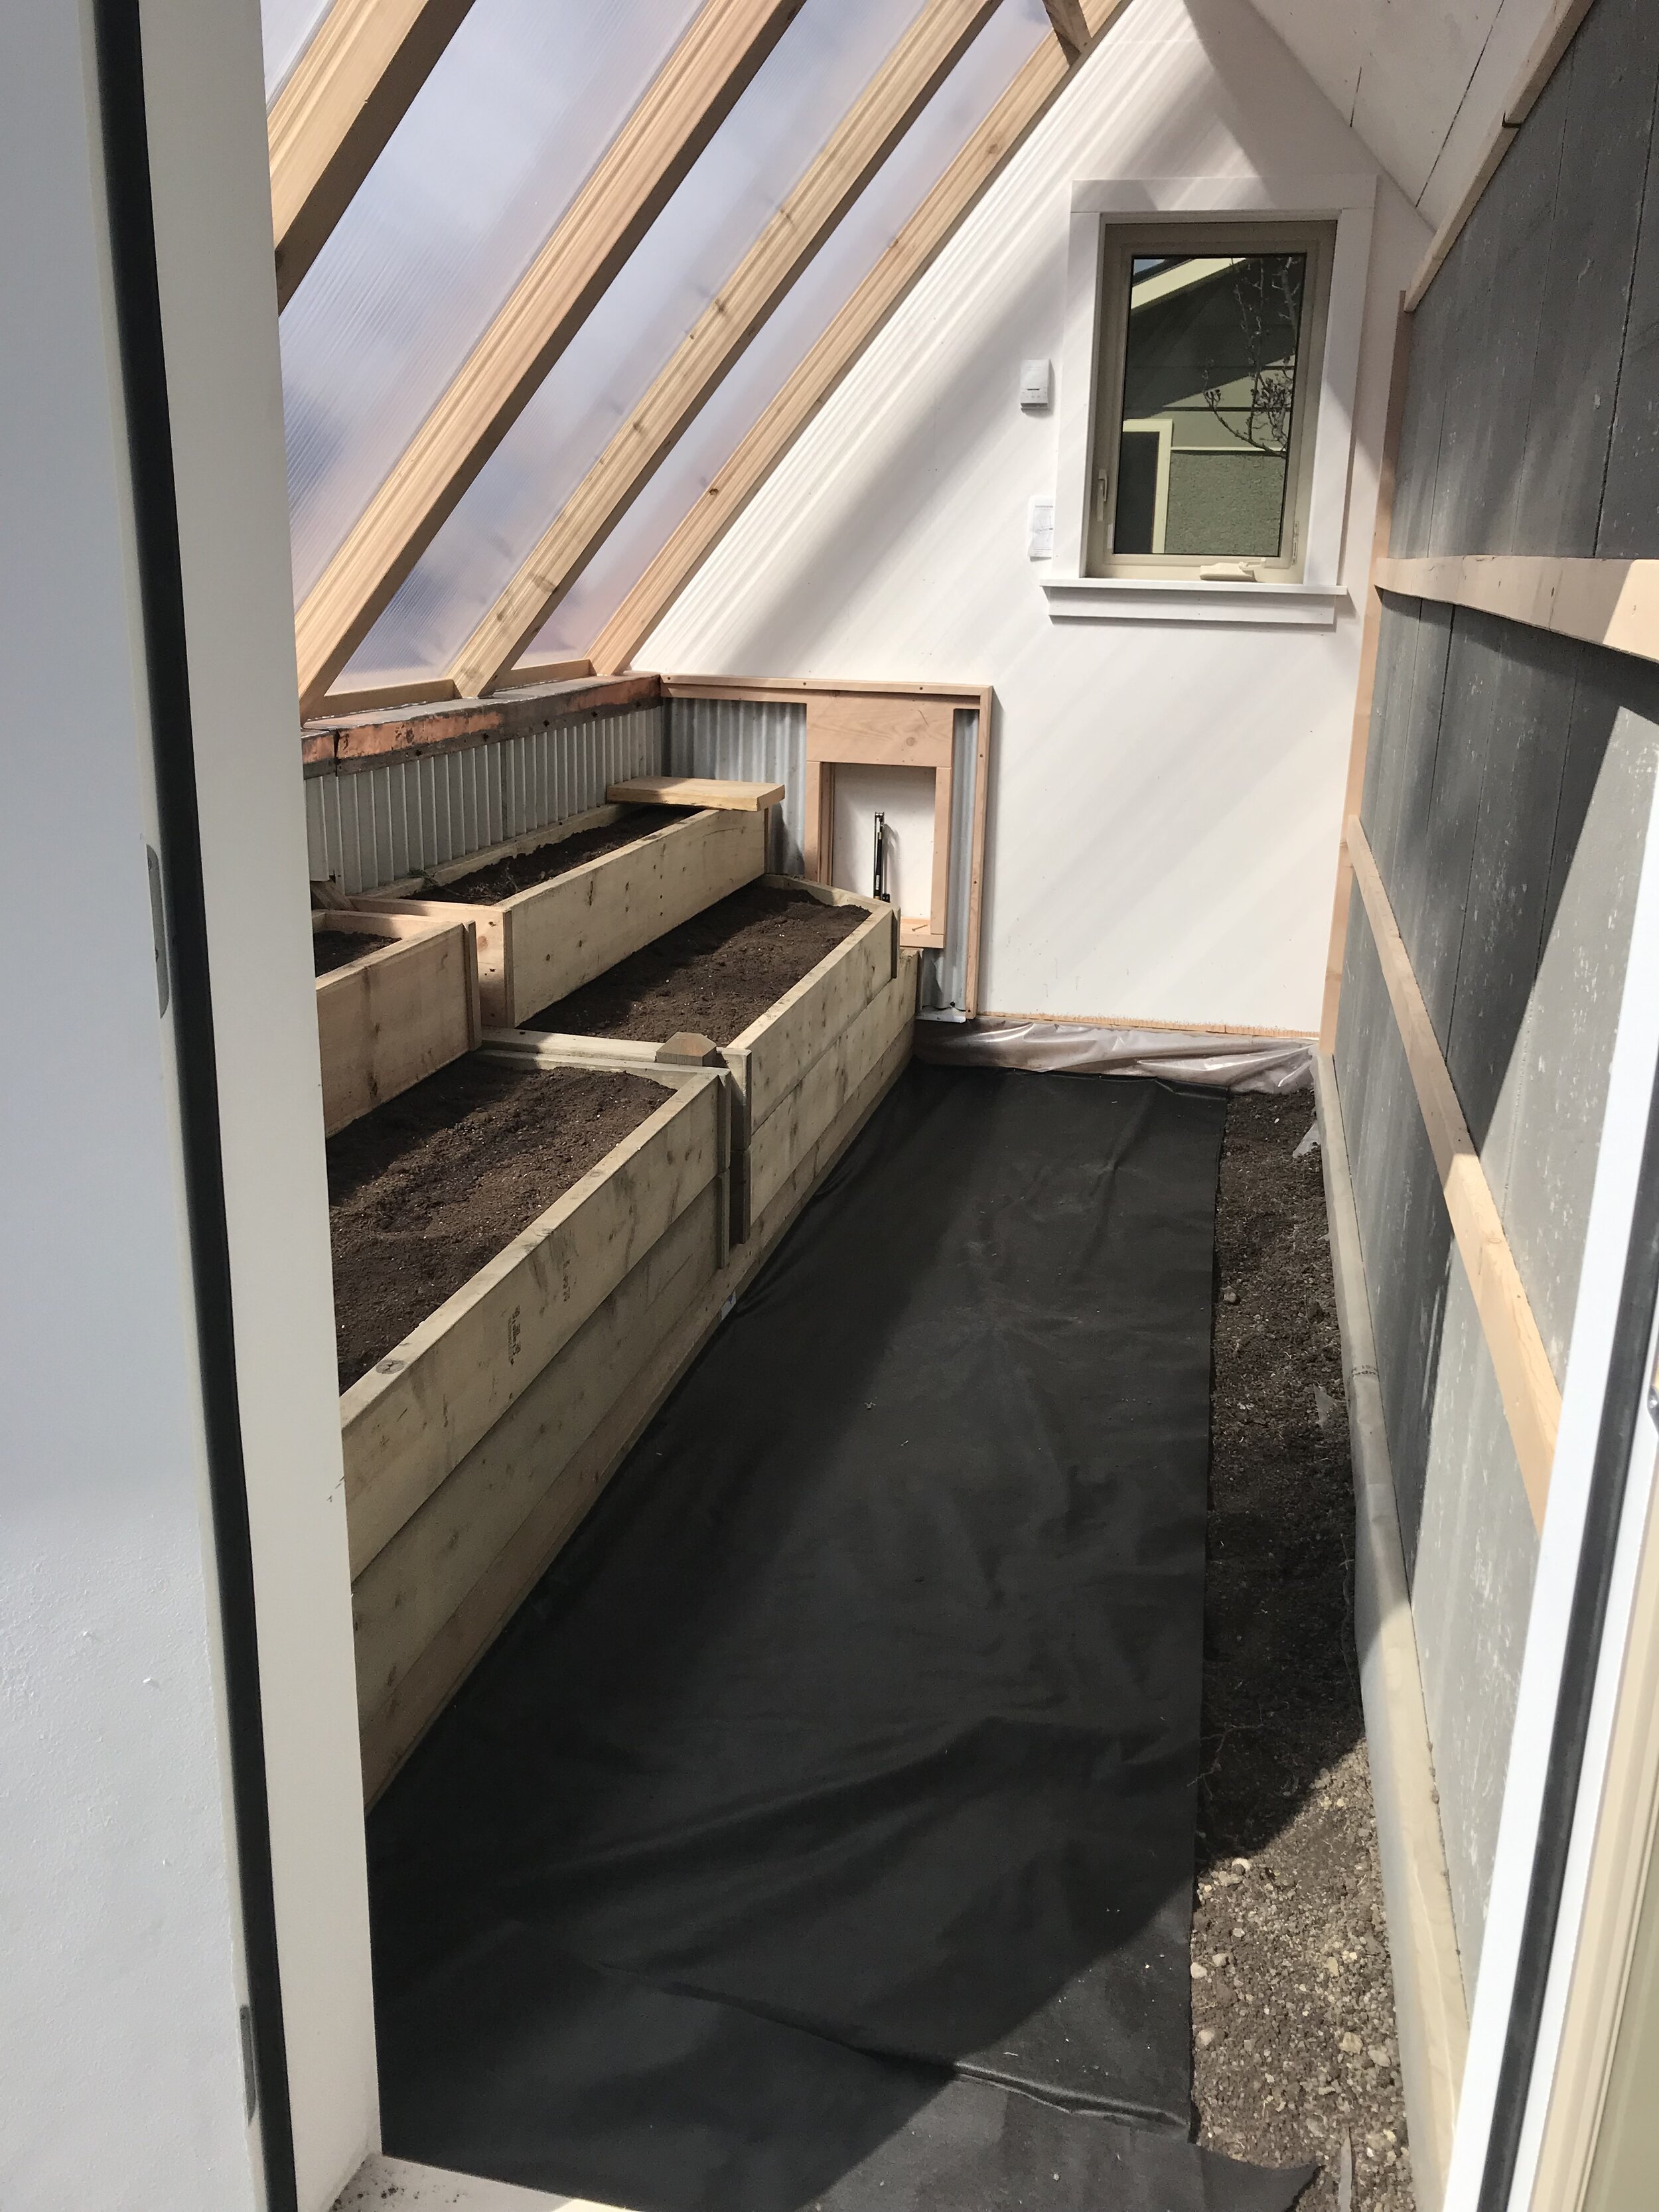
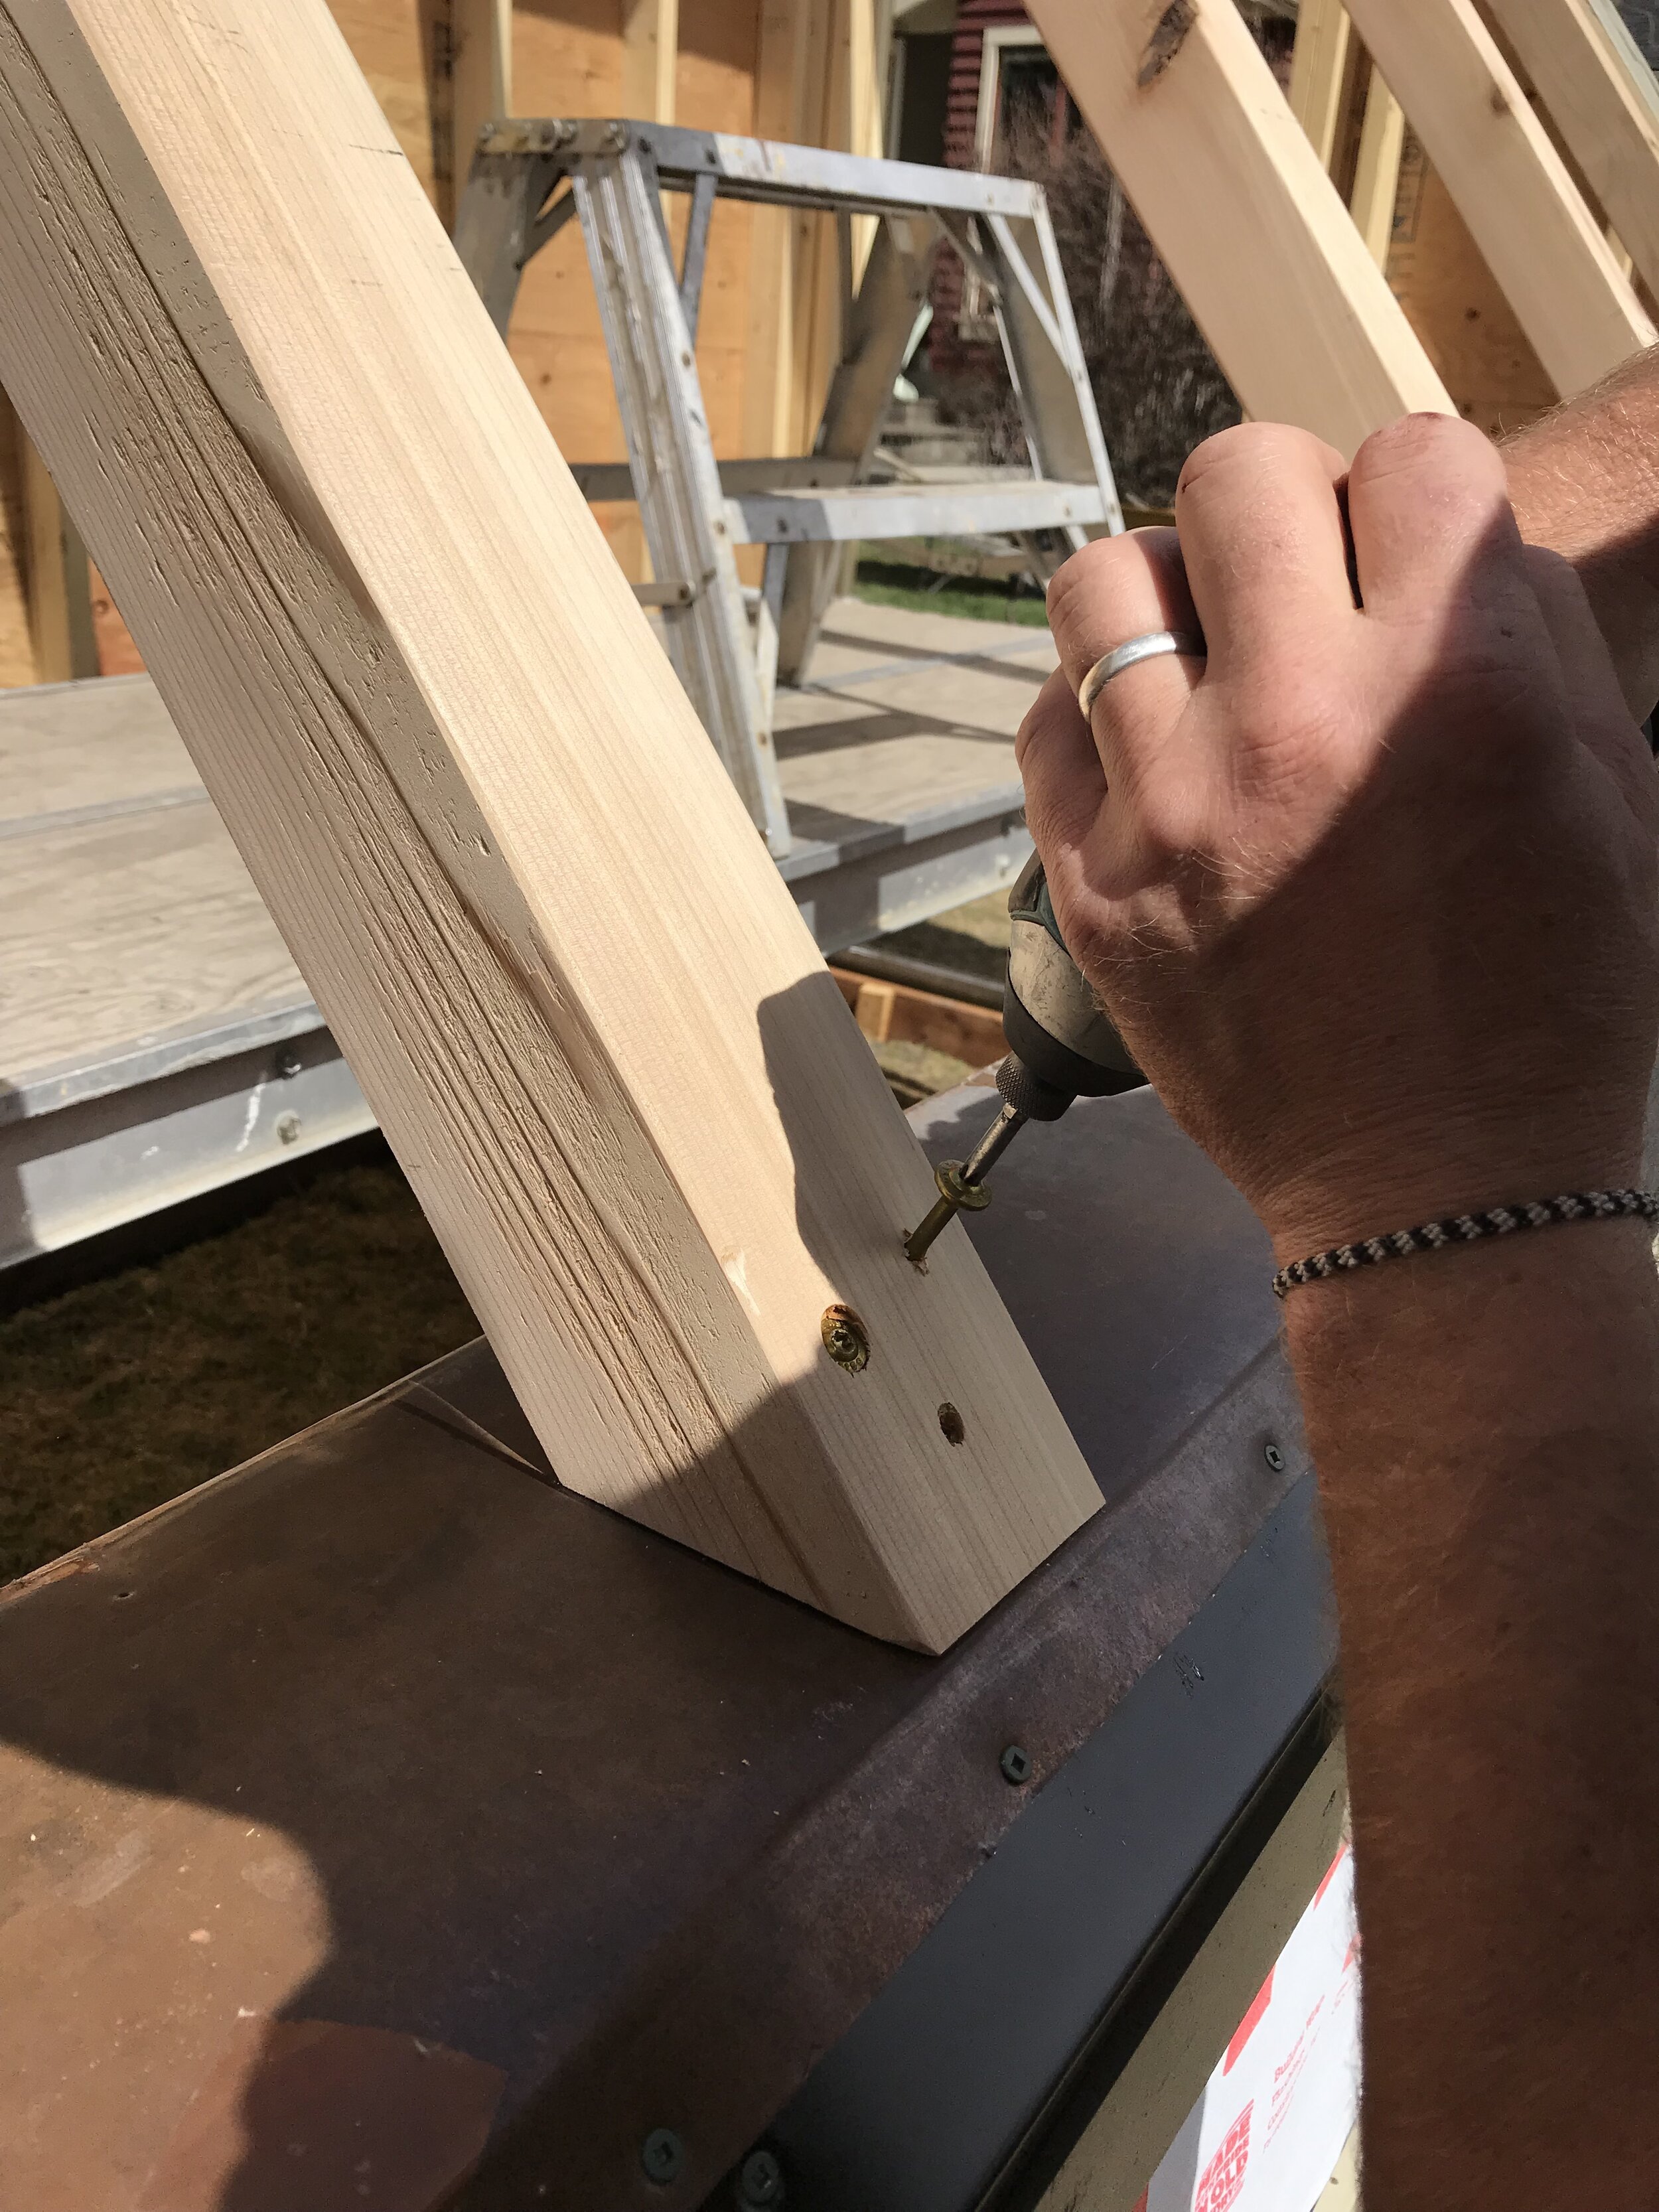
Building beds on the south side turned out to be just a little more involved than I had imagined. We needed to raise the soil height far enough up so the knee wall wasn’t shading the plants from the incoming light. But we couldn’t have that bed in turn shading plants growing just a short distance away against the north wall - those ones would be near ground level to allow vertical space for a shelf as well. We settled on a two-tiered south bed so the height (and shadow cast) would make one step down. I would probably have simply heaped soil against the greenhouse wall and held it back with lumber. But, knowing a thing or two more than me about construction, my husband wisely built four-sided boxes in place to contain the weight of all that soil and water and prevent the knee wall from bowing out over time. Cedar would have been a lovely choice, but it’s pricey and we had some spruce boards already on hand. So we used Lifetime once again to treat them (it’s non-toxic for gardens) and crossed our fingers that they won’t need replacement for several years!
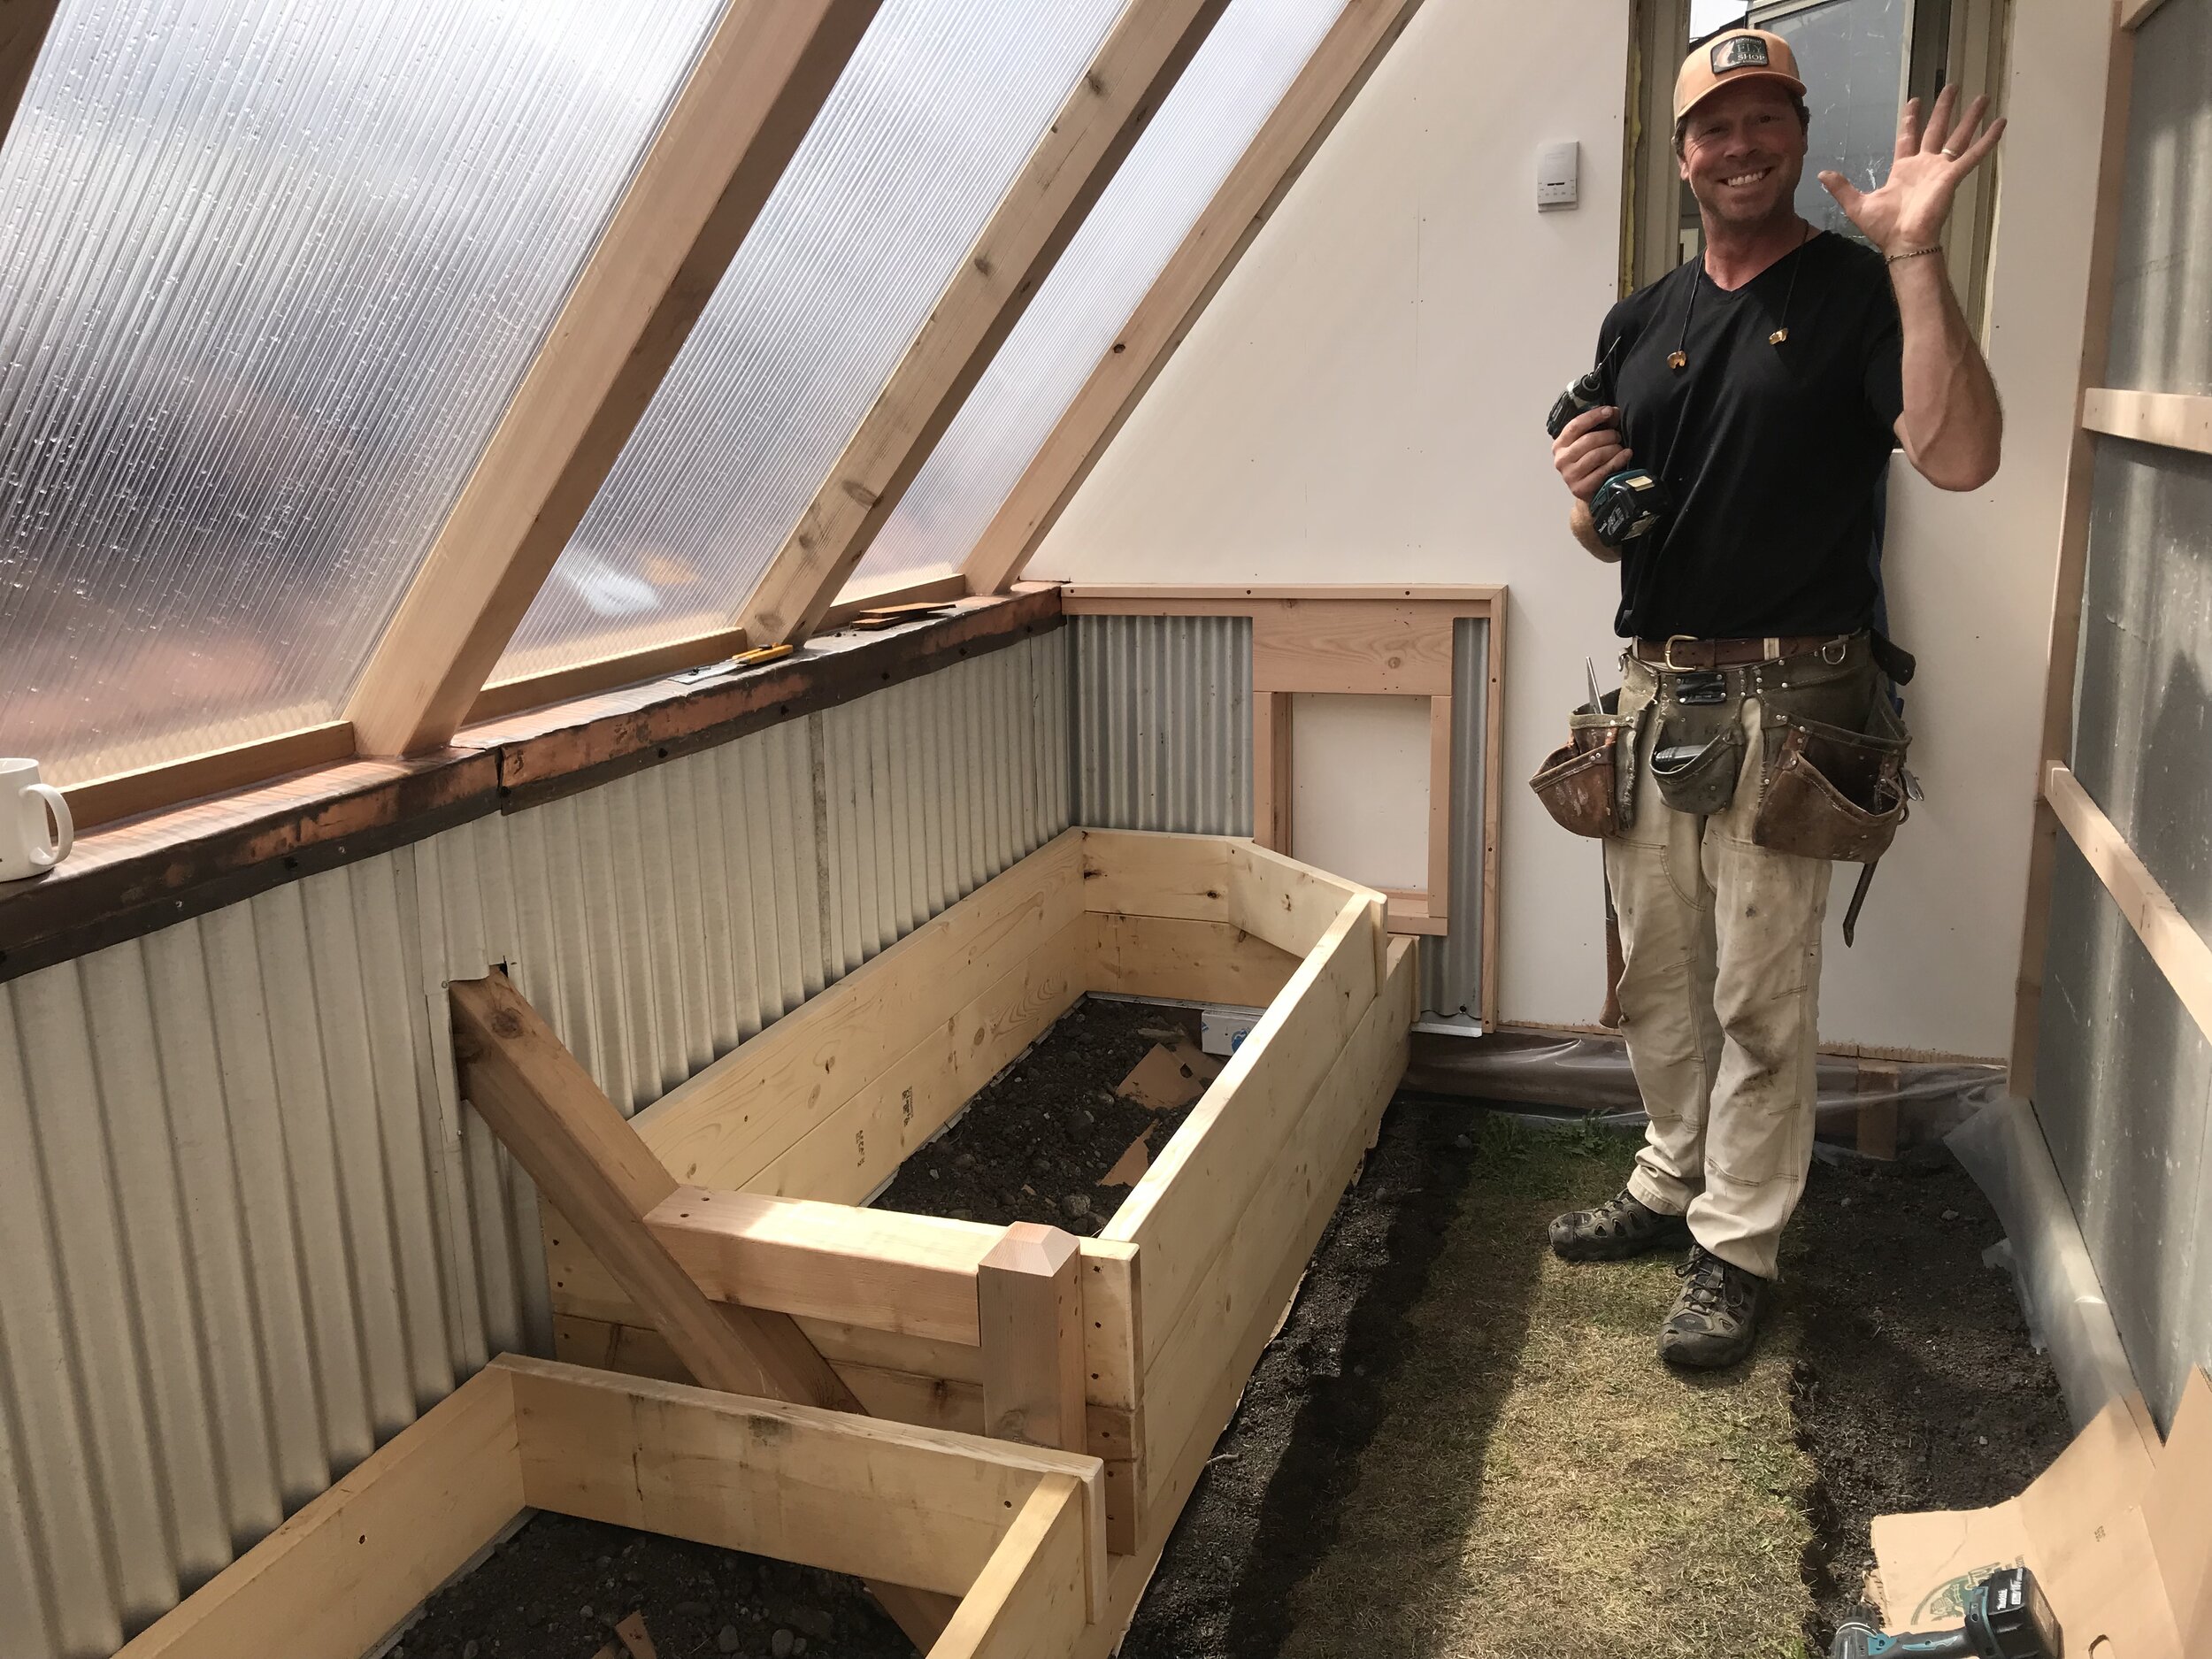
Inside the boxes, we took the sod we had removed earlier, laid it upside down with a layer of cardboard overtop to suppress it from growing back up, and proceeded to fill the deep space with soil. For the bottom foot or so, we used soil we had set aside from our perimeter excavation - quite a bit of rock and clay, but that would be fine as a subsoil layer. We topped that with a mix of better soil also set aside (from just below our excavated lawn), NutriLoam from Top Spray, and well-composted manure from a ranching family member.
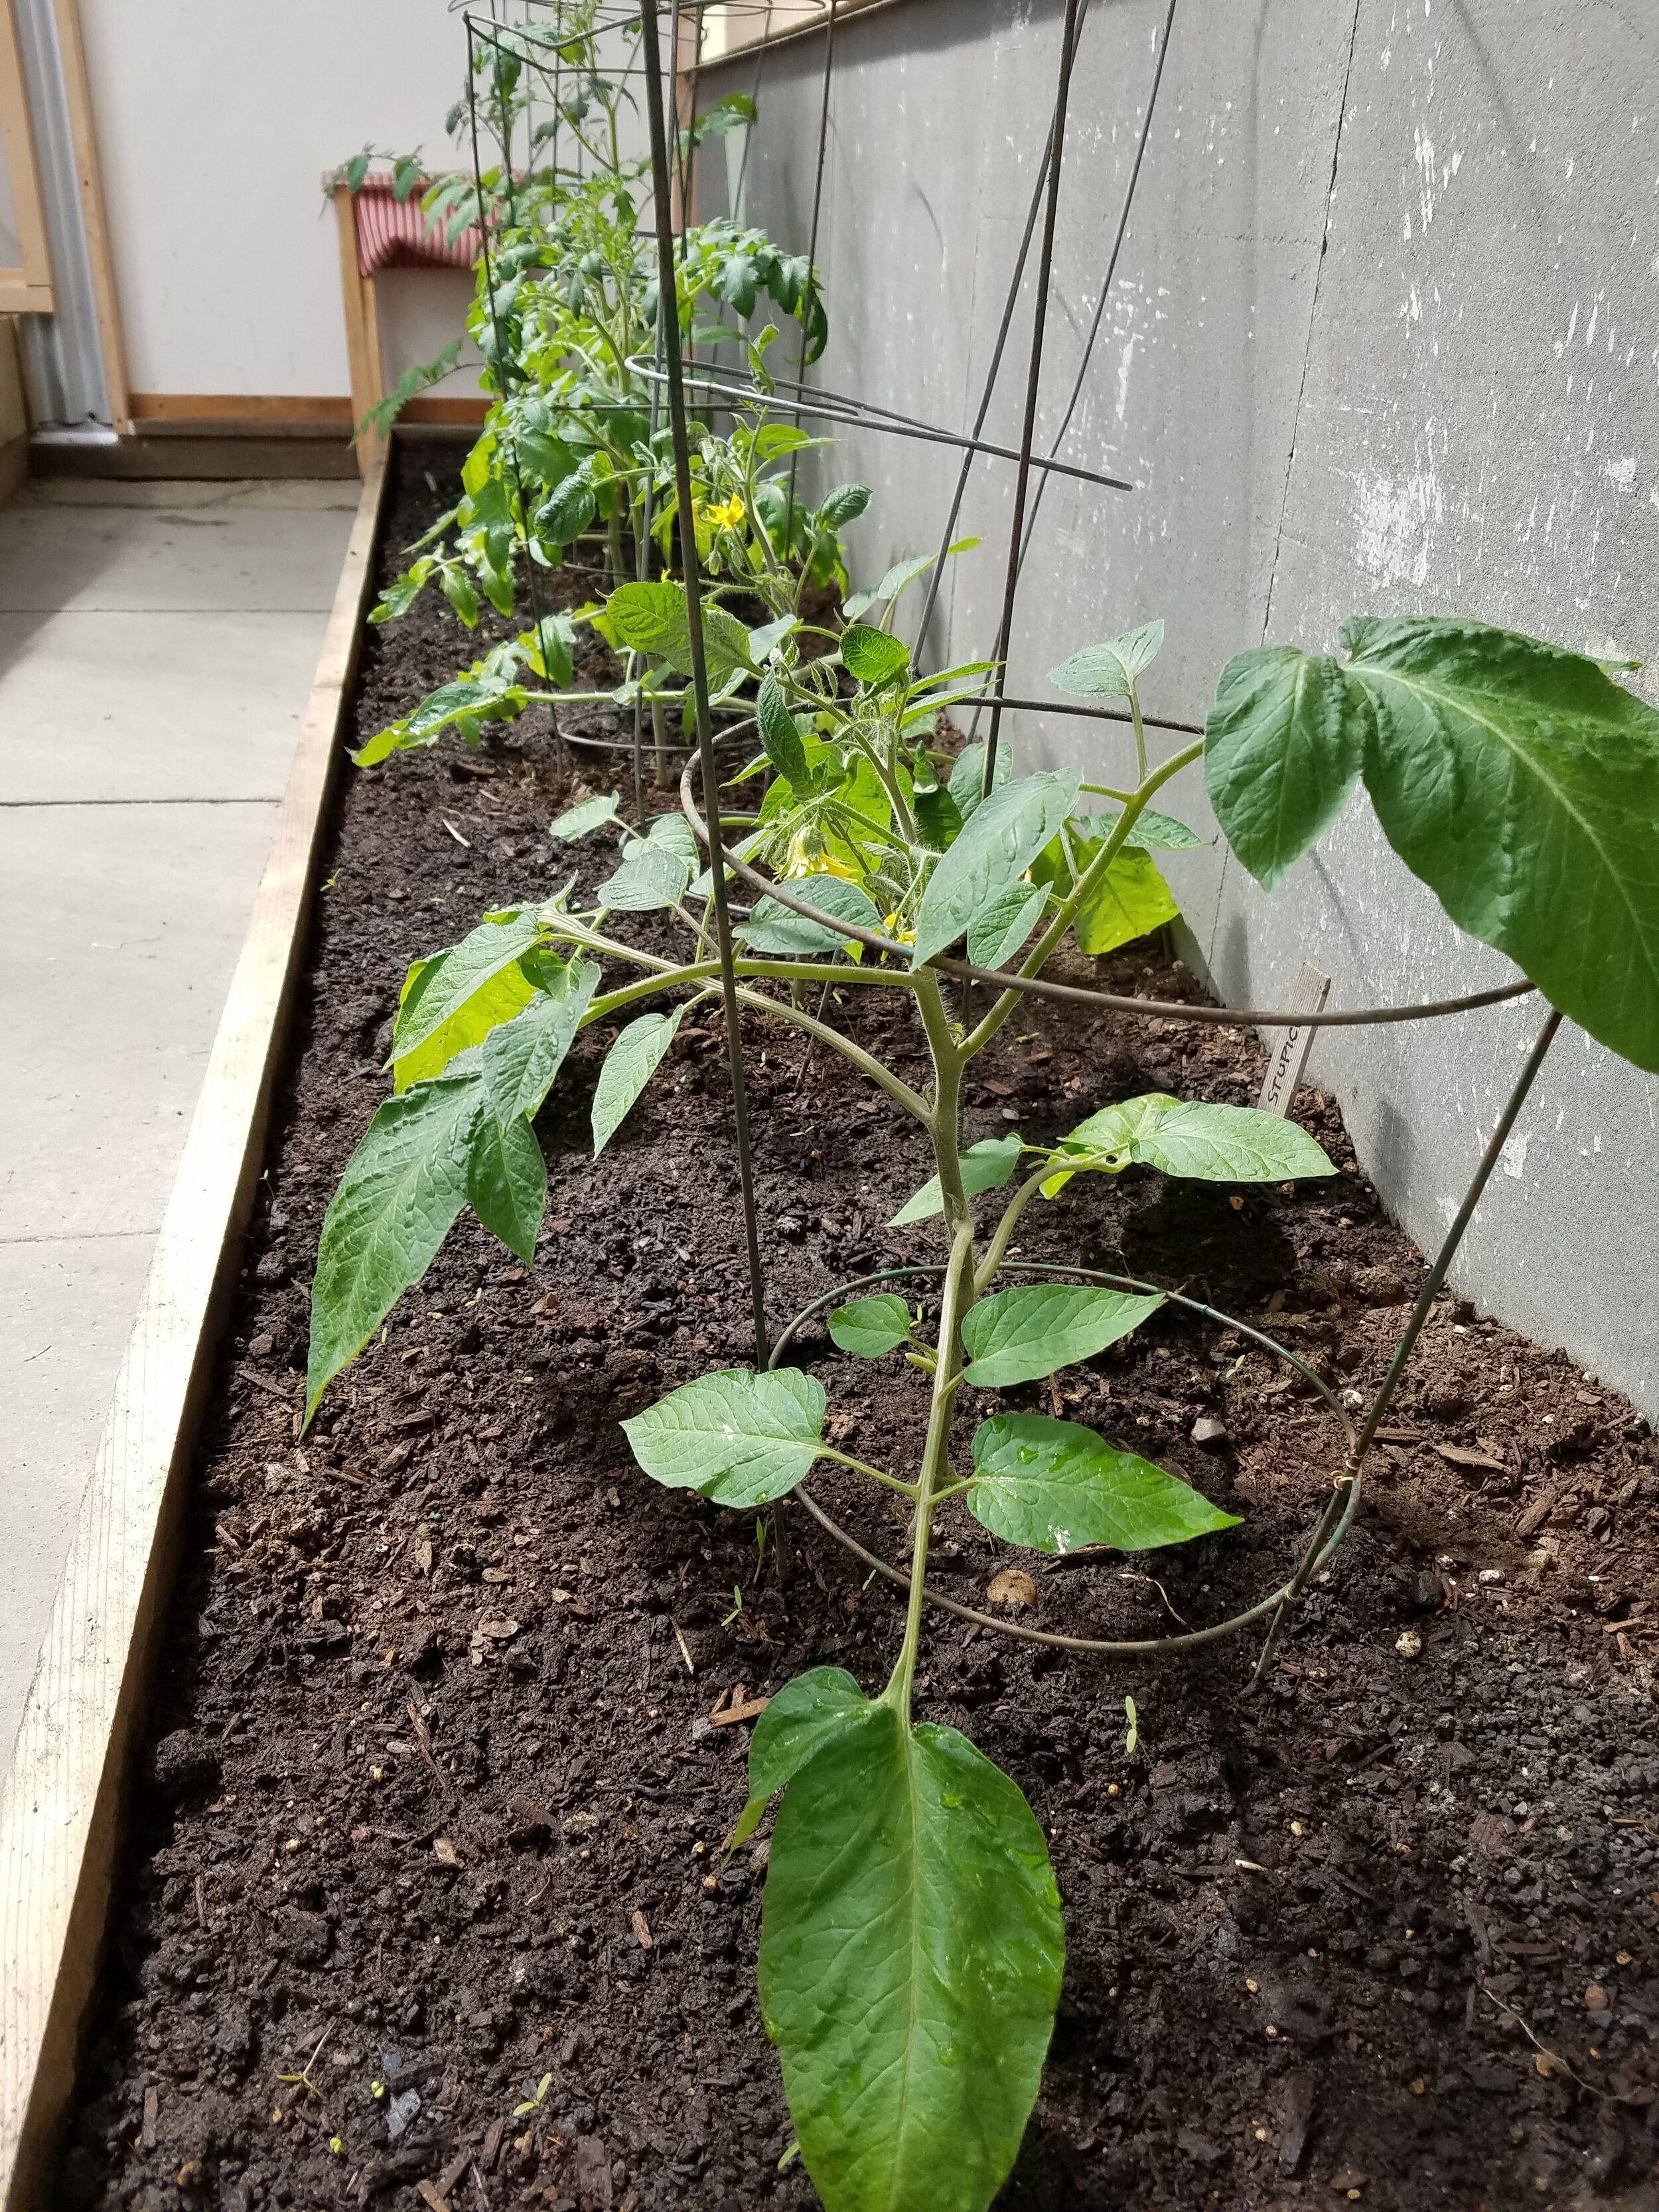
The north bed is much more shallow so, after removing the sod layer, we laid down cardboard to help prevent grass popping back up and topped it with the NutriLoam and manure. I had to cut holes in the cardboard to insert tomato plants this year, but by next year that barrier should have broken down. These beds are fully connected to the earth below and all the soil microbiology and nutrients that come with that, whereas the shelf of pots we placed higher up will need their structure and fertility completely renewed each year. We’ll see how the two scenarios compare.
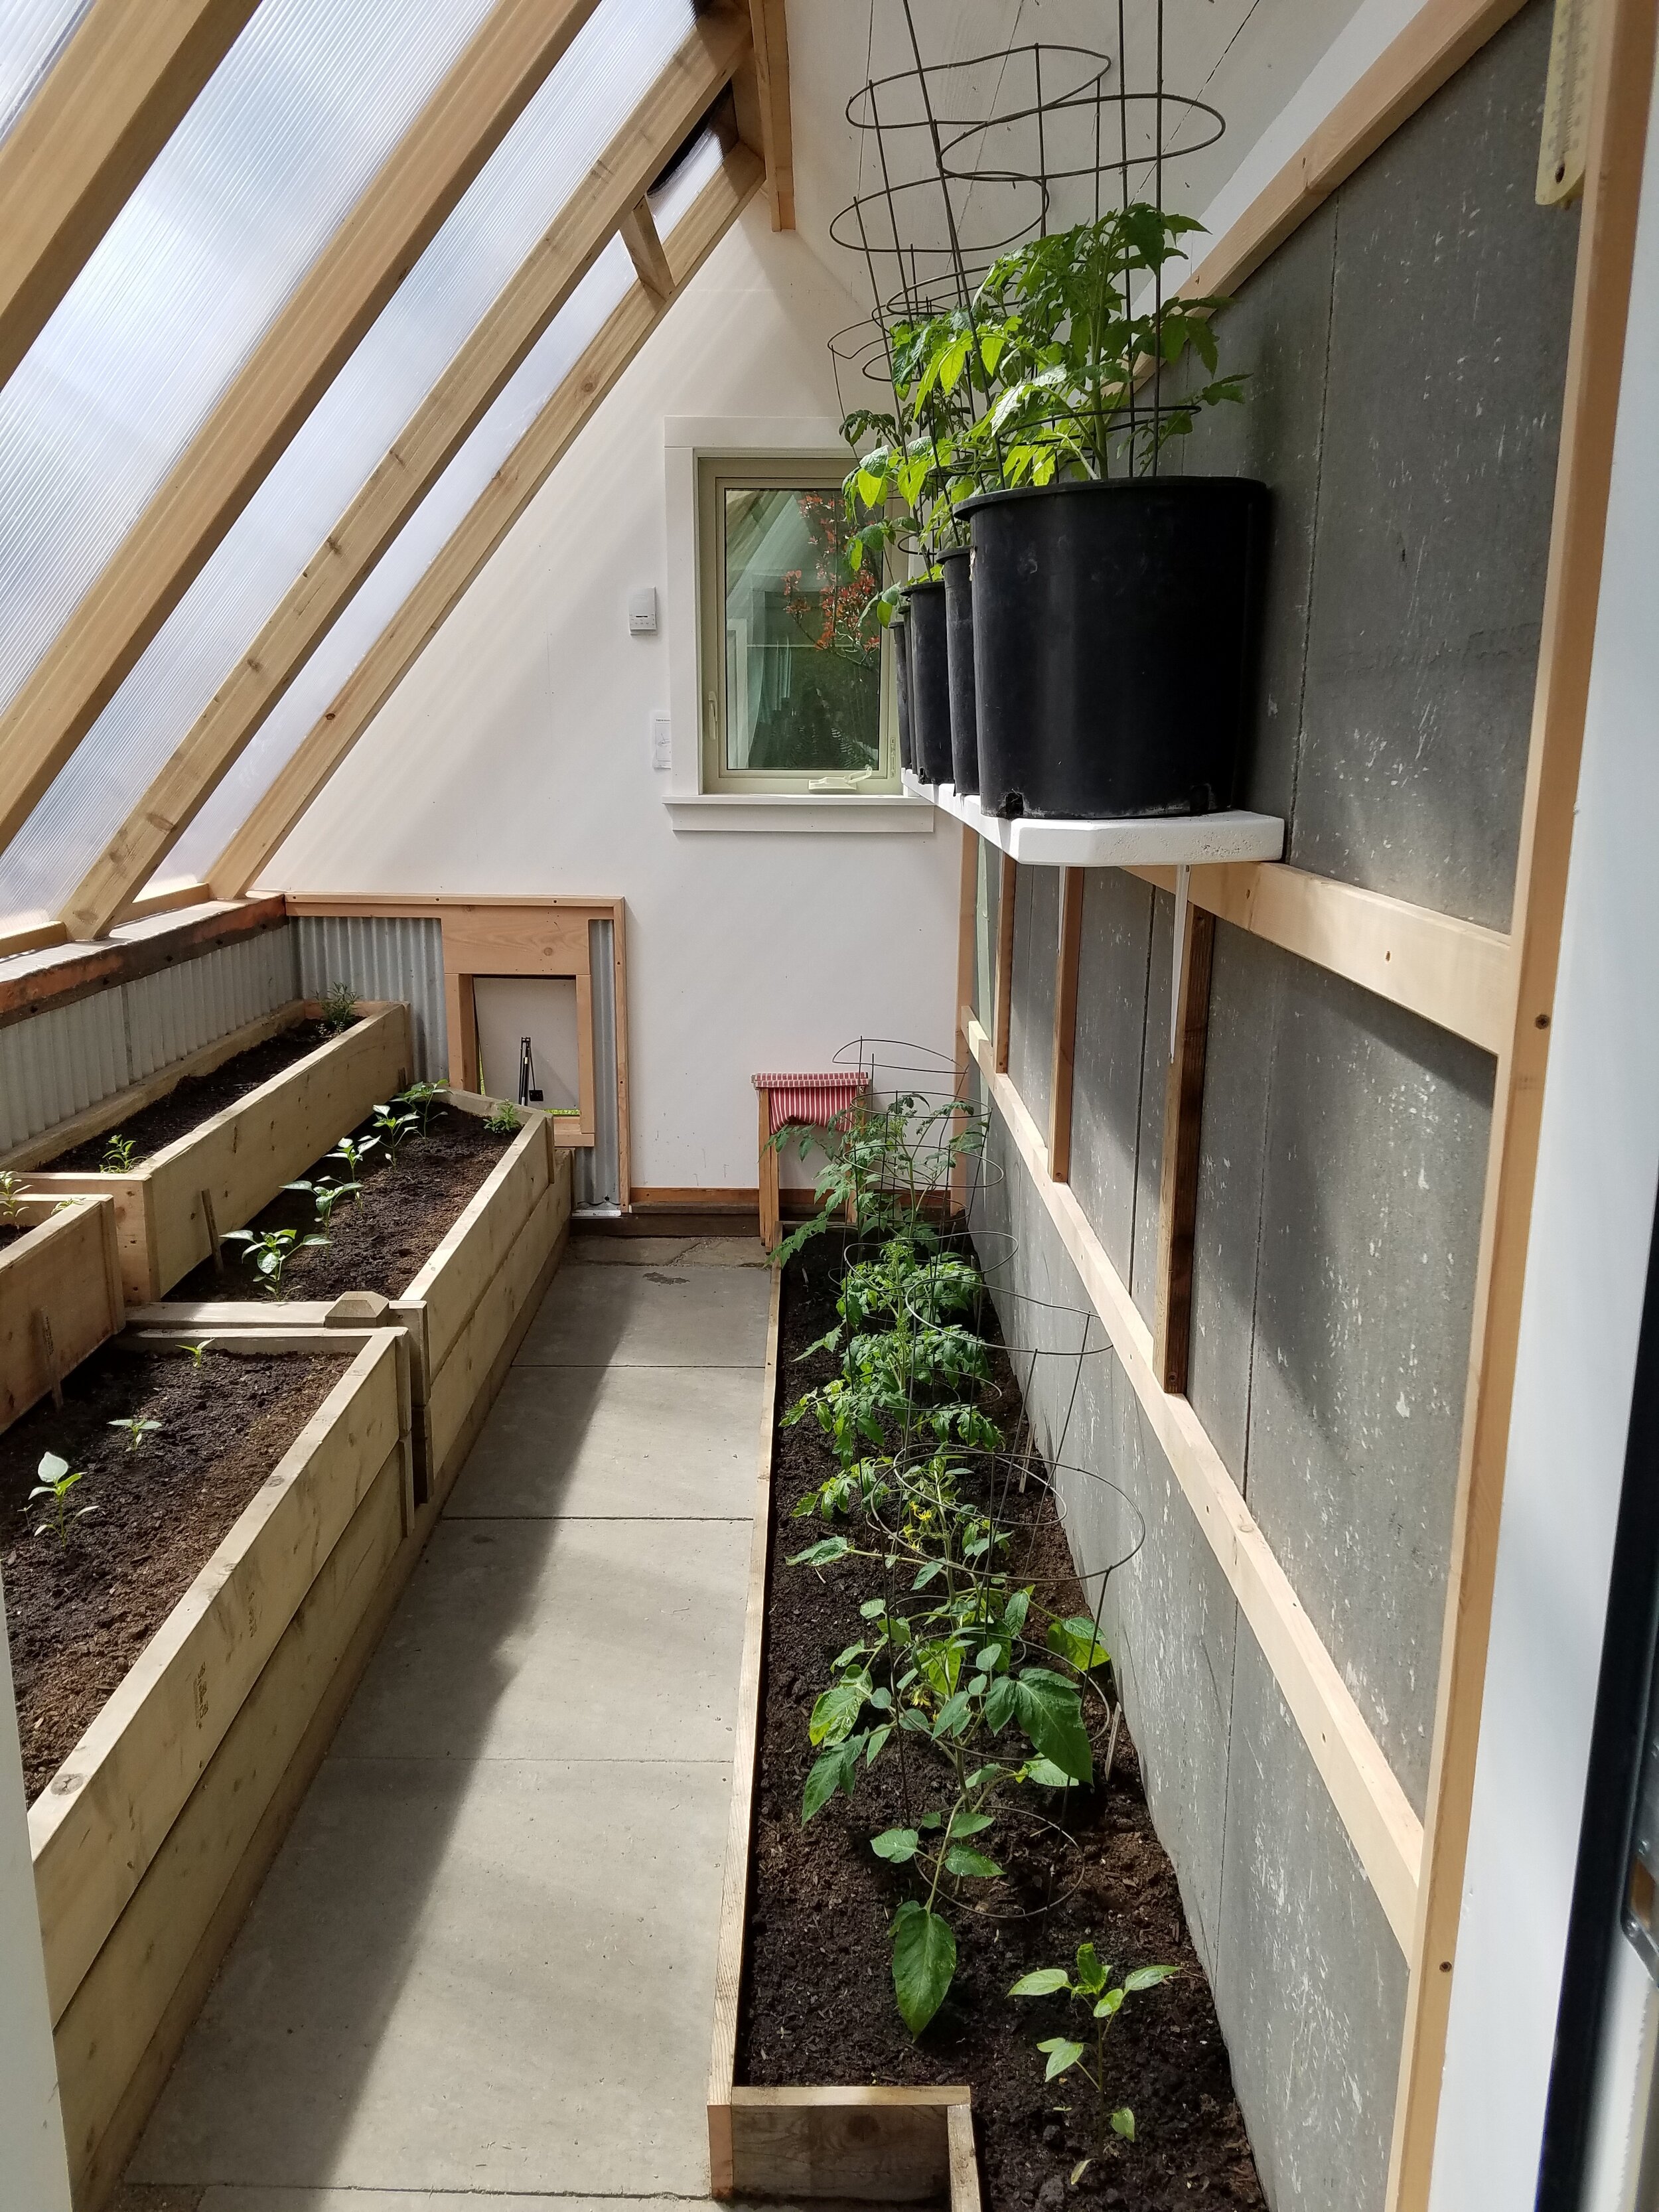
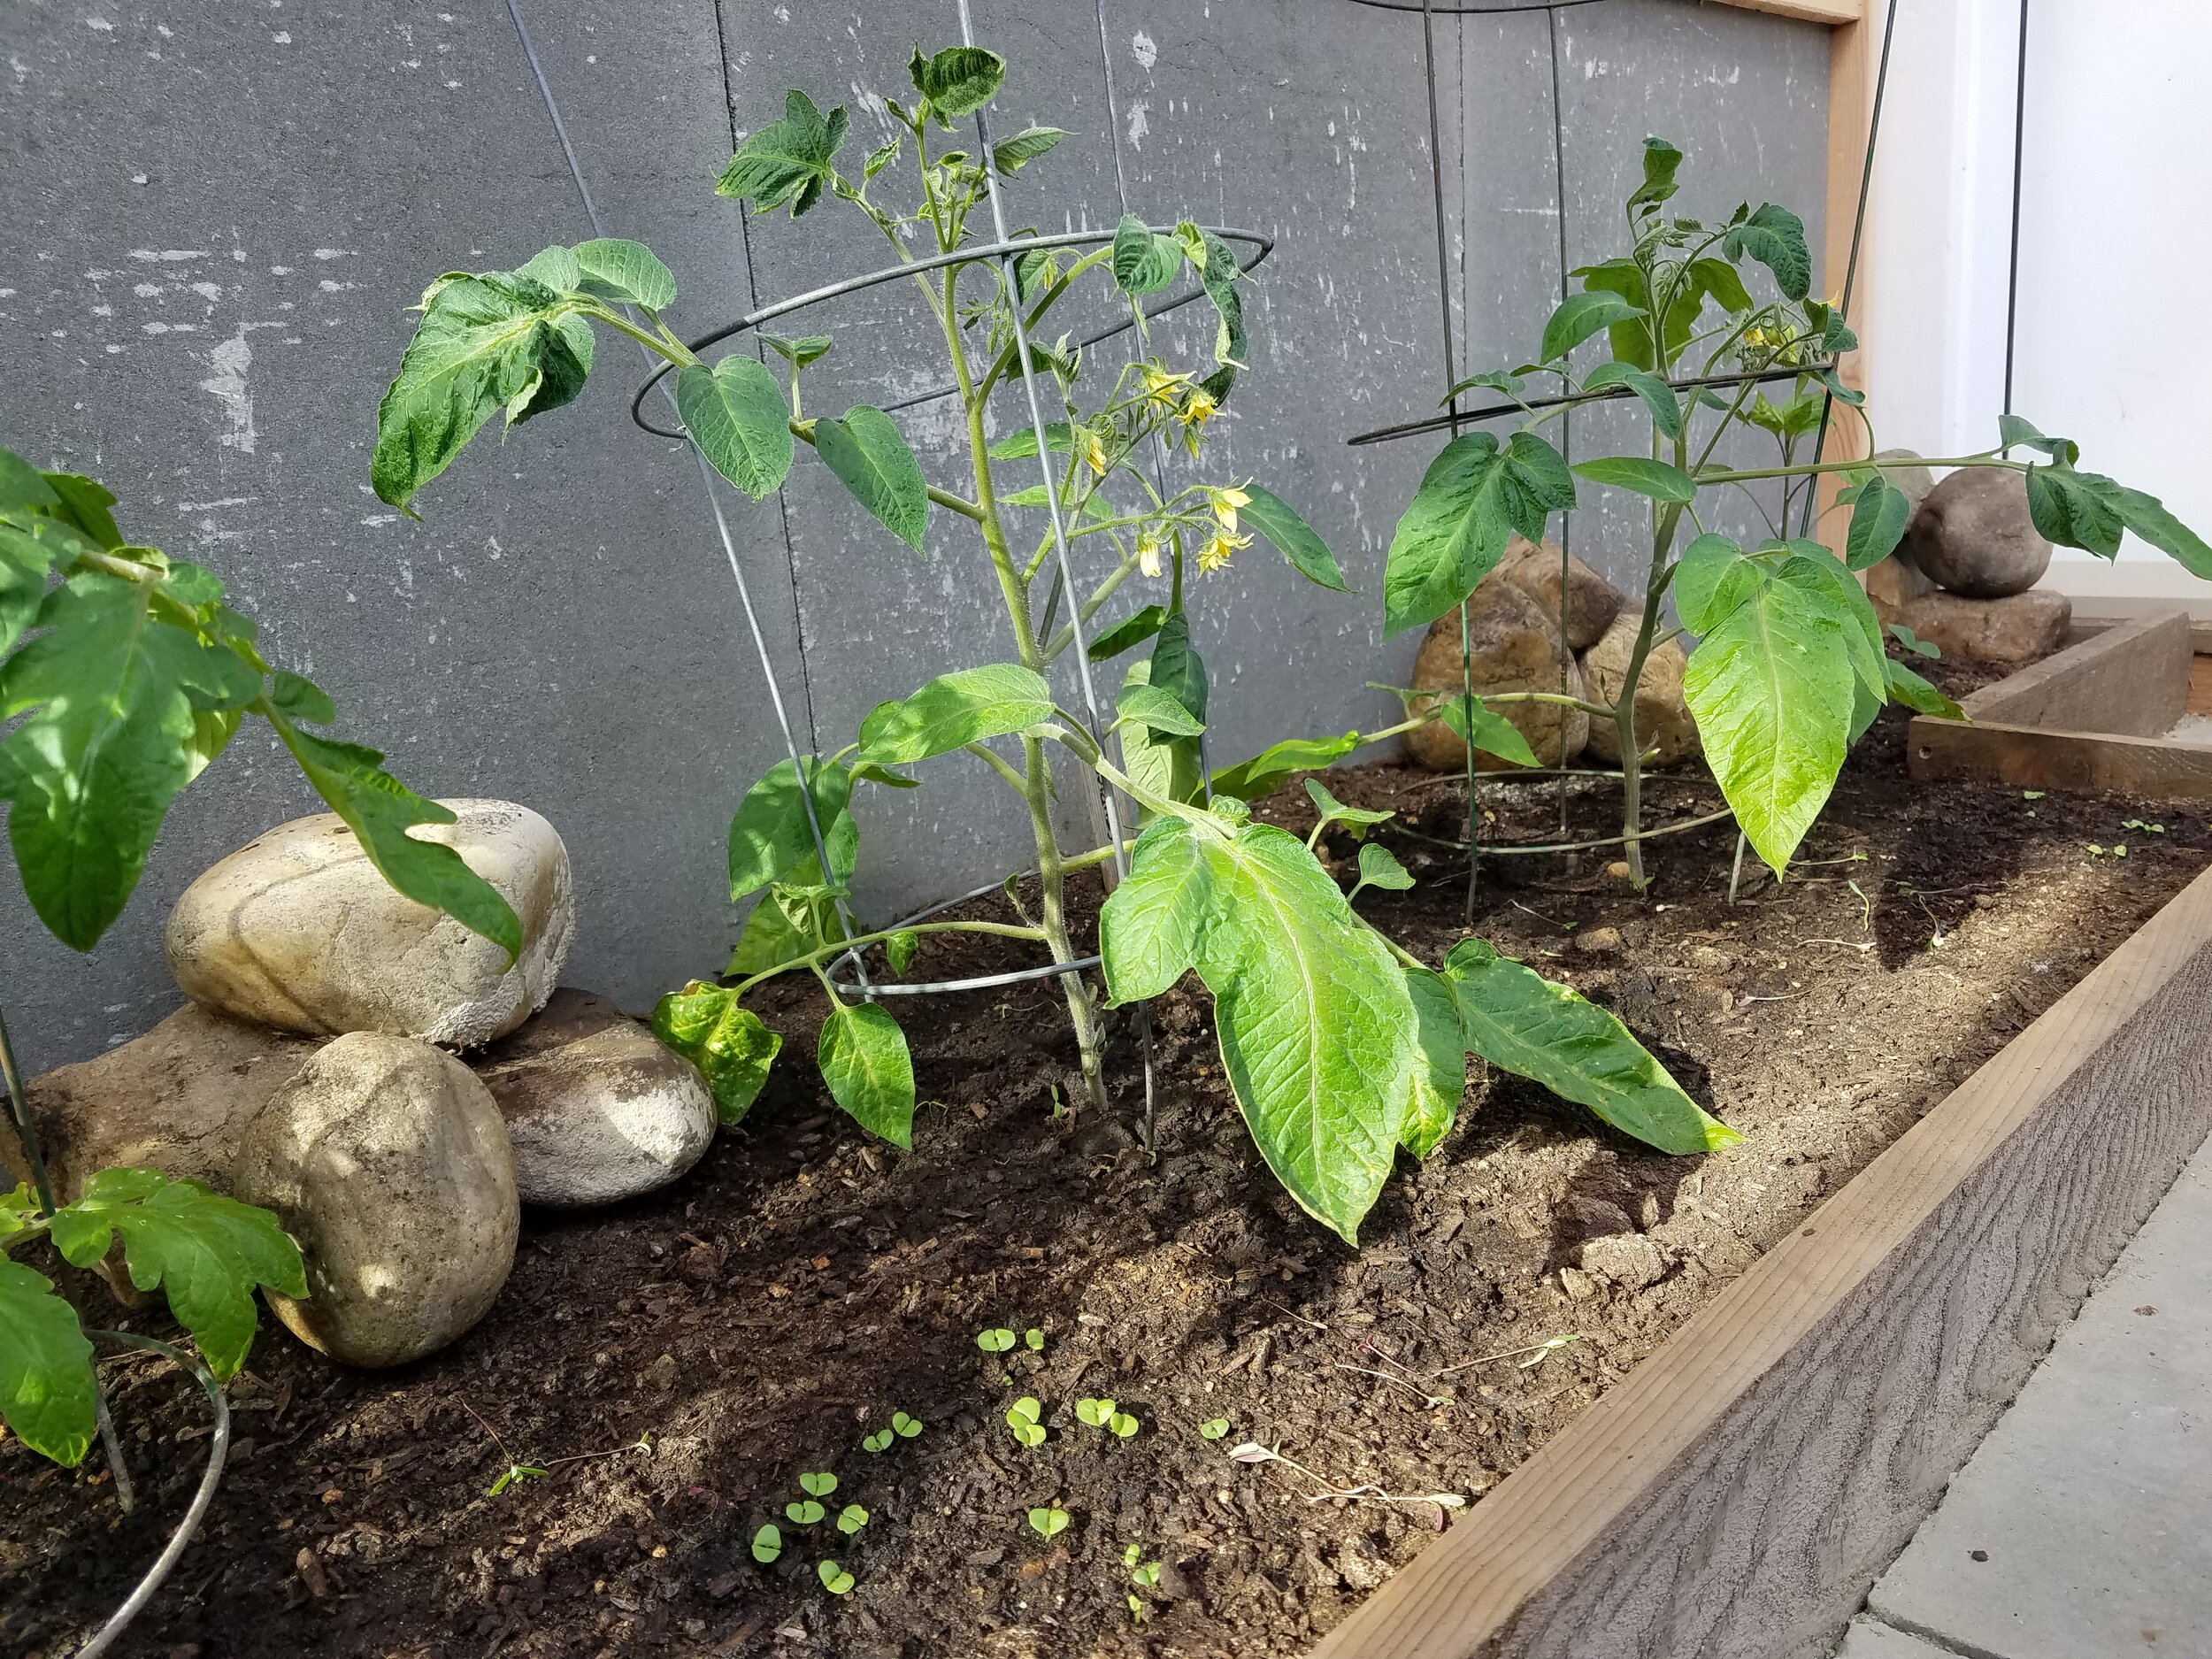
More sidewalk blocks on the floor add to the thermal mass, but we could still use more (the amount needed can be roughly calculated based on square footage of glazing and the heat capacity of your thermal mass material). To this end, I wanted to contain the north bed with upright flat stones we’d inherited from a neighbour, but we quickly realized this was a recipe for endless pockets of weeds (not to mention tripping over sharp, protruding rocks!). Instead, we used the very last of some stashed cedar we had and simply stacked some stones between plants in the bed to achieve a little extra thermal mass.
We plan to play around with adding a flip-down seat or two, maybe a little shelf at table height to set a book and a drink. One corner will host a grapevine which we hope will have no trouble over-wintering. And we’ll direct rain off the south face into a barrel or two for easy watering (while it lasts). But mostly, we’re ready to sit back, enjoy this space and see how it performs. Populated with plants and seeds, it’s finally serving its purpose, though I worry that after all this work and expense I’ll discover I’ve grossly miscalculated something and the greenhouse inhabitants will fail to thrive. But with nearly two weeks under their belts, the plants seem to be quite happy with their new home.
My husband and I even spent our anniversary in there sipping cider and sharing pizza from one of our best local establishments. If all goes as planned, we’ll still be enjoying this warm enclave when the snow flies in earnest, usually sometime around Halloween. If we’re basking in our greenhouse at Christmas, that would be a wild success and we’ll be sure to let you know!
Backyard Greenhouse - Part 3: Nearly Complete
Welcome to a series of blogs about Cultivate Cochrane president Jackie Skrypnek’s backyard greenhouse building process. The intent is to share a realistic account of one couple’s experience to help inspire and inform other community members in their own season-extending, food-producing ventures.

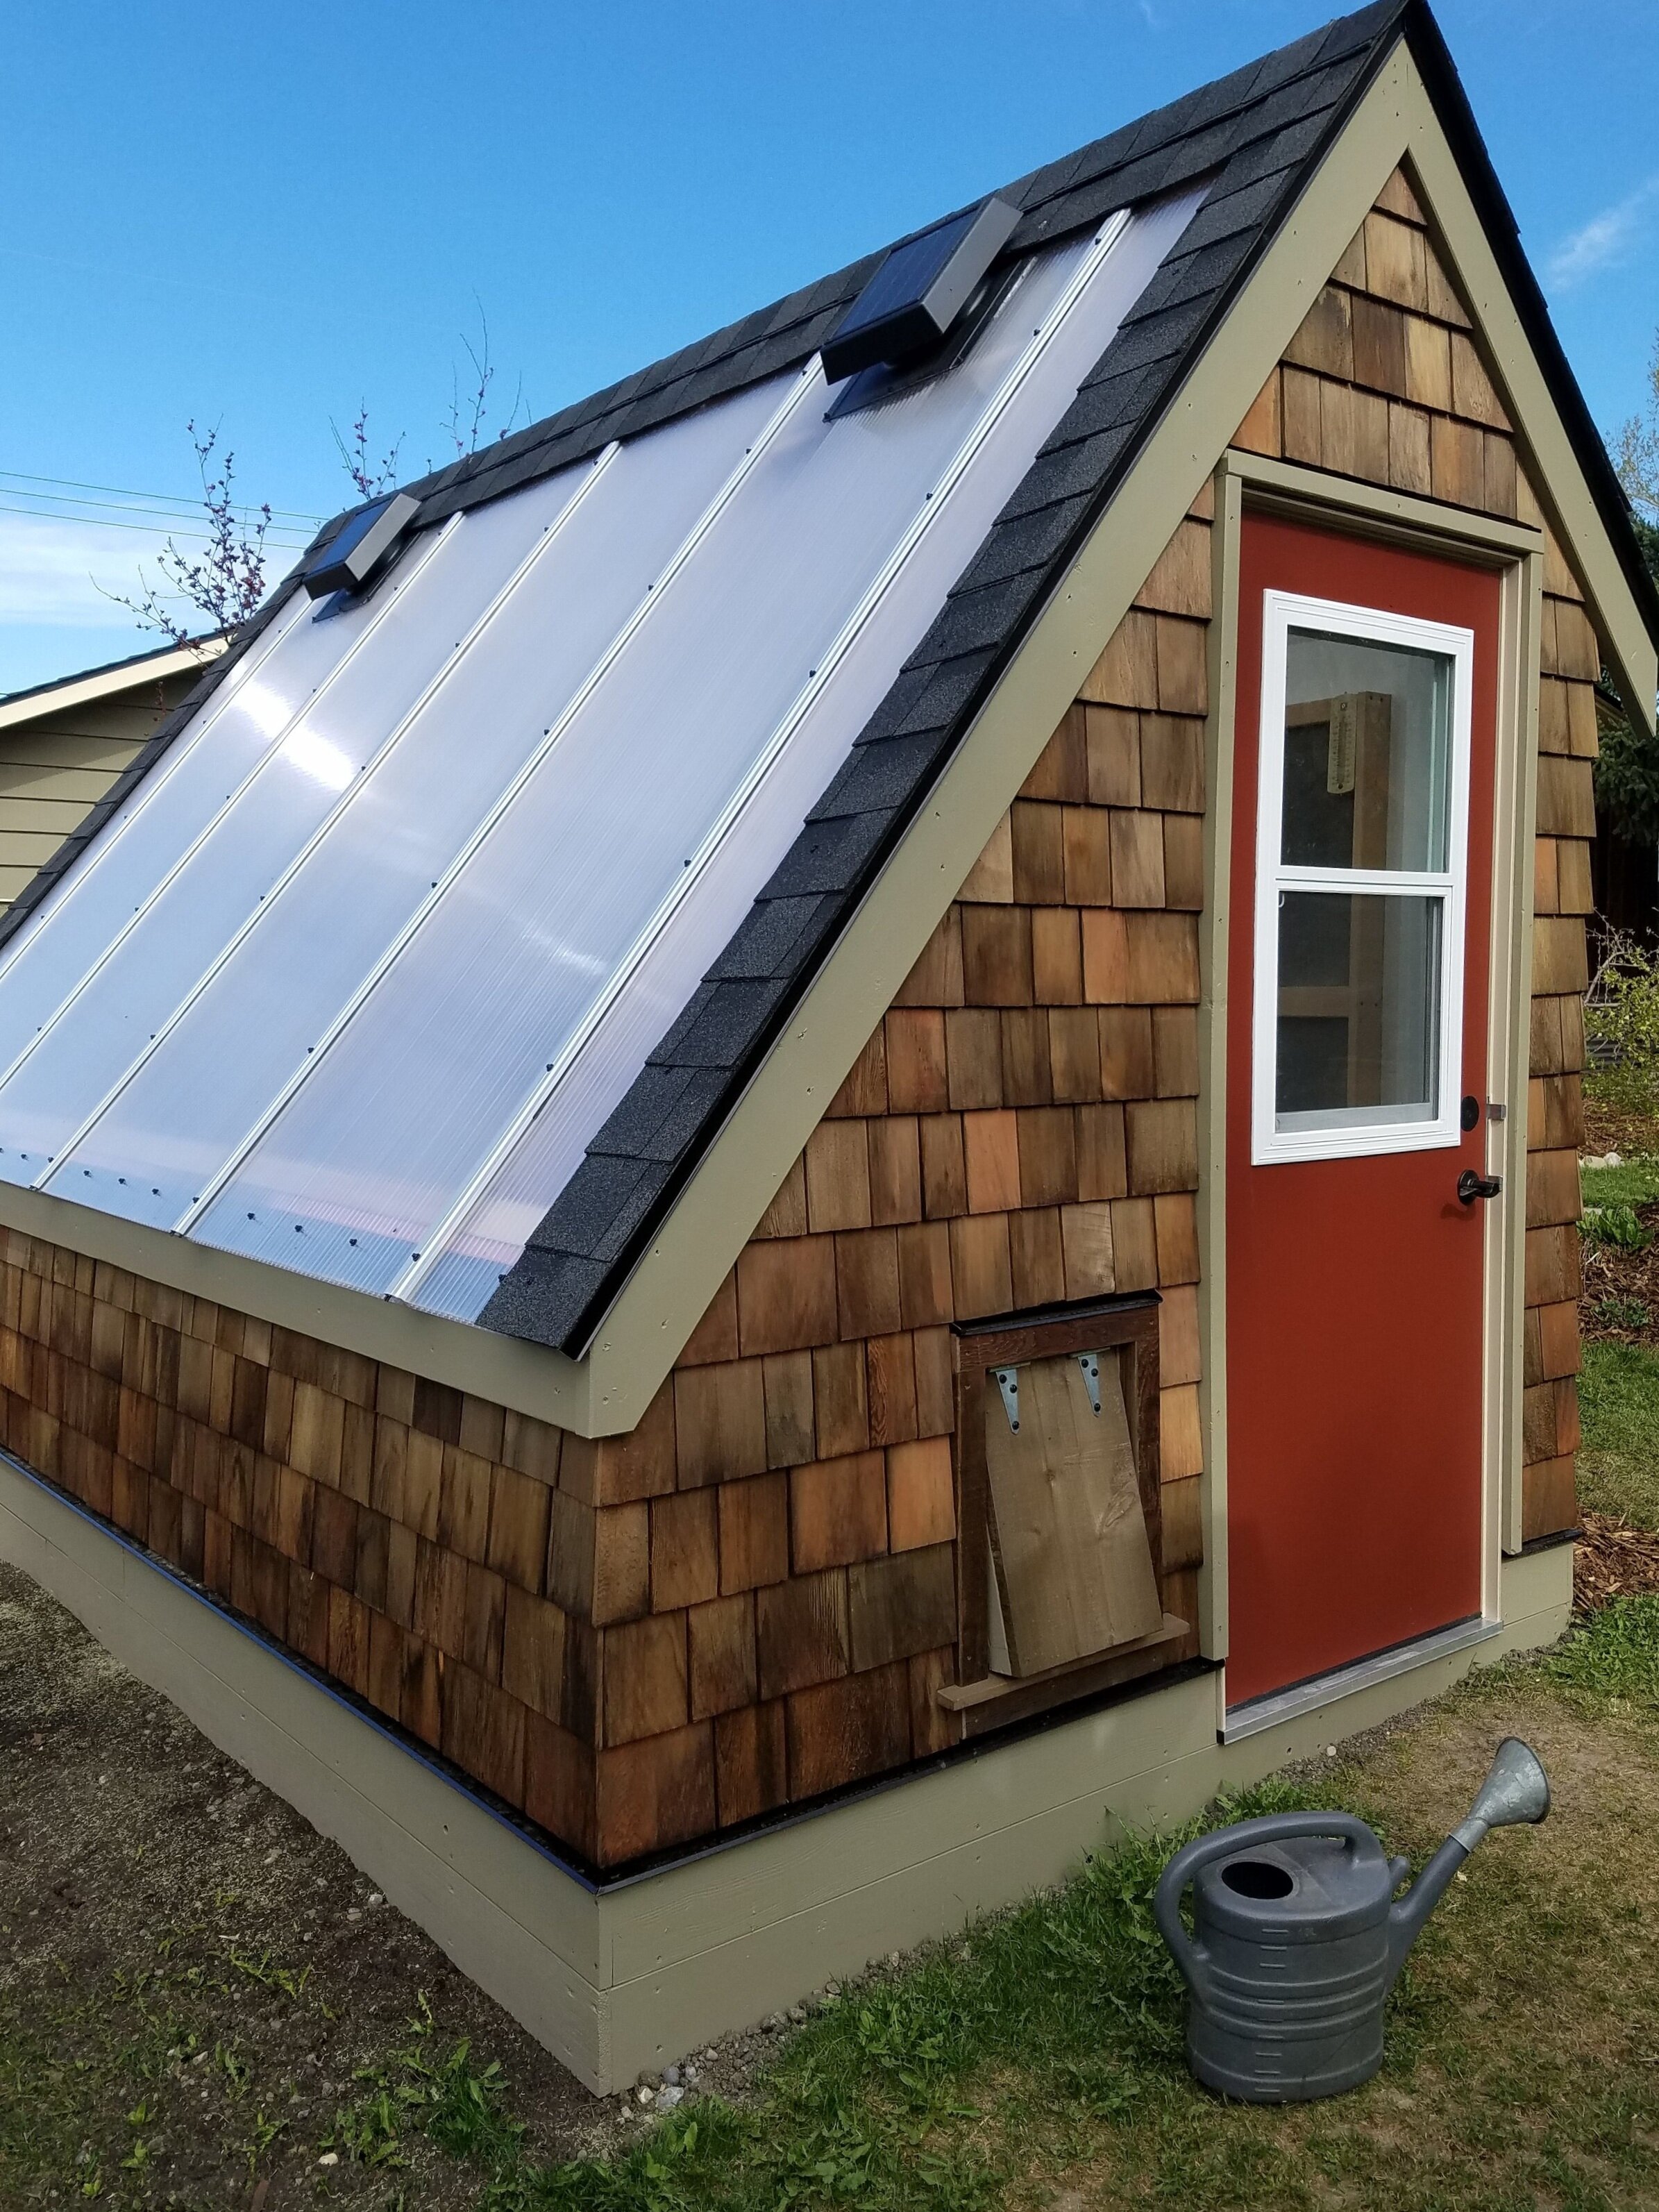
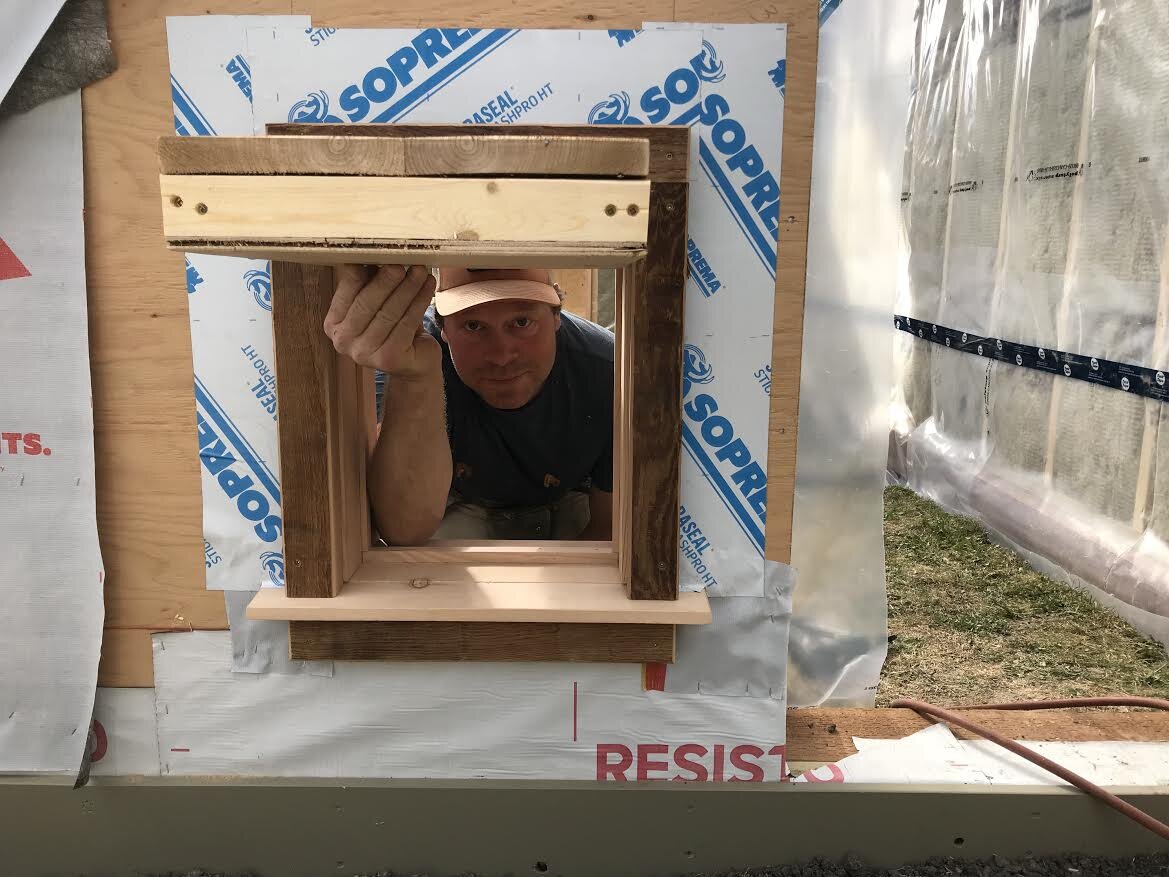
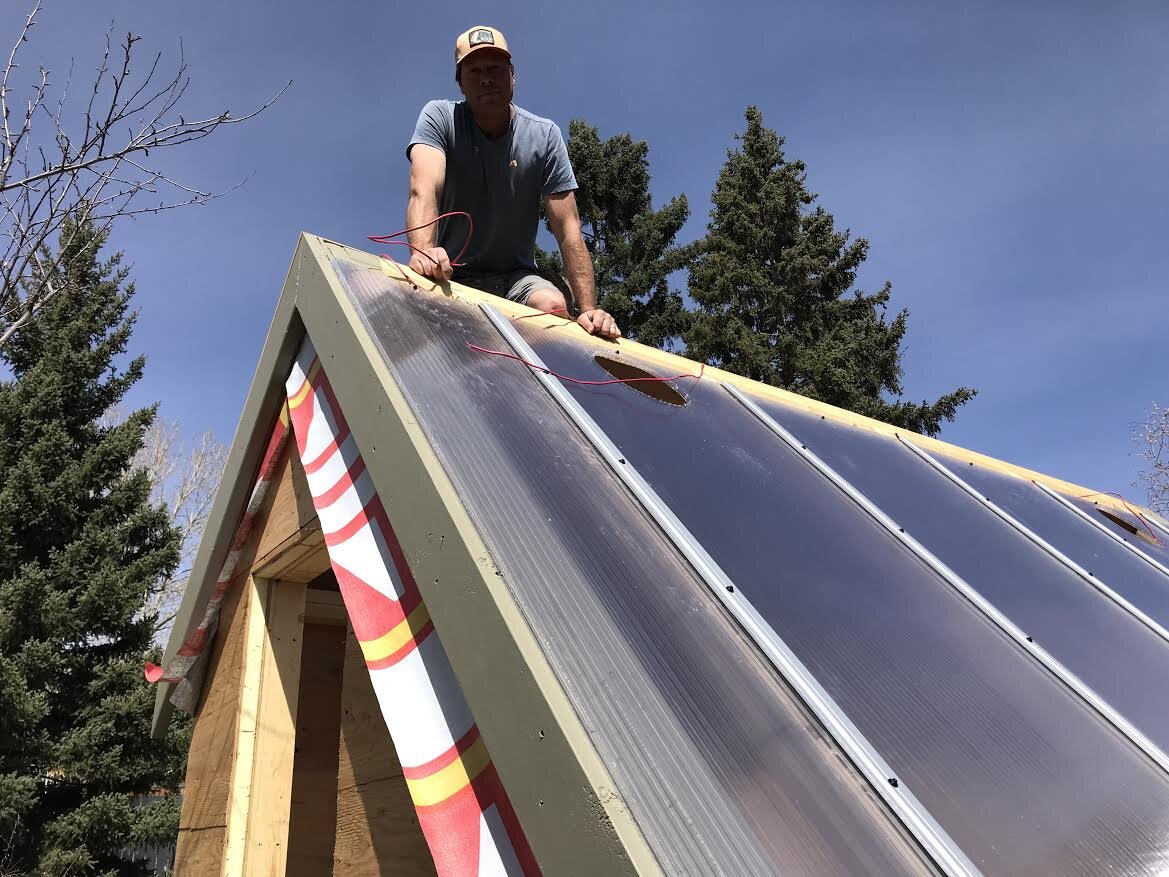
With the shell now formed, it was time to add all the elements that would turn our little structure into a functioning passive solar greenhouse. Installing polycarbonate panels on the south face felt like a defining moment - you could no longer mistake this thing for a garden shed or chicken coop! There are several options for greenhouse glazing, each with pros and cons. Poly film has a short lifespan, is a very poor insulator, and is prone to damage from wind and hail. But it’s cheap. Glass is heavy, prone to breaking, and would be very expensive if you went with high-efficiency windows. But it looks nice and gives you a crystal clear view. We chose polycarbonate because it’s extremely lightweight, durable, and offers a good balance between R-value and transmitting adequate light. It’s not cheap, though, so it makes sense to take a look at the dimensions it’s sold in and adapt your design as necessary to avoid waste. We purchased from EcoFort in Calgary.

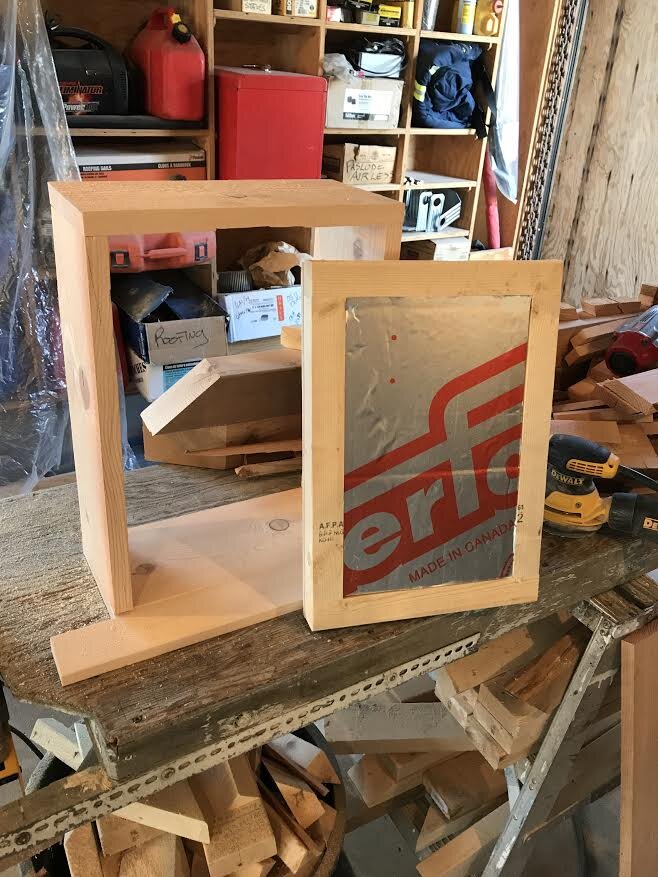
Ventilation in a greenhouse is vital both to prevent disease through air movement and to avoid overheating. To passively ventilate, you essentially need intake vents located near the base of the greenhouse and exhaust vents near the top so that as hot air moves up and out, cooler air is drawn in. We settled on two custom-built intake vents that will passively open and close using heat-activated openers, and two solar powered exhaust fans connected to a thermostat. The exhaust fans are designed to seal well in a roof application - something we couldn’t confidently say of installing custom-built vents in the same spot. The cost of the fans was also likely no more than what we would have spent on two more heat-activated openers and miscellaneous material to build our own watertight exhaust vents. We can add to this ventilation system, of course, by simply opening the door and window.
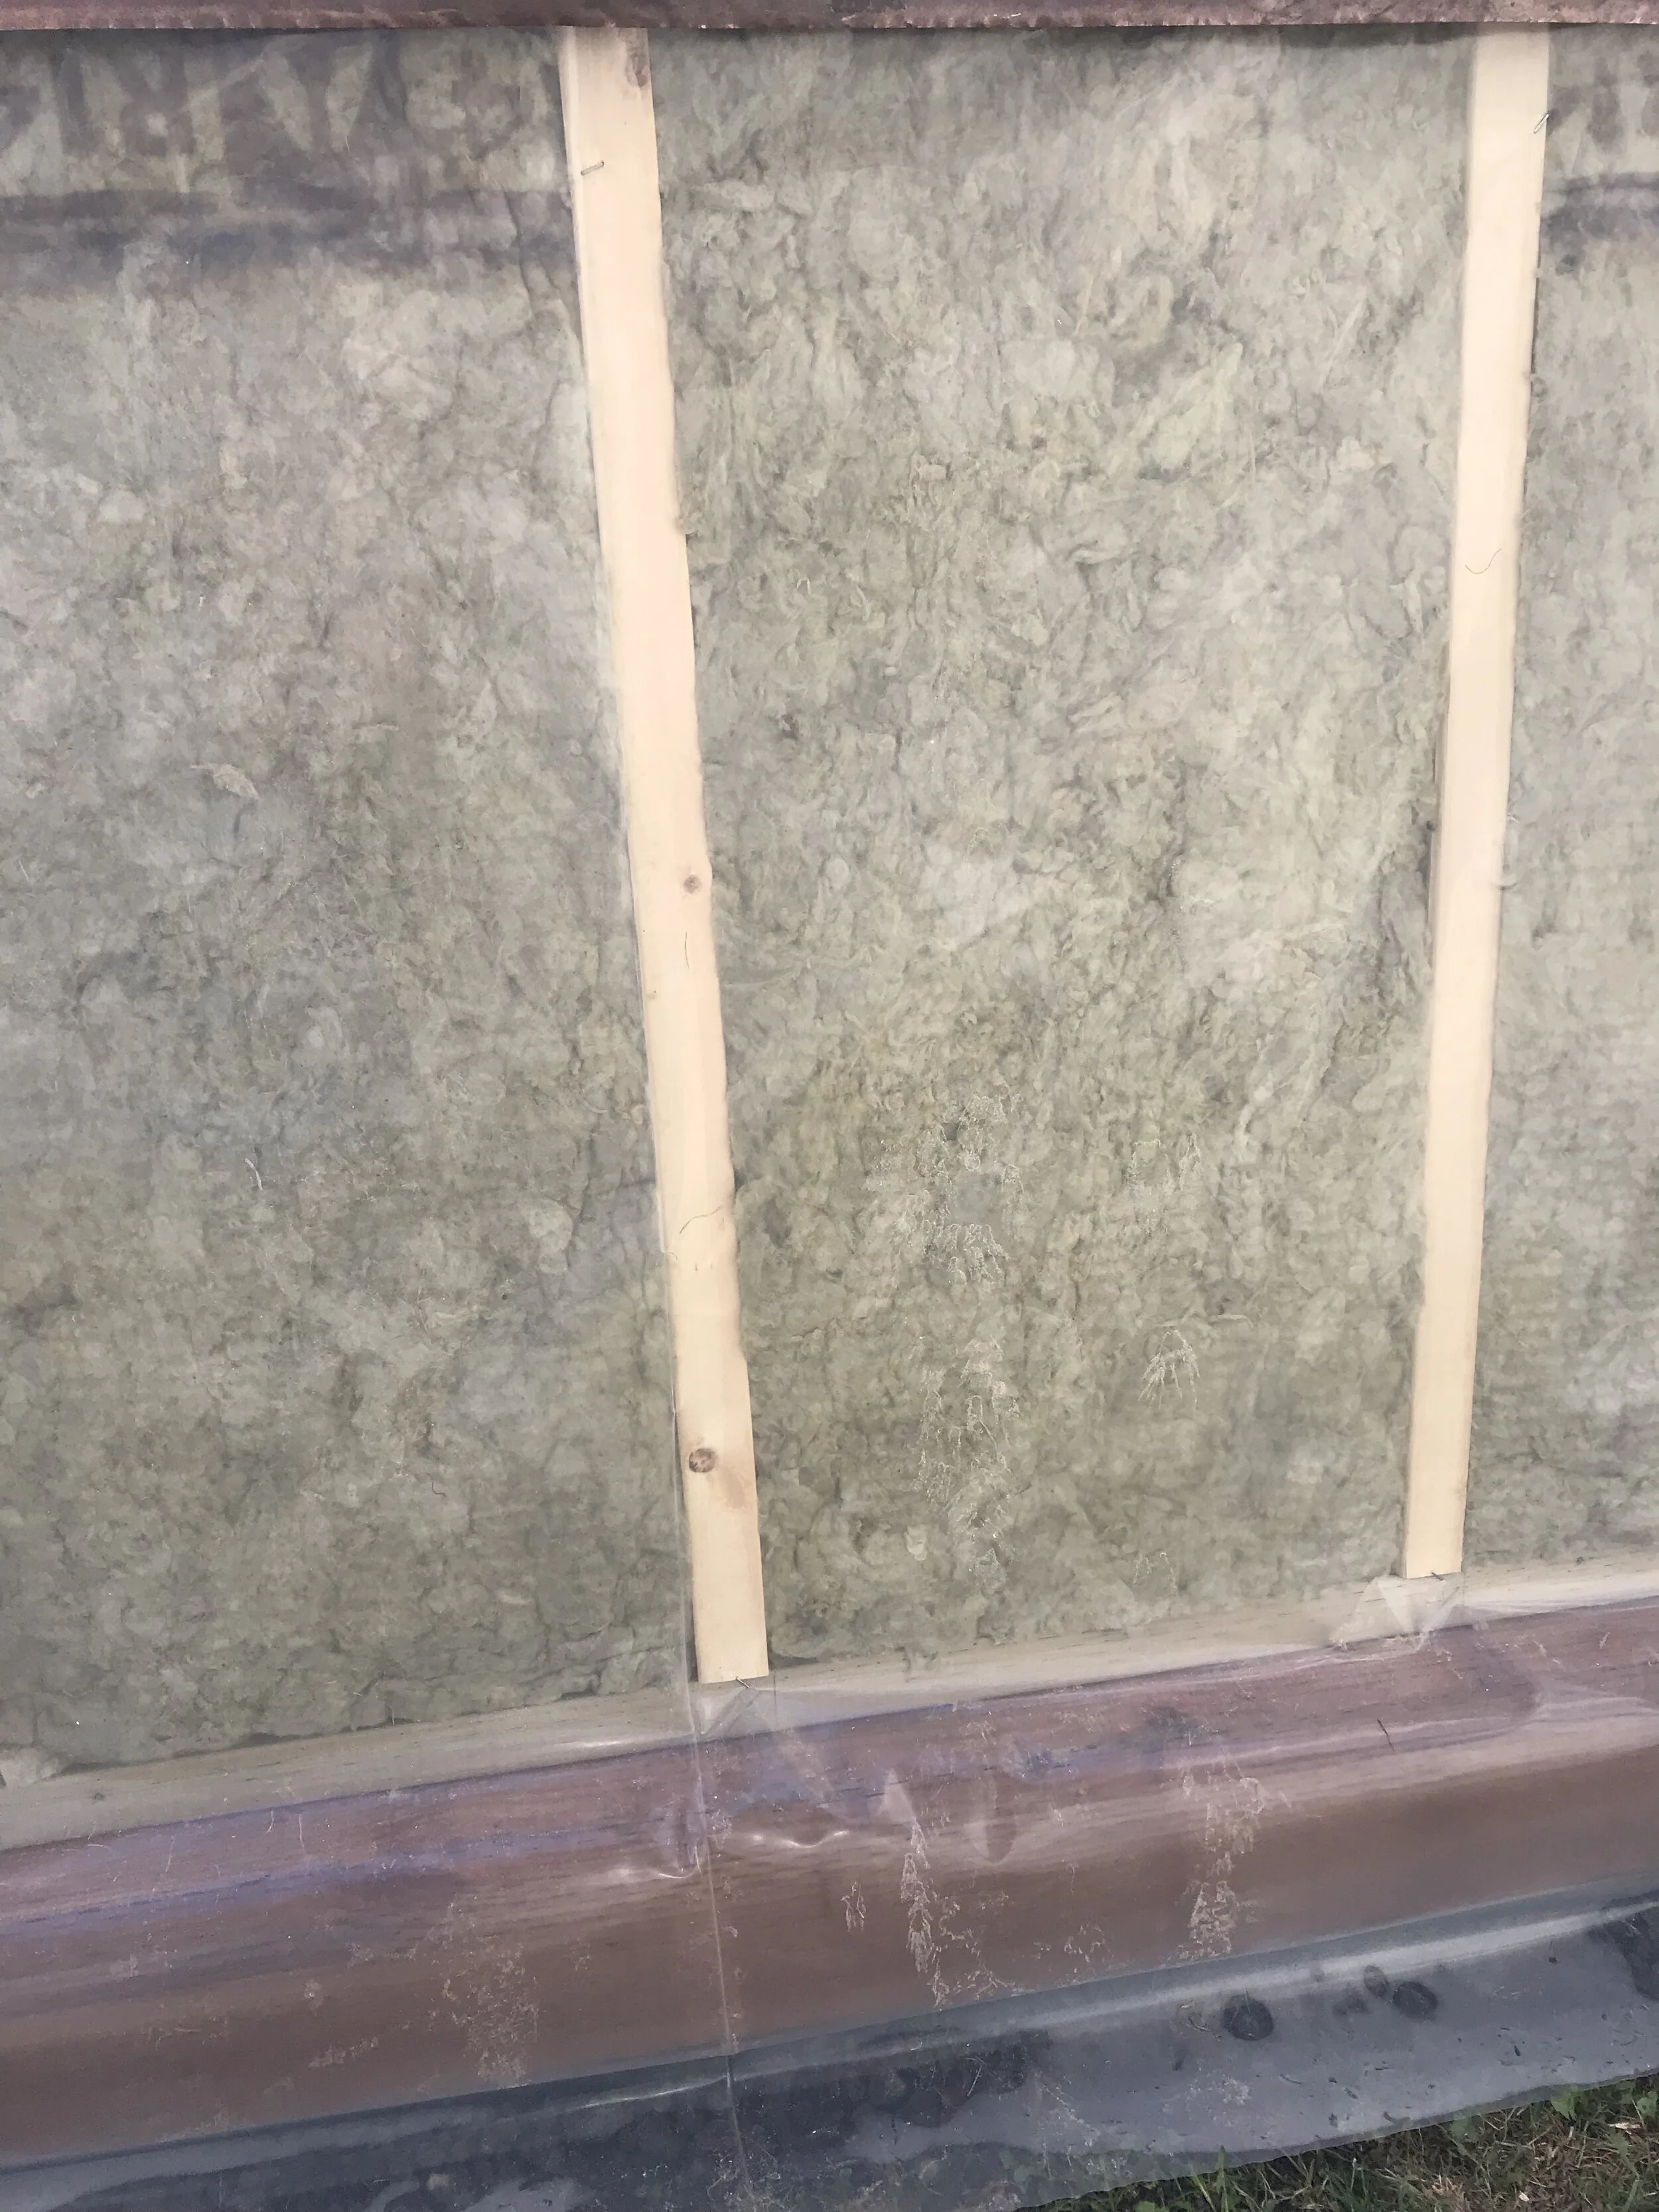
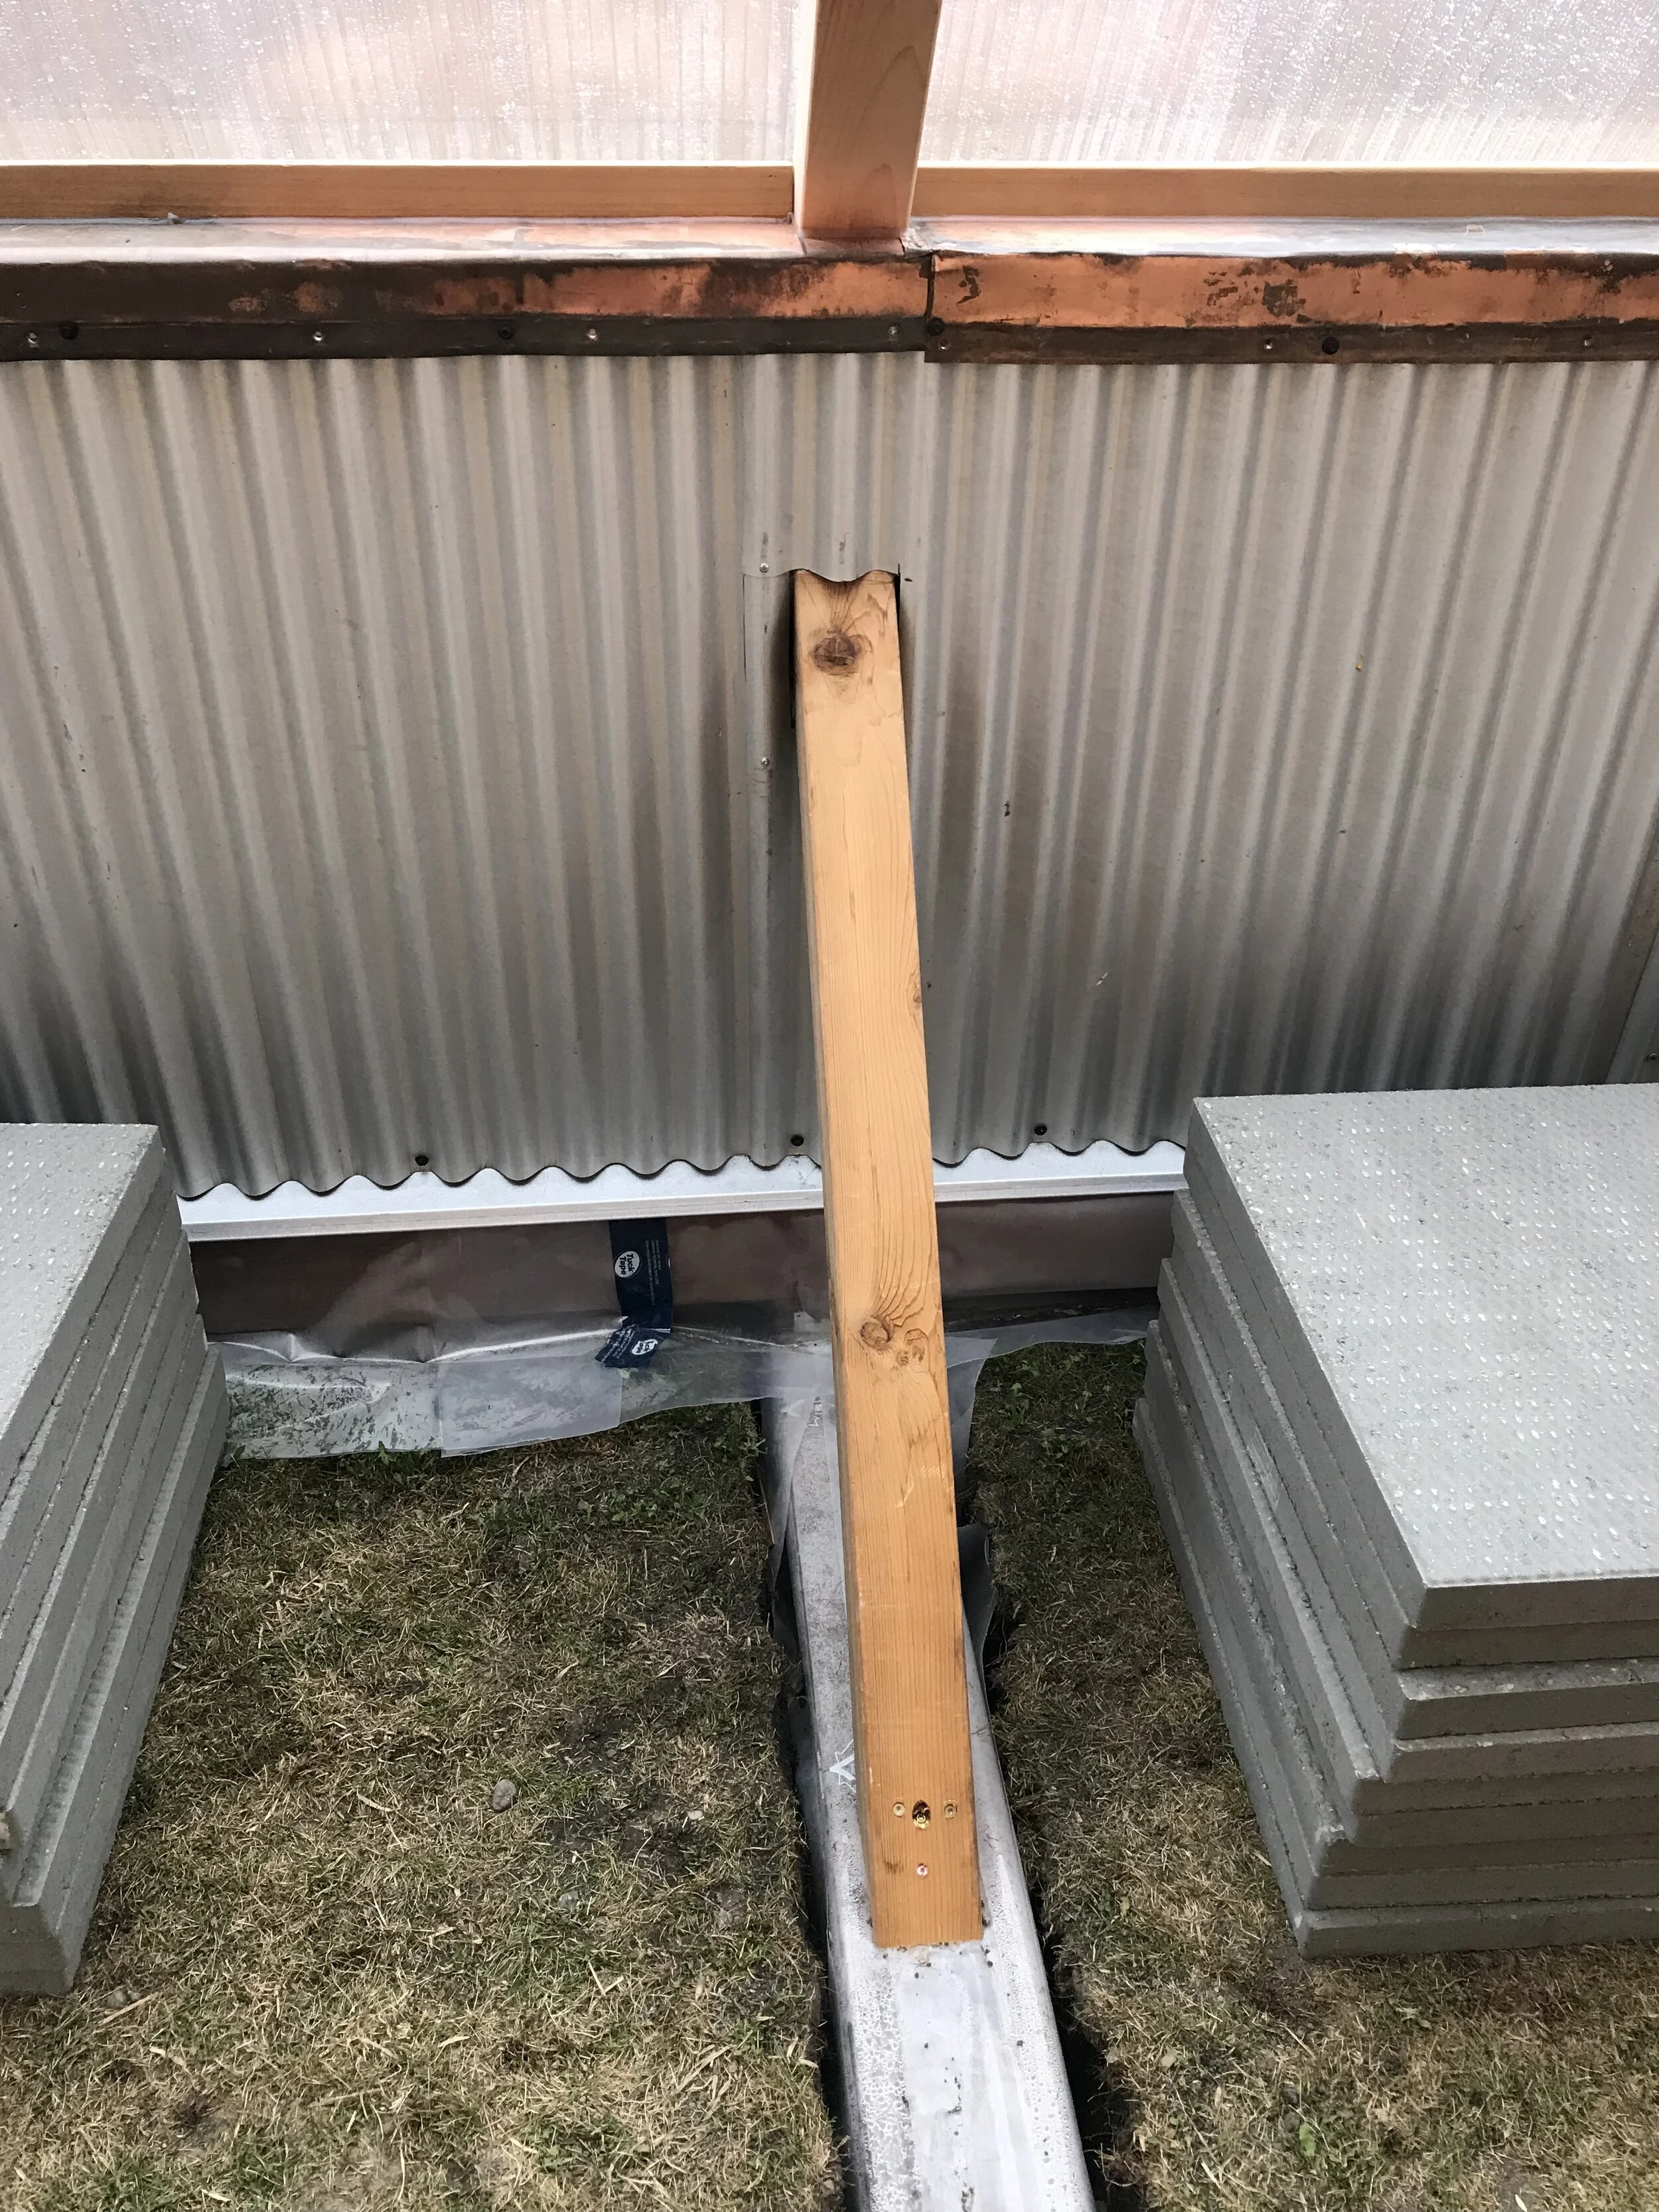
A key ingredient in passive solar building is thermal mass - those dense materials that absorb and slowly release solar heat. Barrels of water, cob structures, concrete, brick, and stone are examples of such materials. As I’ve noted, our indoor space was at a premium given the small square footage, so we installed 2” thick sidewalk blocks up the north wall to act as thermal mass while keeping a slim profile. I’m happy with the fact that the blocks are simply strapped in place with strips of wood and, if ever the greenhouse was deconstructed, they would come out intact and reusable. We’ll add a little more thermal mass, likely concrete blocks or stone, in the floor between growing beds.

Concrete sidewalk blocks strapped to north wall for thermal mass
Because passive solar greenhouse design restricts light entry to mainly just the south side, it helps to reflect that light around as much as possible by painting interior surfaces white. So, apart from the concrete blocks and a bit of wood detailing my husband couldn’t bear to see coated, we applied white paint to everything: the walls, door, and ceiling. The increased brightness was immediately noticeable!

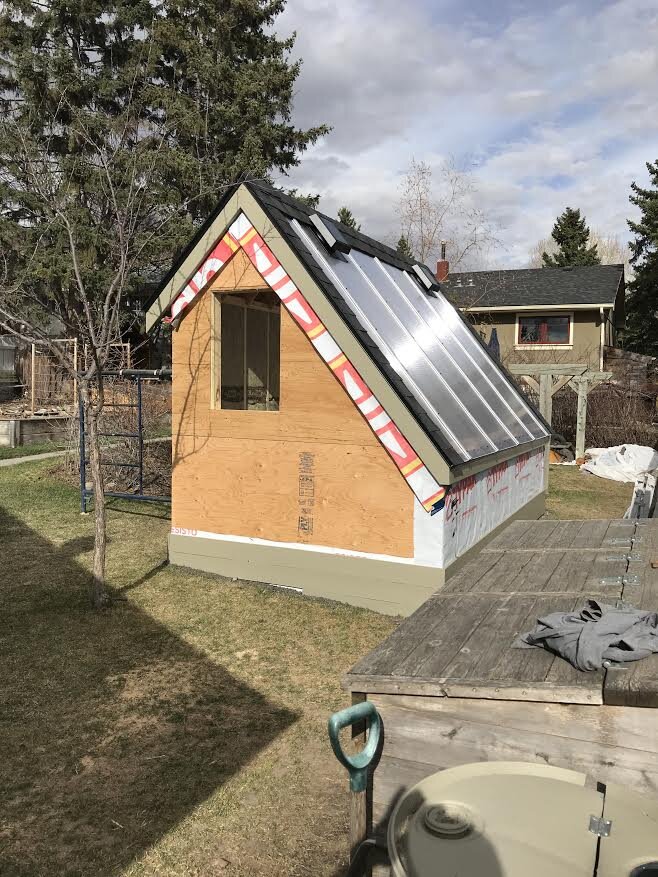
With some finishing touches to the exterior, we very nearly have ourselves a finished and functioning passive solar greenhouse. All that remains is to set up the growing beds inside, a rain capture system outside, and any other fun and functional details as they occur to us.

Finishing the exterior with cedar shingles treated with non-toxic Lifetime product
The price tag for this whole undertaking, you ask? Well, brace yourself - it may strike you as quite high, especially considering our labour was free. Our current rough calculation comes out to about $7,000. That’s a lot of food this little building will have to produce to pay for itself!
I will, in fact, loosely keep track of the pounds of tomatoes, cups of basil, etc. that come out of it each year. But, of course, you can’t really compare zero-mile, nutrient-rich, soil-grown produce to anything commercially available. And there are yields from this greenhouse that go beyond filling our fridge - an all-season feel-good retreat space, a venue to trial and get up close and personal with some crops that go beyond our Zone 3 limits, an experiment in design for climate extension, increased resiliency for ourselves and anyone who inherits this property, and a privacy screen between our yard and the next. Heck, maybe even a special place to share a glass of wine with friends!
In the next instalment we should have plants in there trying out their new home…
Backyard Greenhouse - Part 2: Foundation & Frame
Welcome to a series of blogs about Cultivate Cochrane president Jackie Skrypnek’s backyard greenhouse building process. The intent is to share a realistic account of one couple’s experience to help inspire and inform other community members in their own season-extending, food-producing ventures.

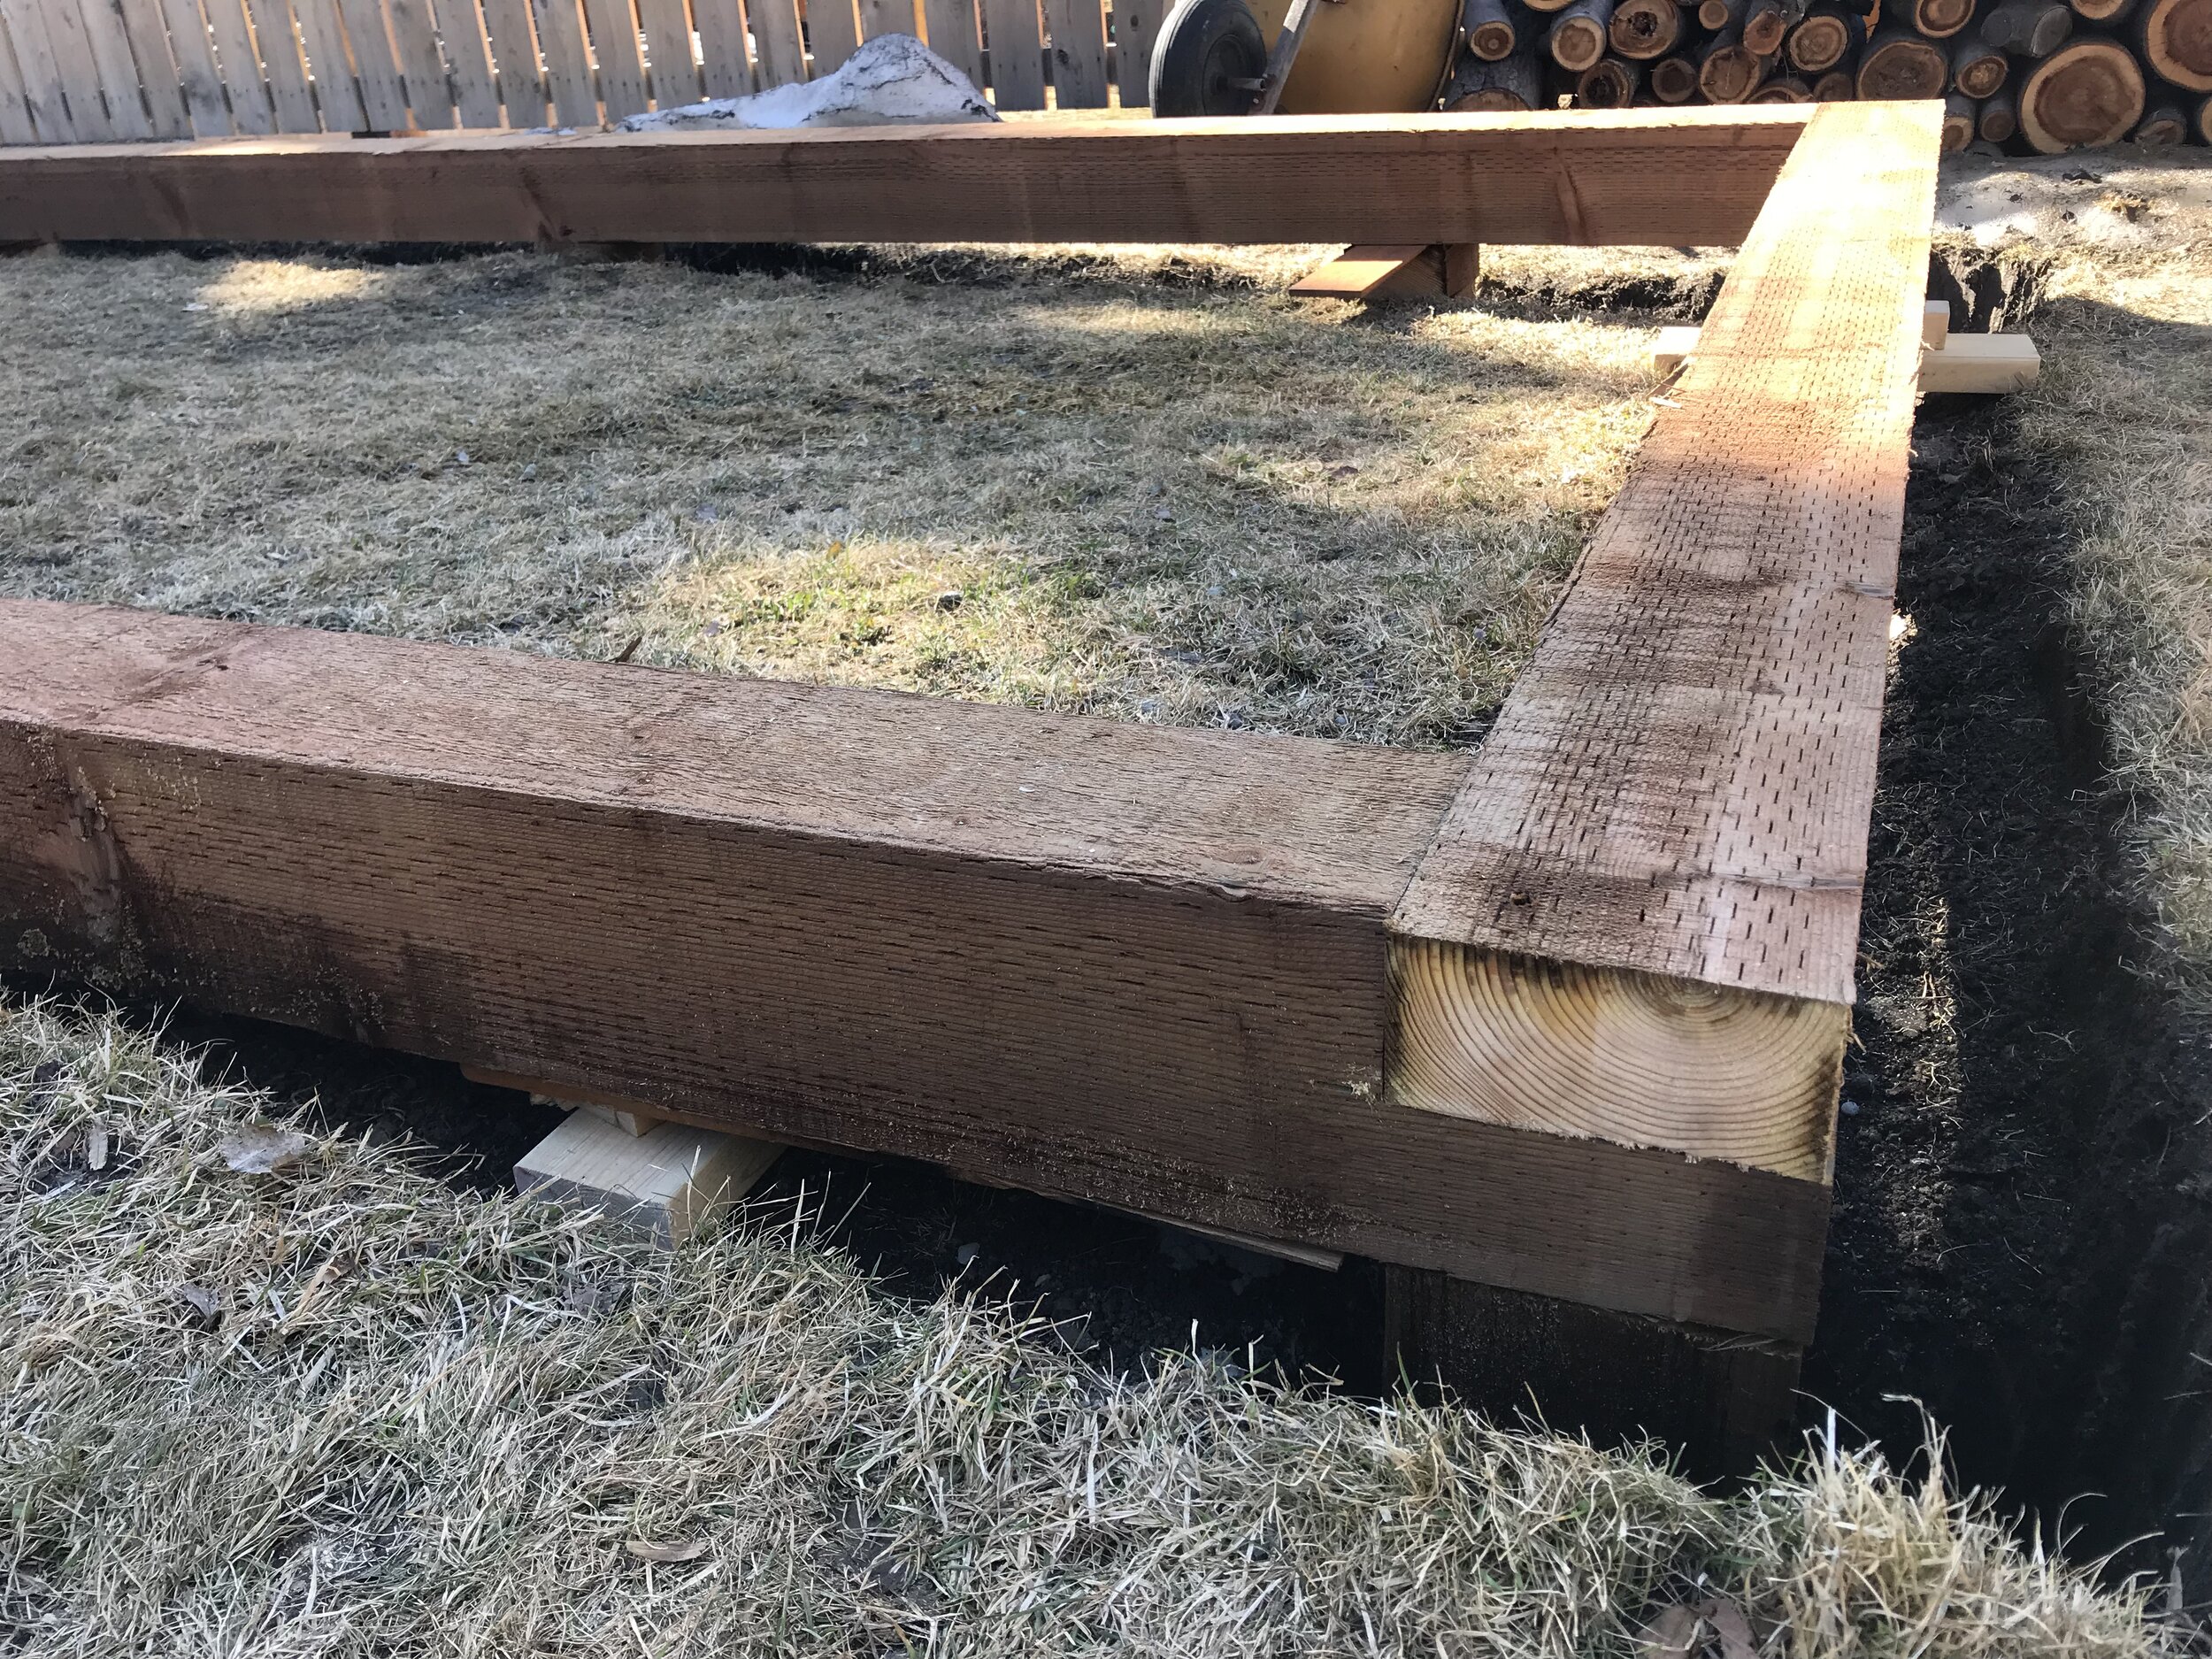
With a design in place and the frost out of the ground, it was time to take our little greenhouse from plan to reality. In preparation, I had scoured Kijiji for materials we might be able to use both to save money and to lighten the footprint of resources. I had high hopes of finding a large stash of free bricks, a suitable window or door, or foam insulation otherwise destined for the landfill. But my searches turned up nothing reasonably useful or cost-saving. We had to remember that the reason we were going to the considerable expense of building with passive solar design was to create a really efficient structure that could hold heat well in our shoulder seasons. If we put in a leaky window, warped boards where air would infiltrate, or patchy insulation to save a few bucks it would somewhat defeat the purpose of spending money on the project in general.
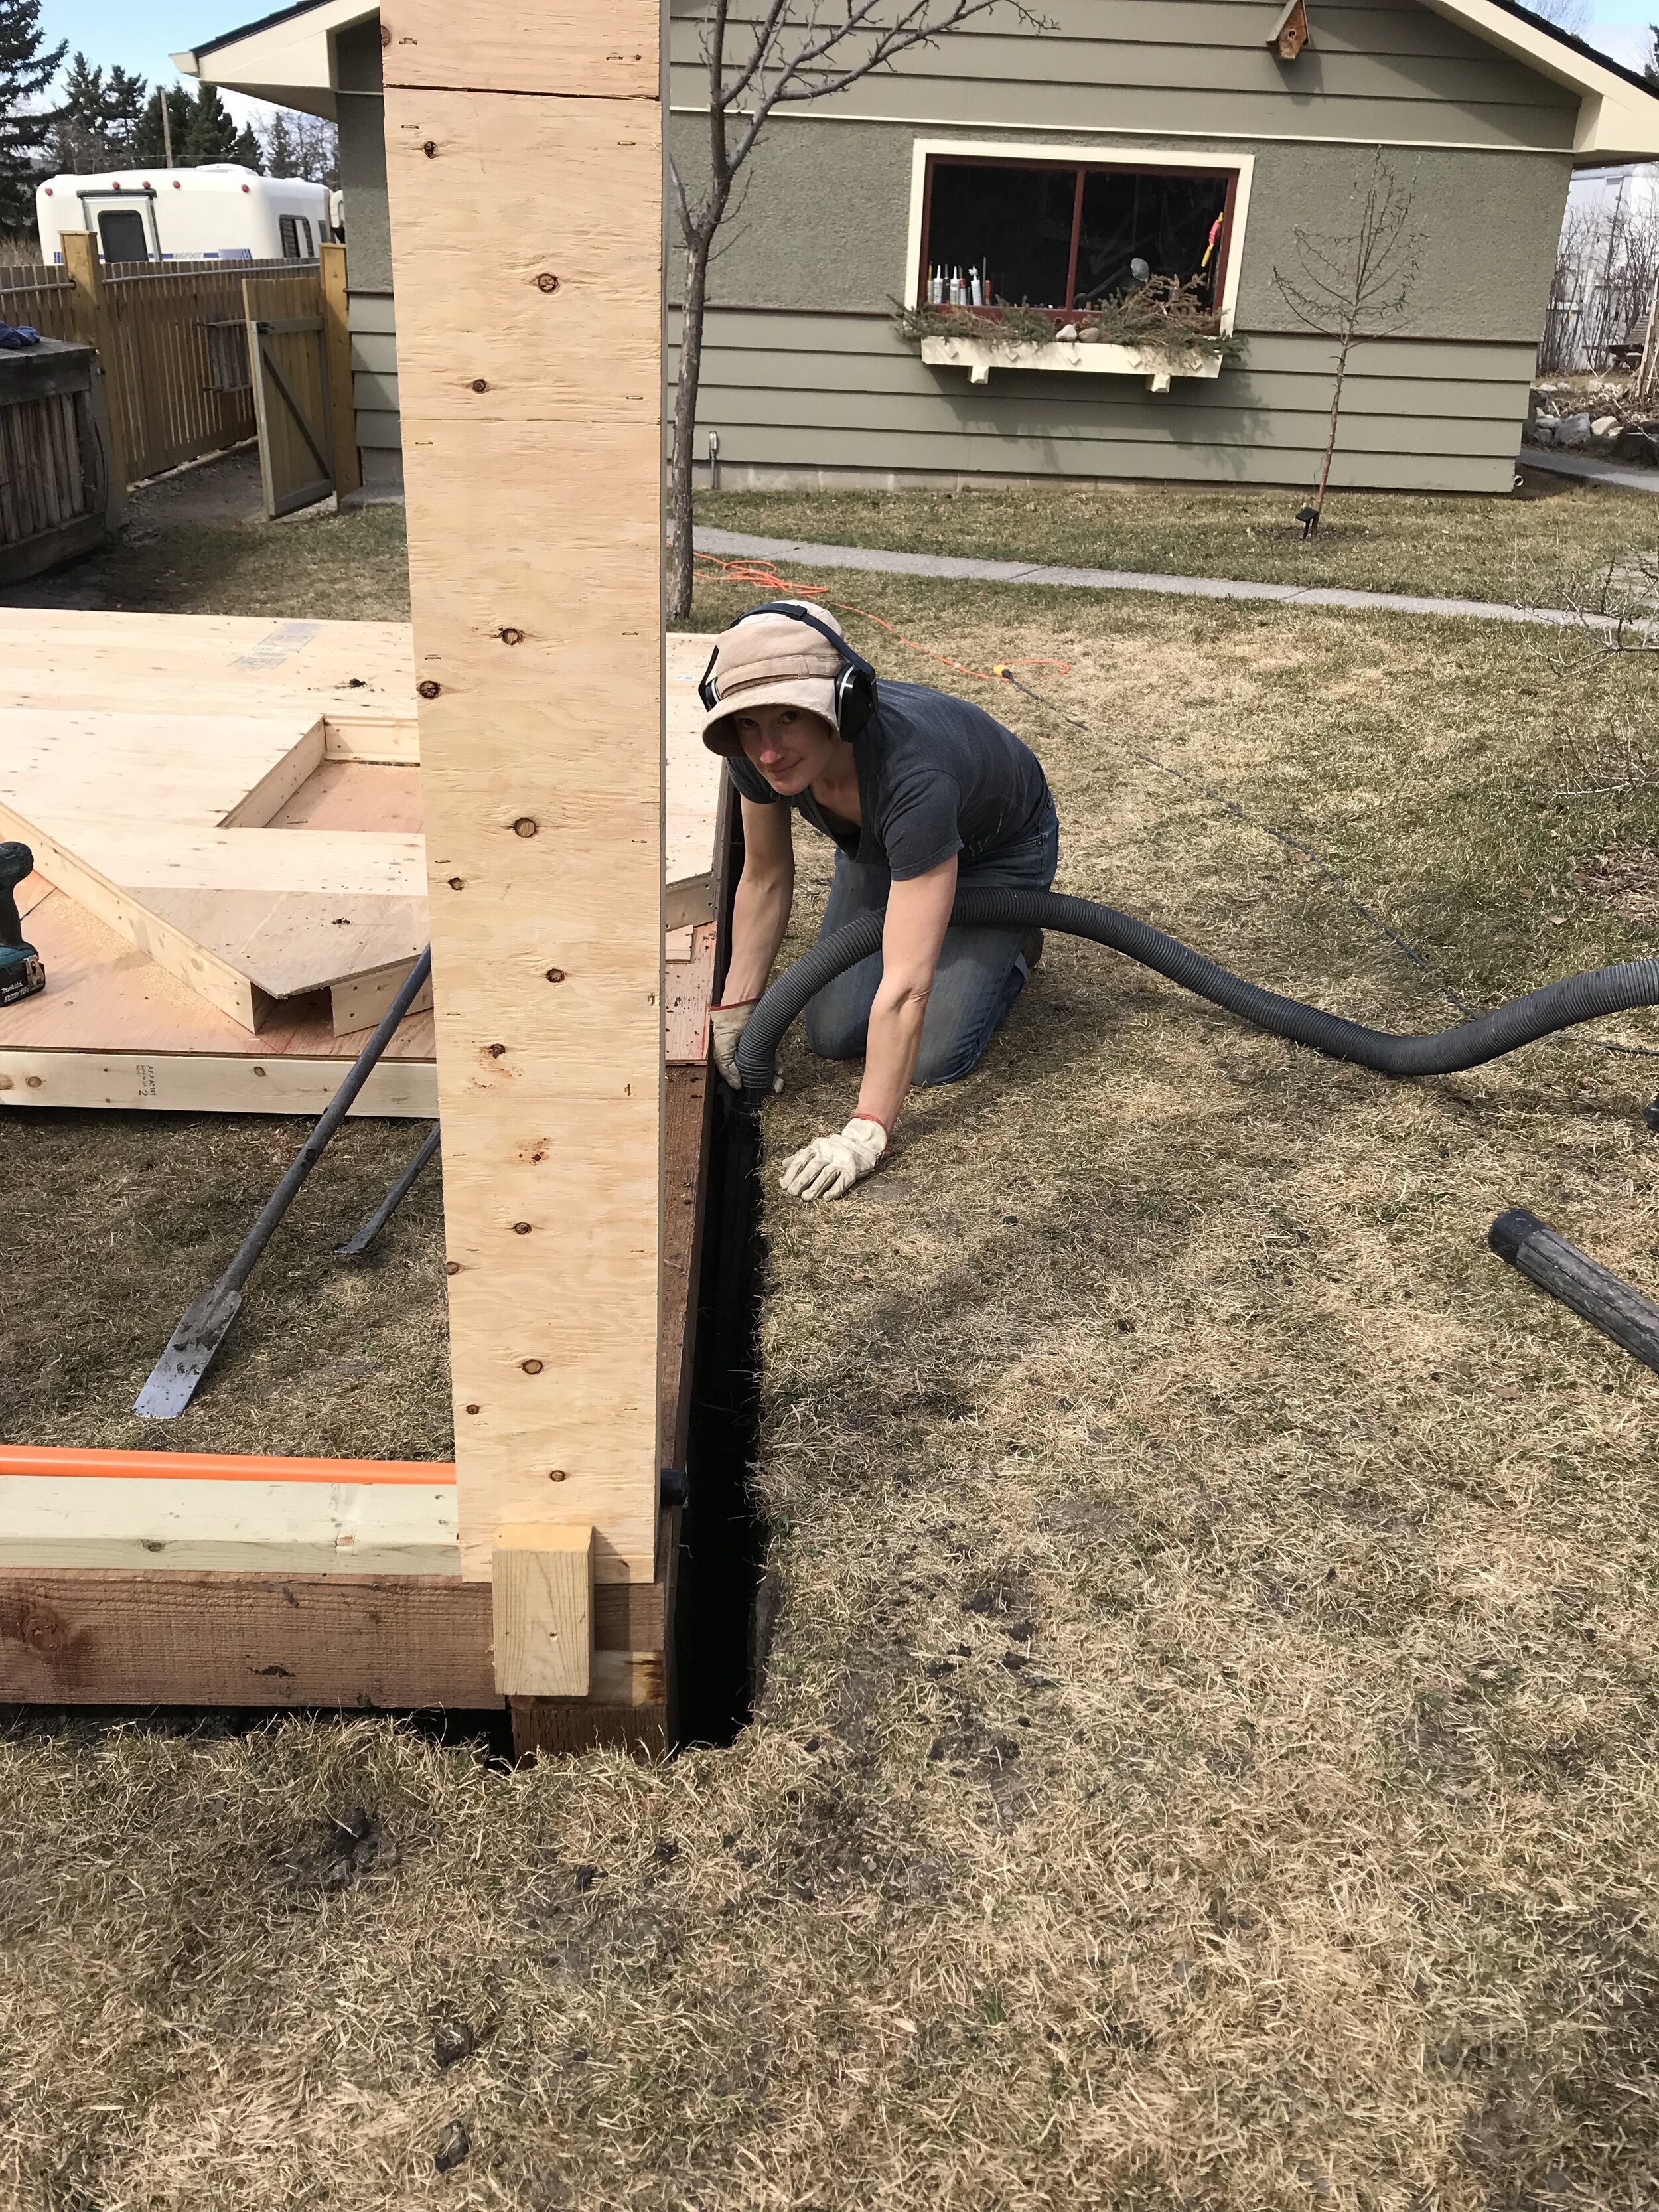
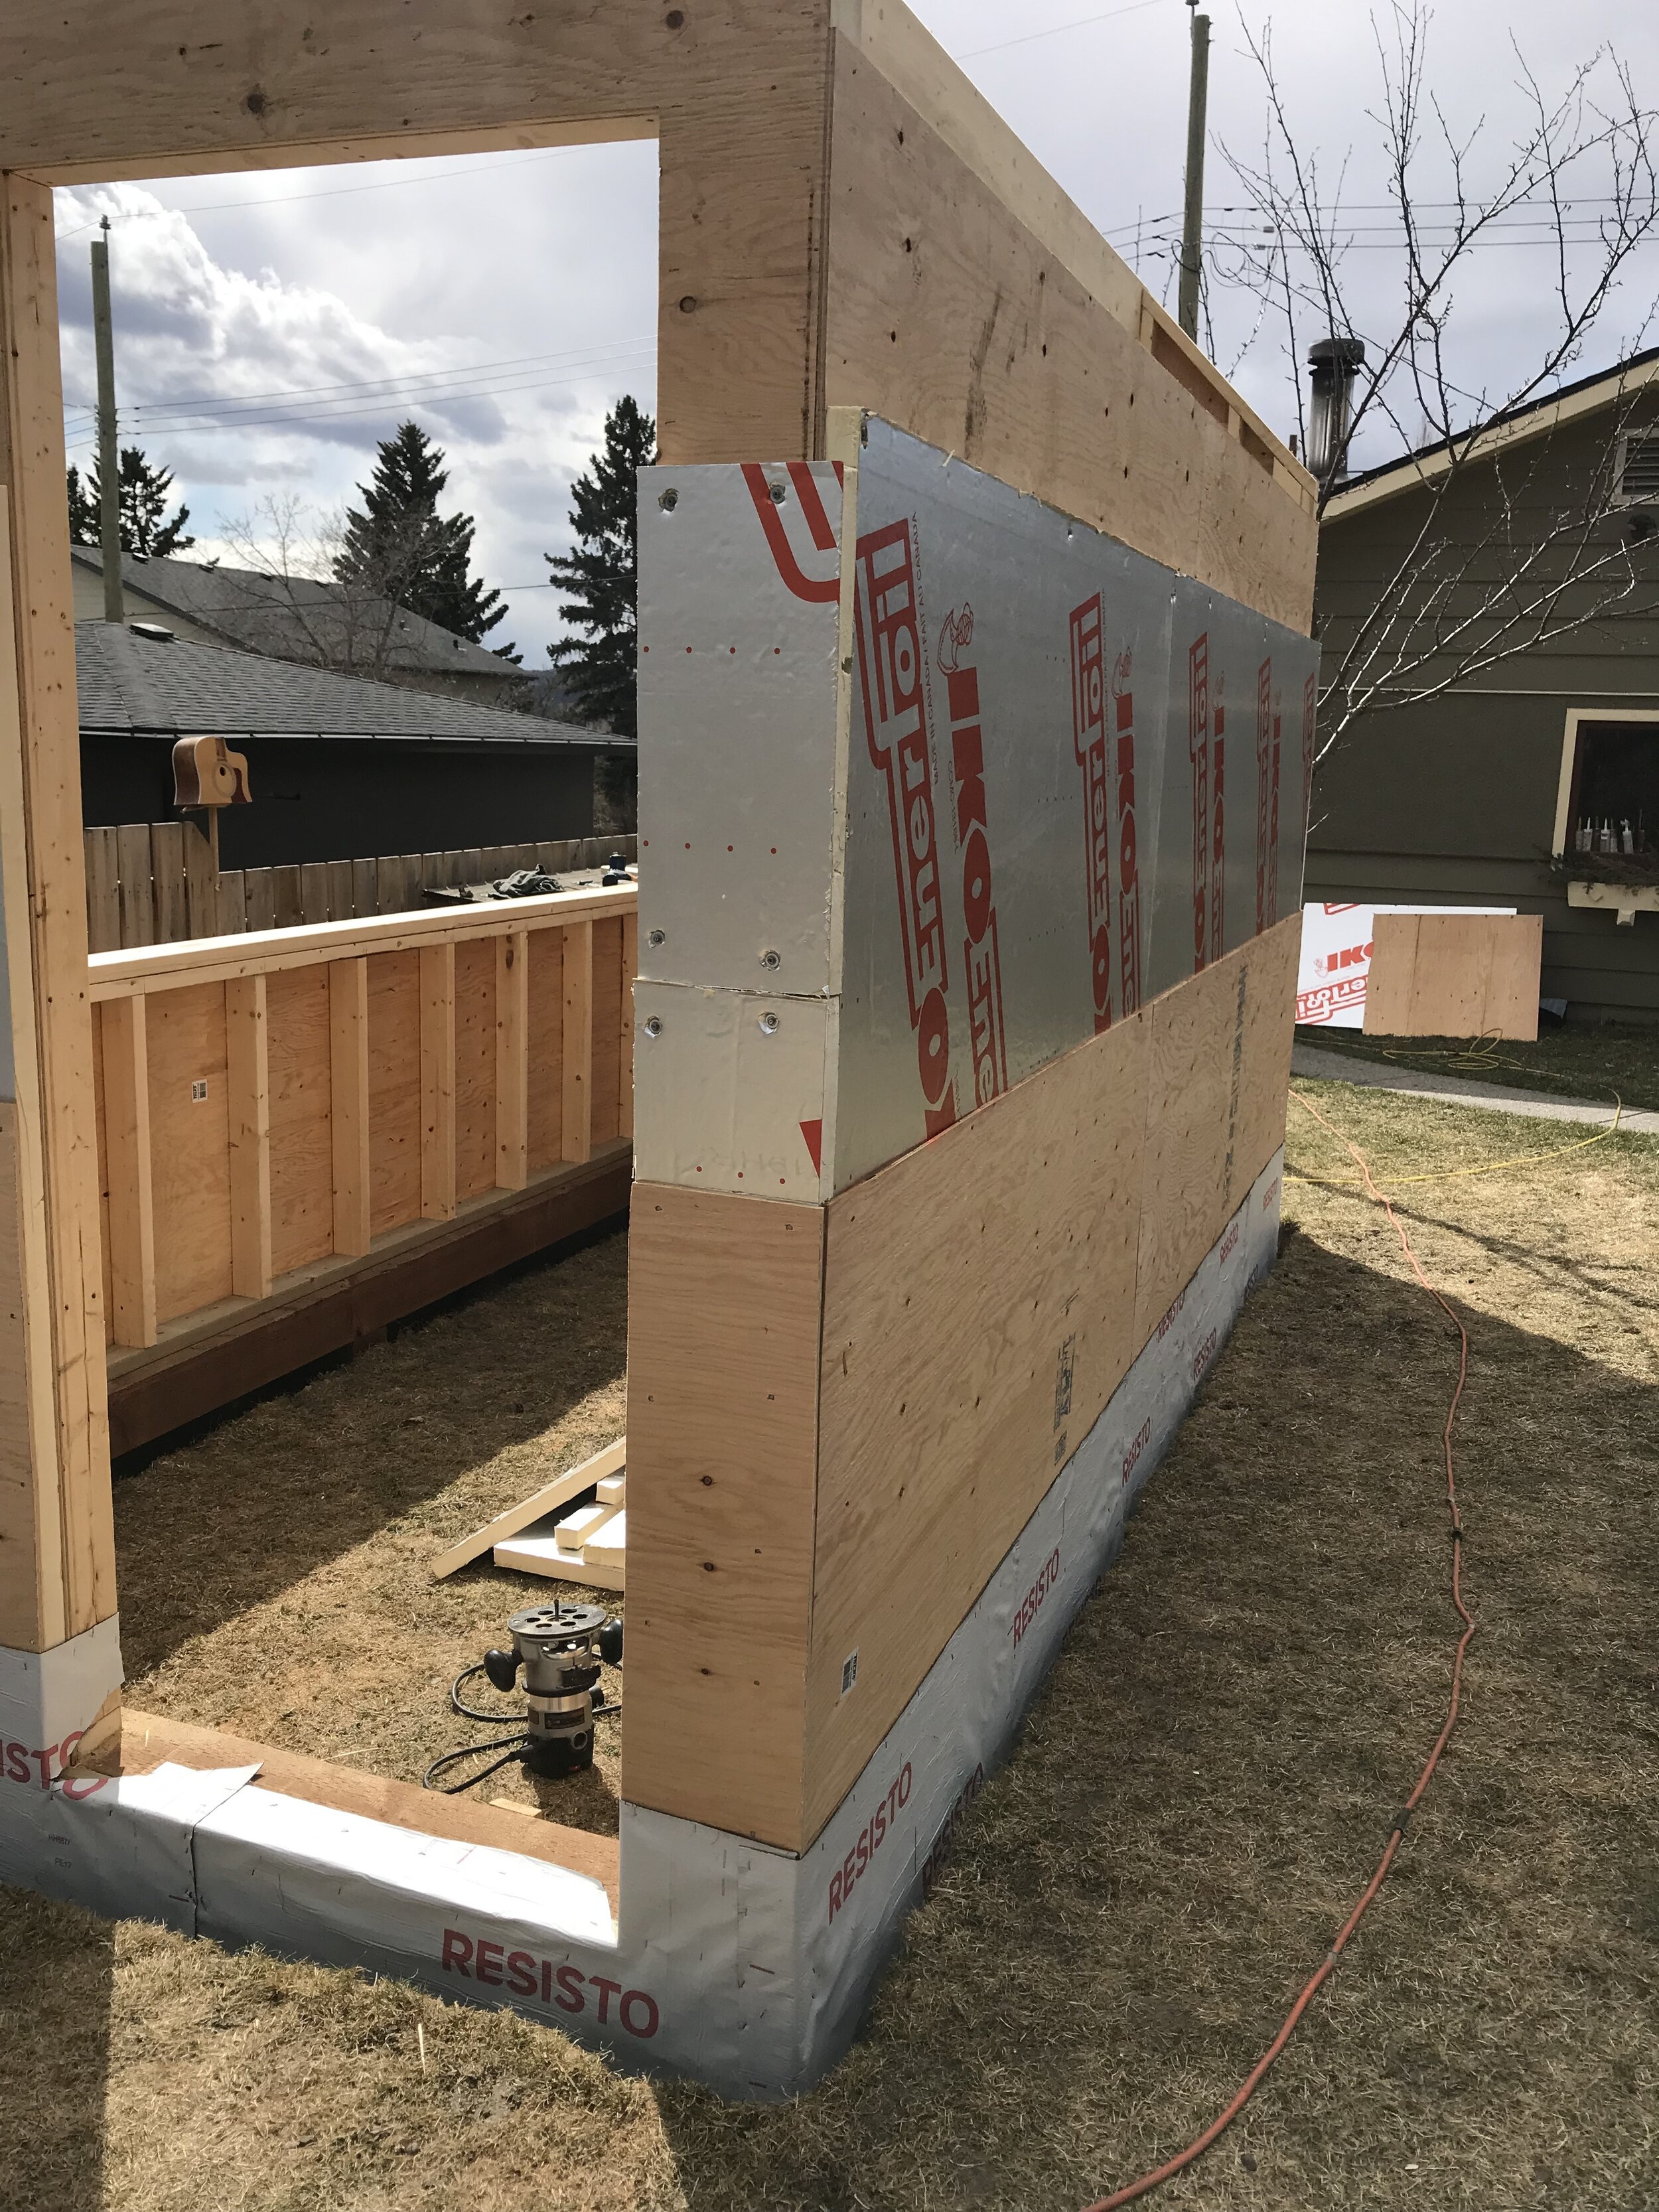
So, new building materials amassed, we began. We constructed a perimeter foundation of treated 6x6’s (nearly the only place we used treated lumber) levelled on 6 posts each on a concrete footing in the ground. Ideally a passive solar greenhouse is insulated to some degree from the frost below ground and there are several options for doing this. We chose to excavate a perimeter trench just wide enough to slip foil-backed foam insulation down as deep as possible. After several hours of work using a digging bar and a shop vac to help bring the soil up and out, we called it quits at a depth of about two feet. It would have to suffice! The upside of this foundation and insulation method is that it took minimal materials - just 6 bags of concrete, some wood and the insulation.
As a side note, installing a solid floor such as poured concrete is not recommended for optimal and ecological greenhouse function. Allowing your growing beds to access the subsoil is important for nutrient cycling and soil microbiology, plus the earth itself will act as uninterrupted thermal mass, storing excess greenhouse heat (at least as far down as the insulation runs). A concrete floor also inhibits drainage and comes with an immense embodied energy footprint.
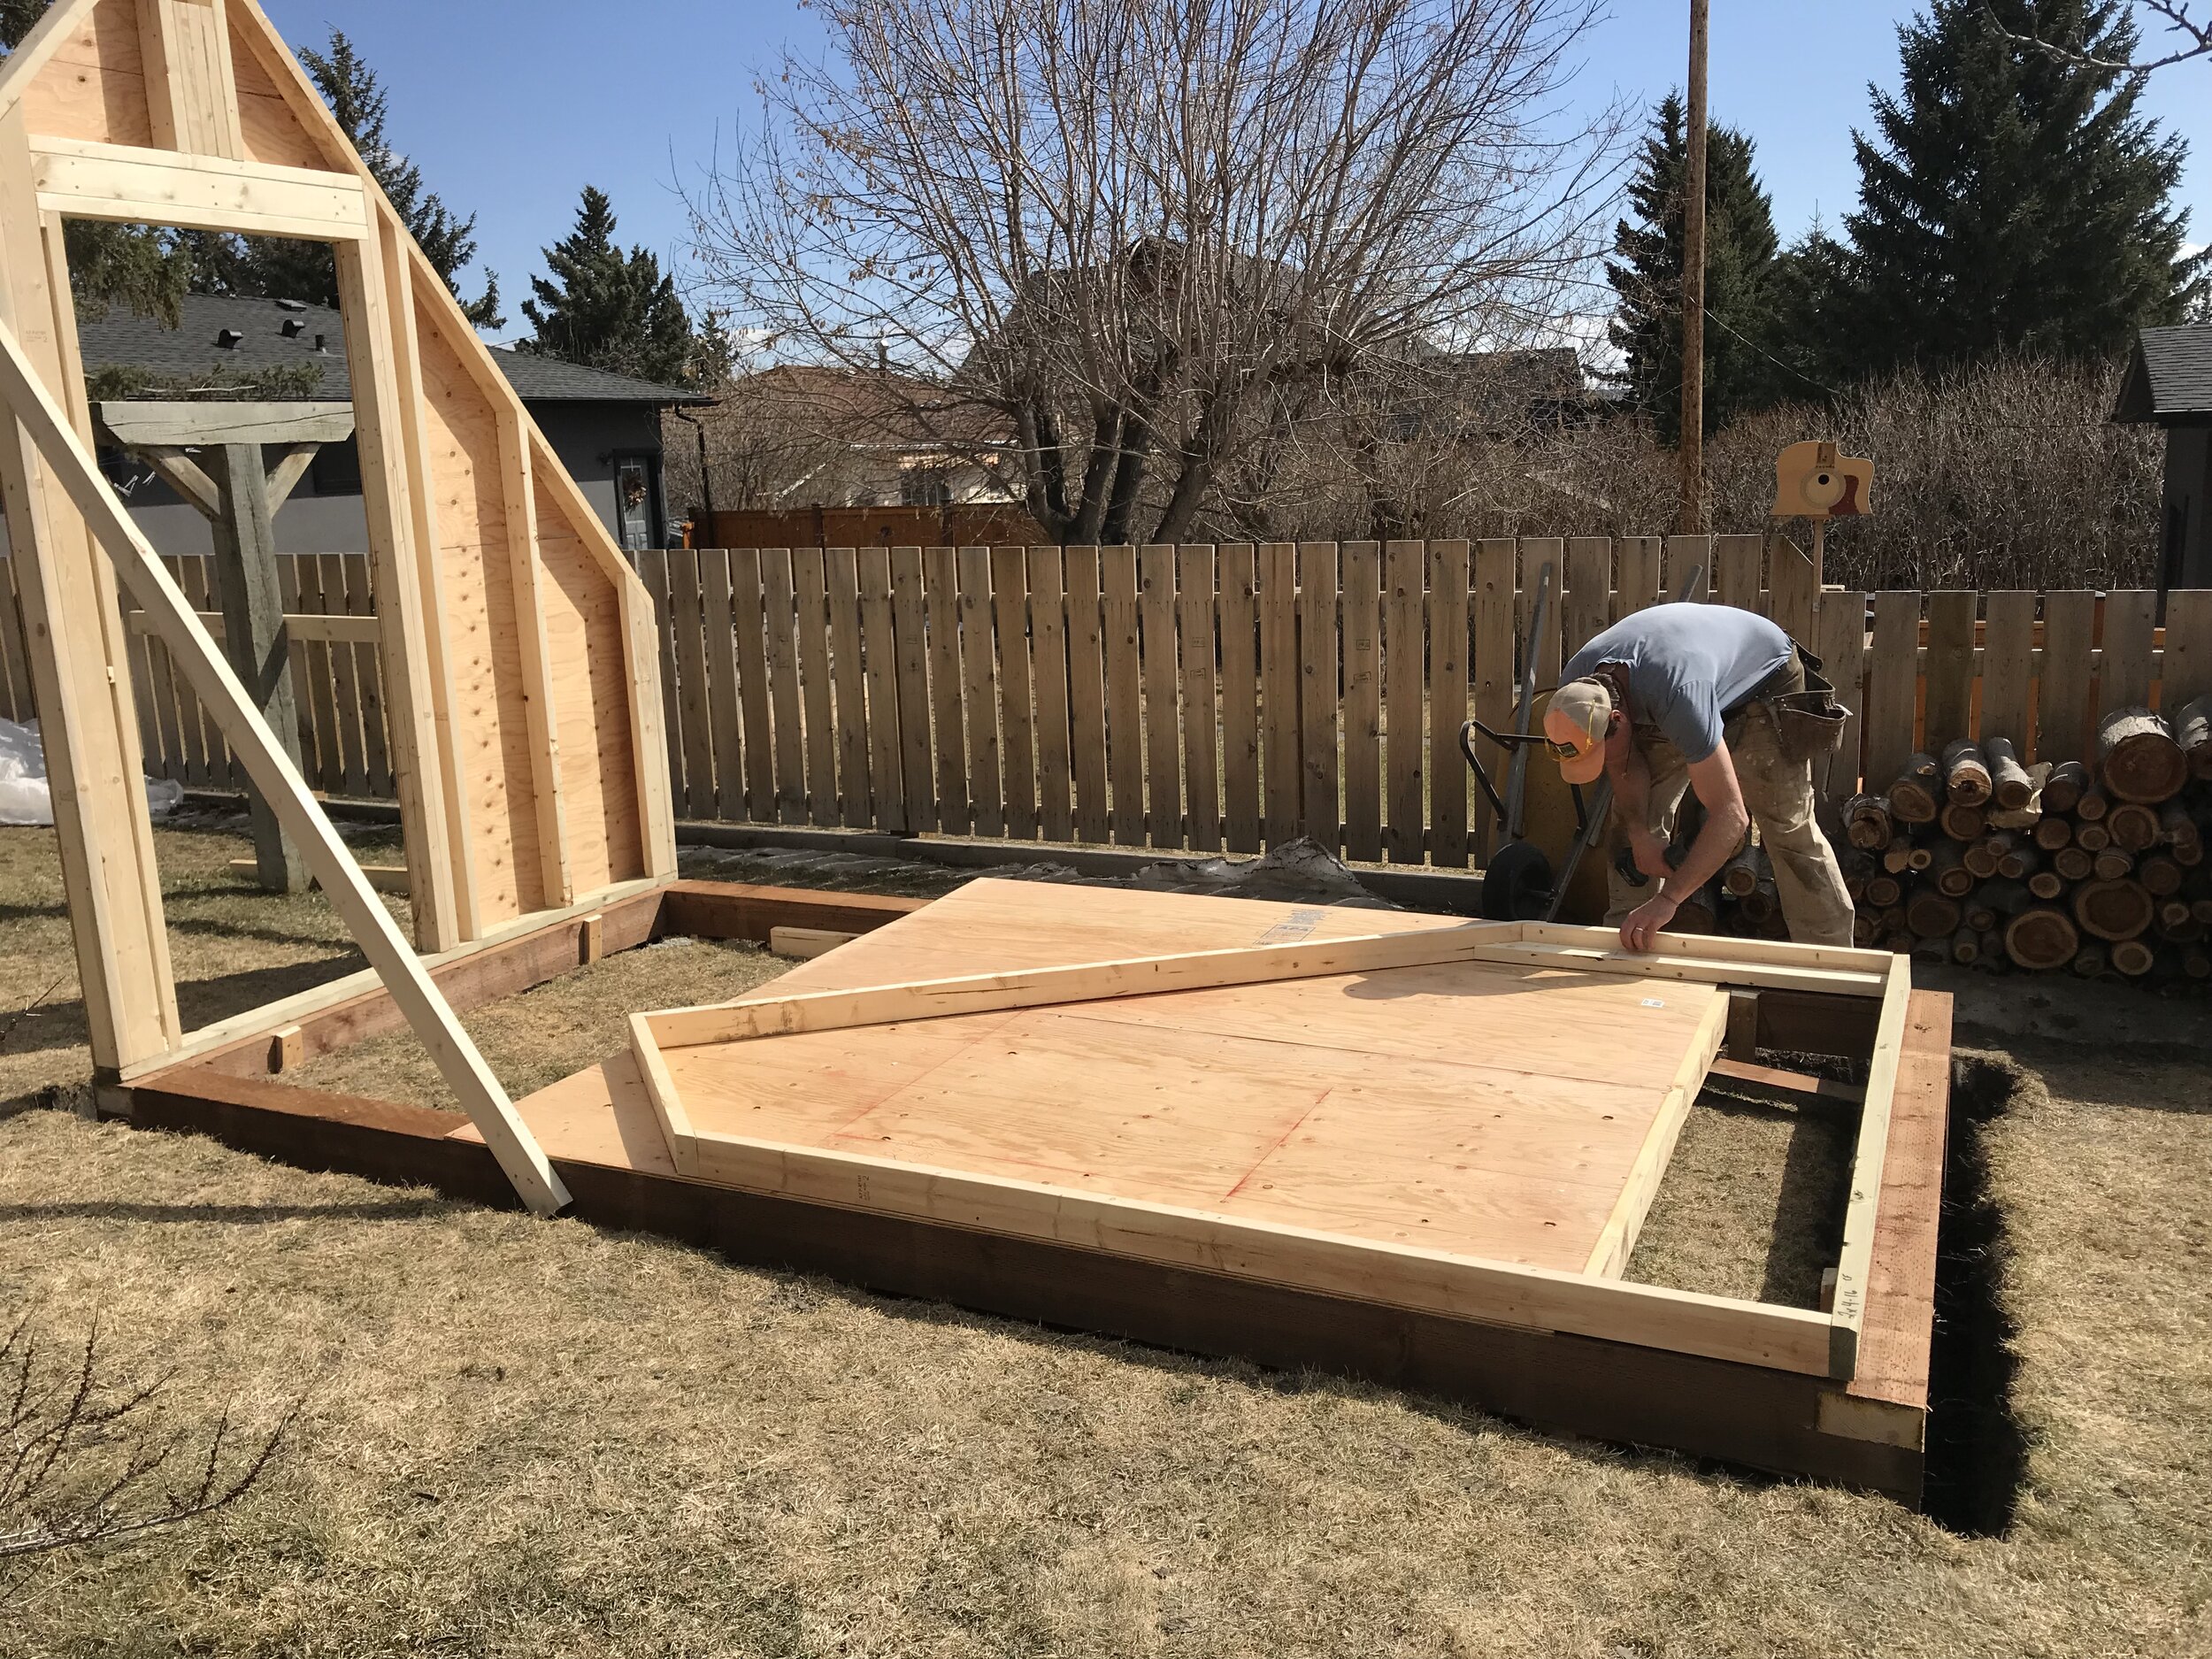
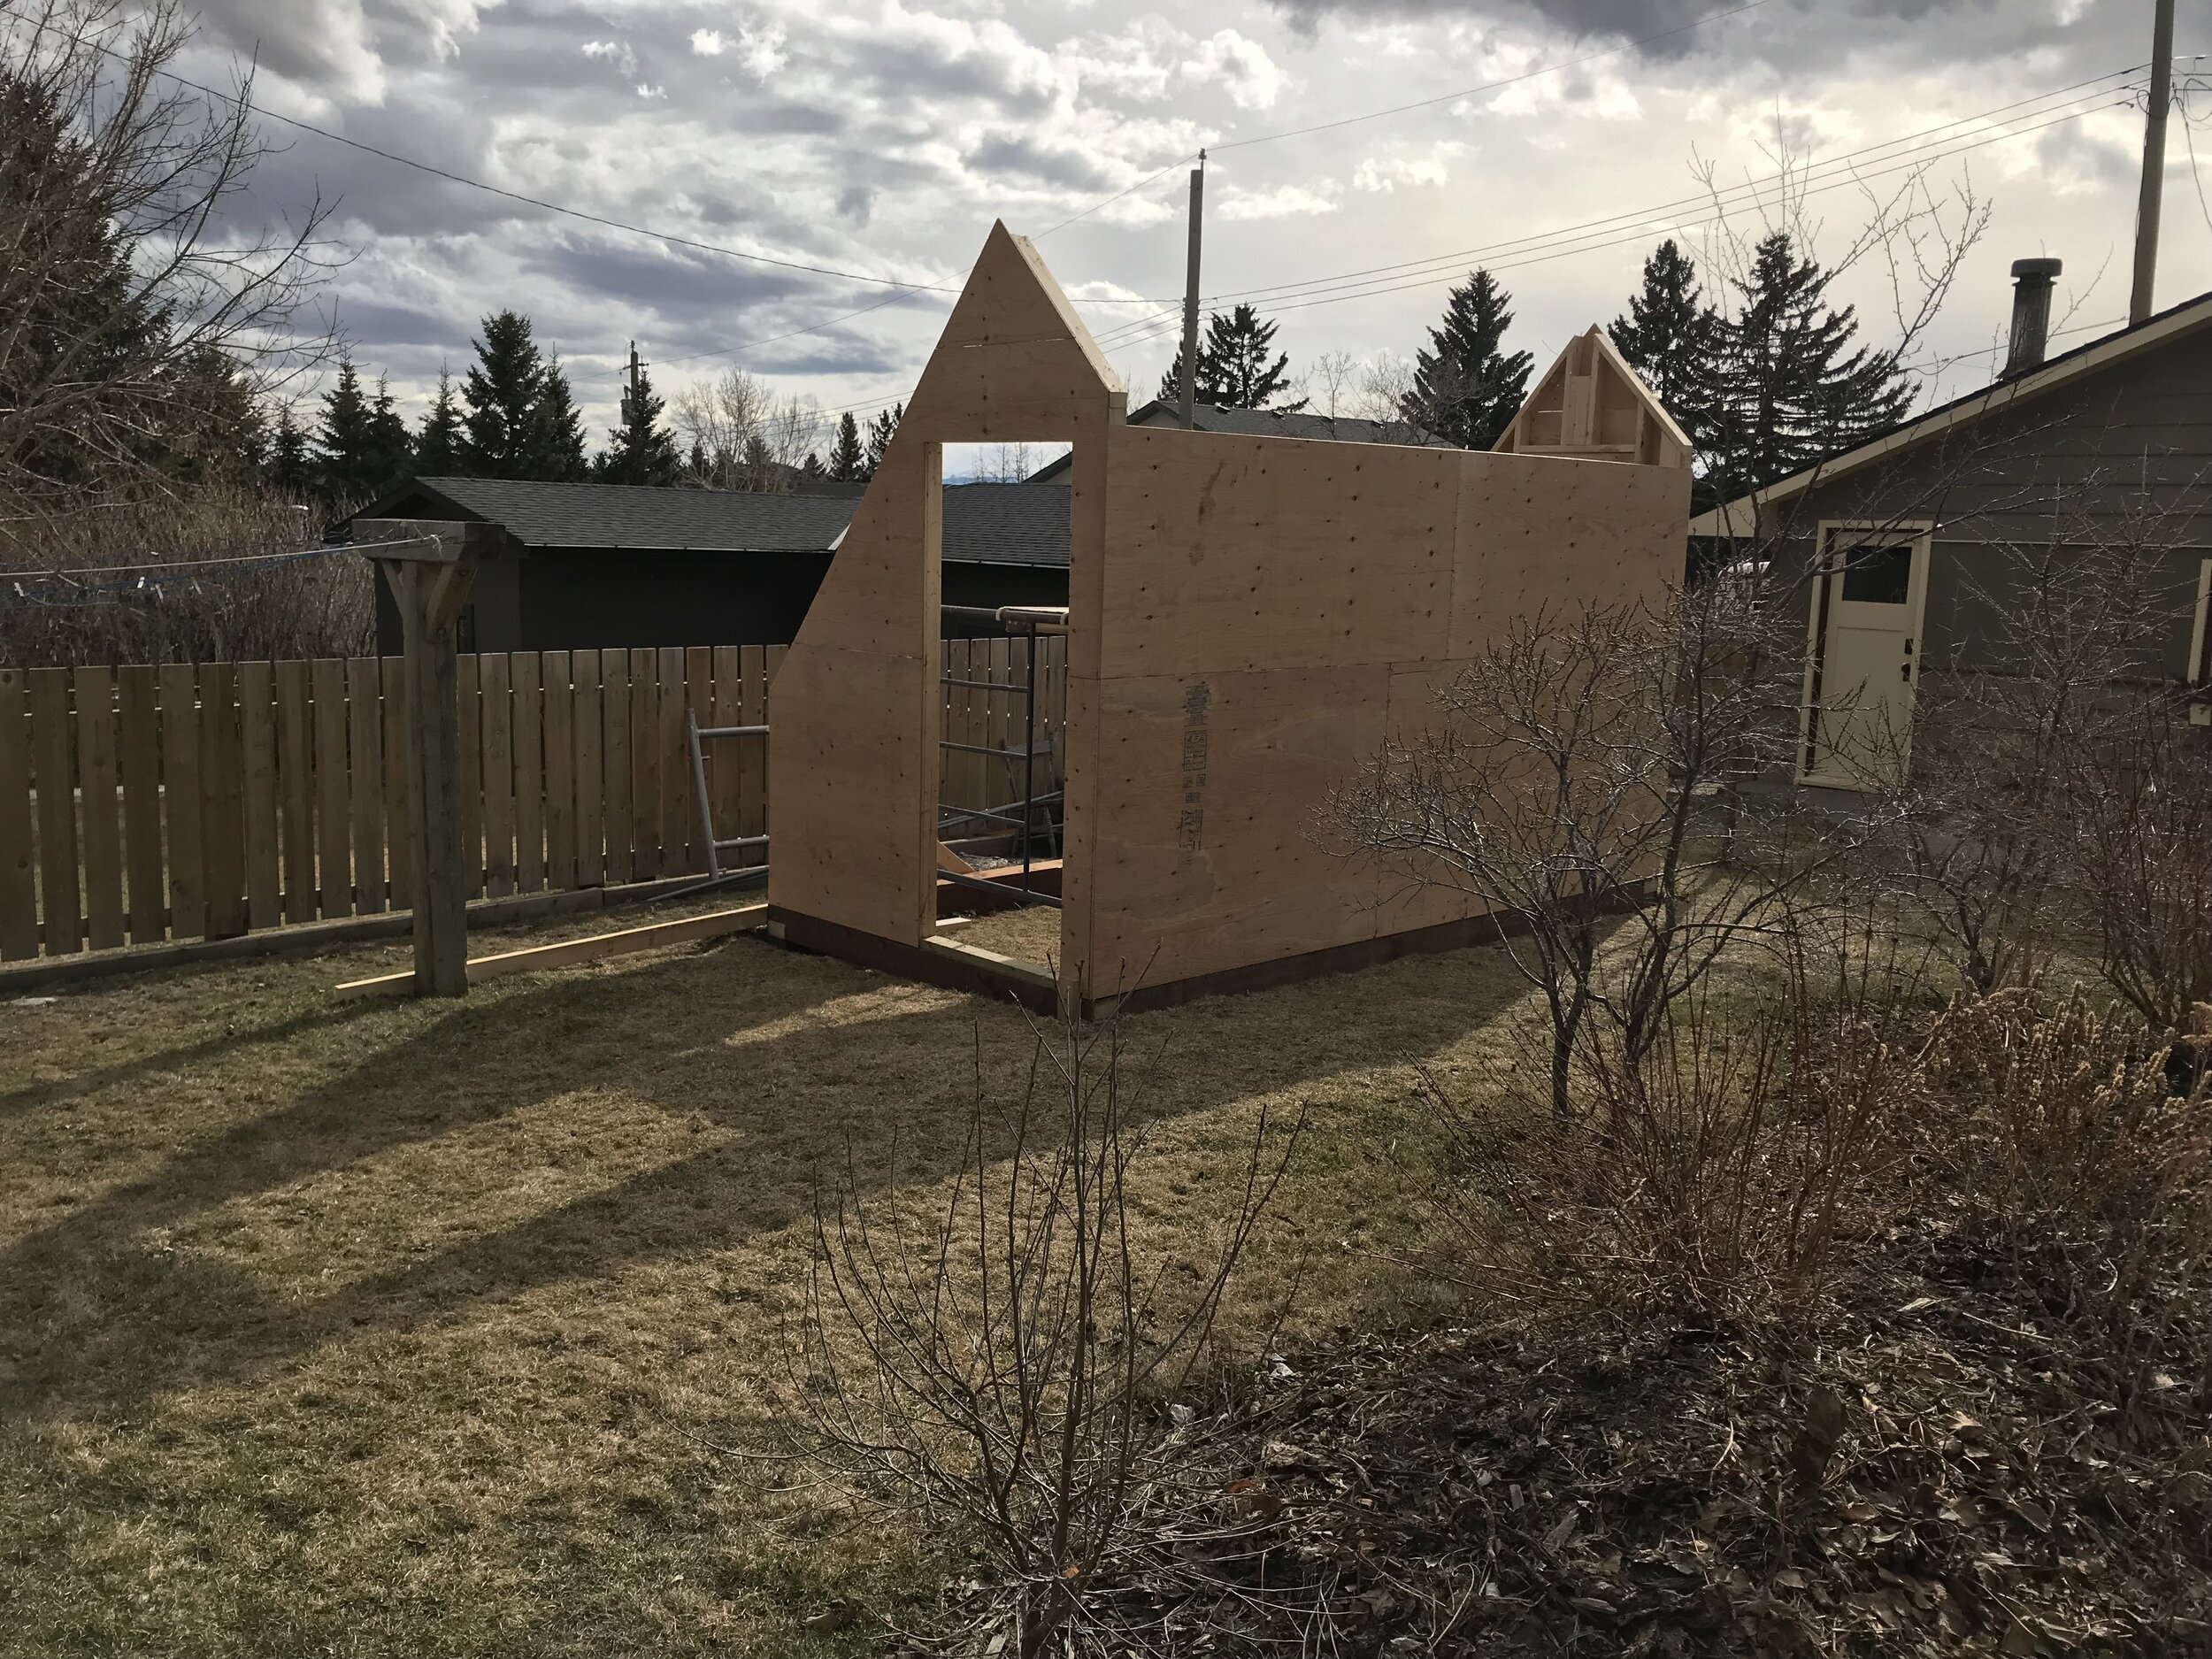
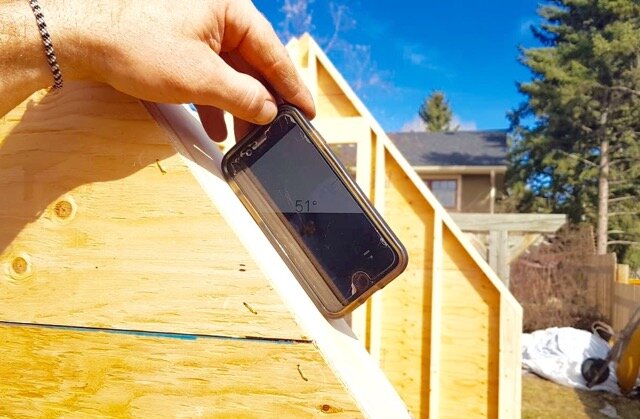
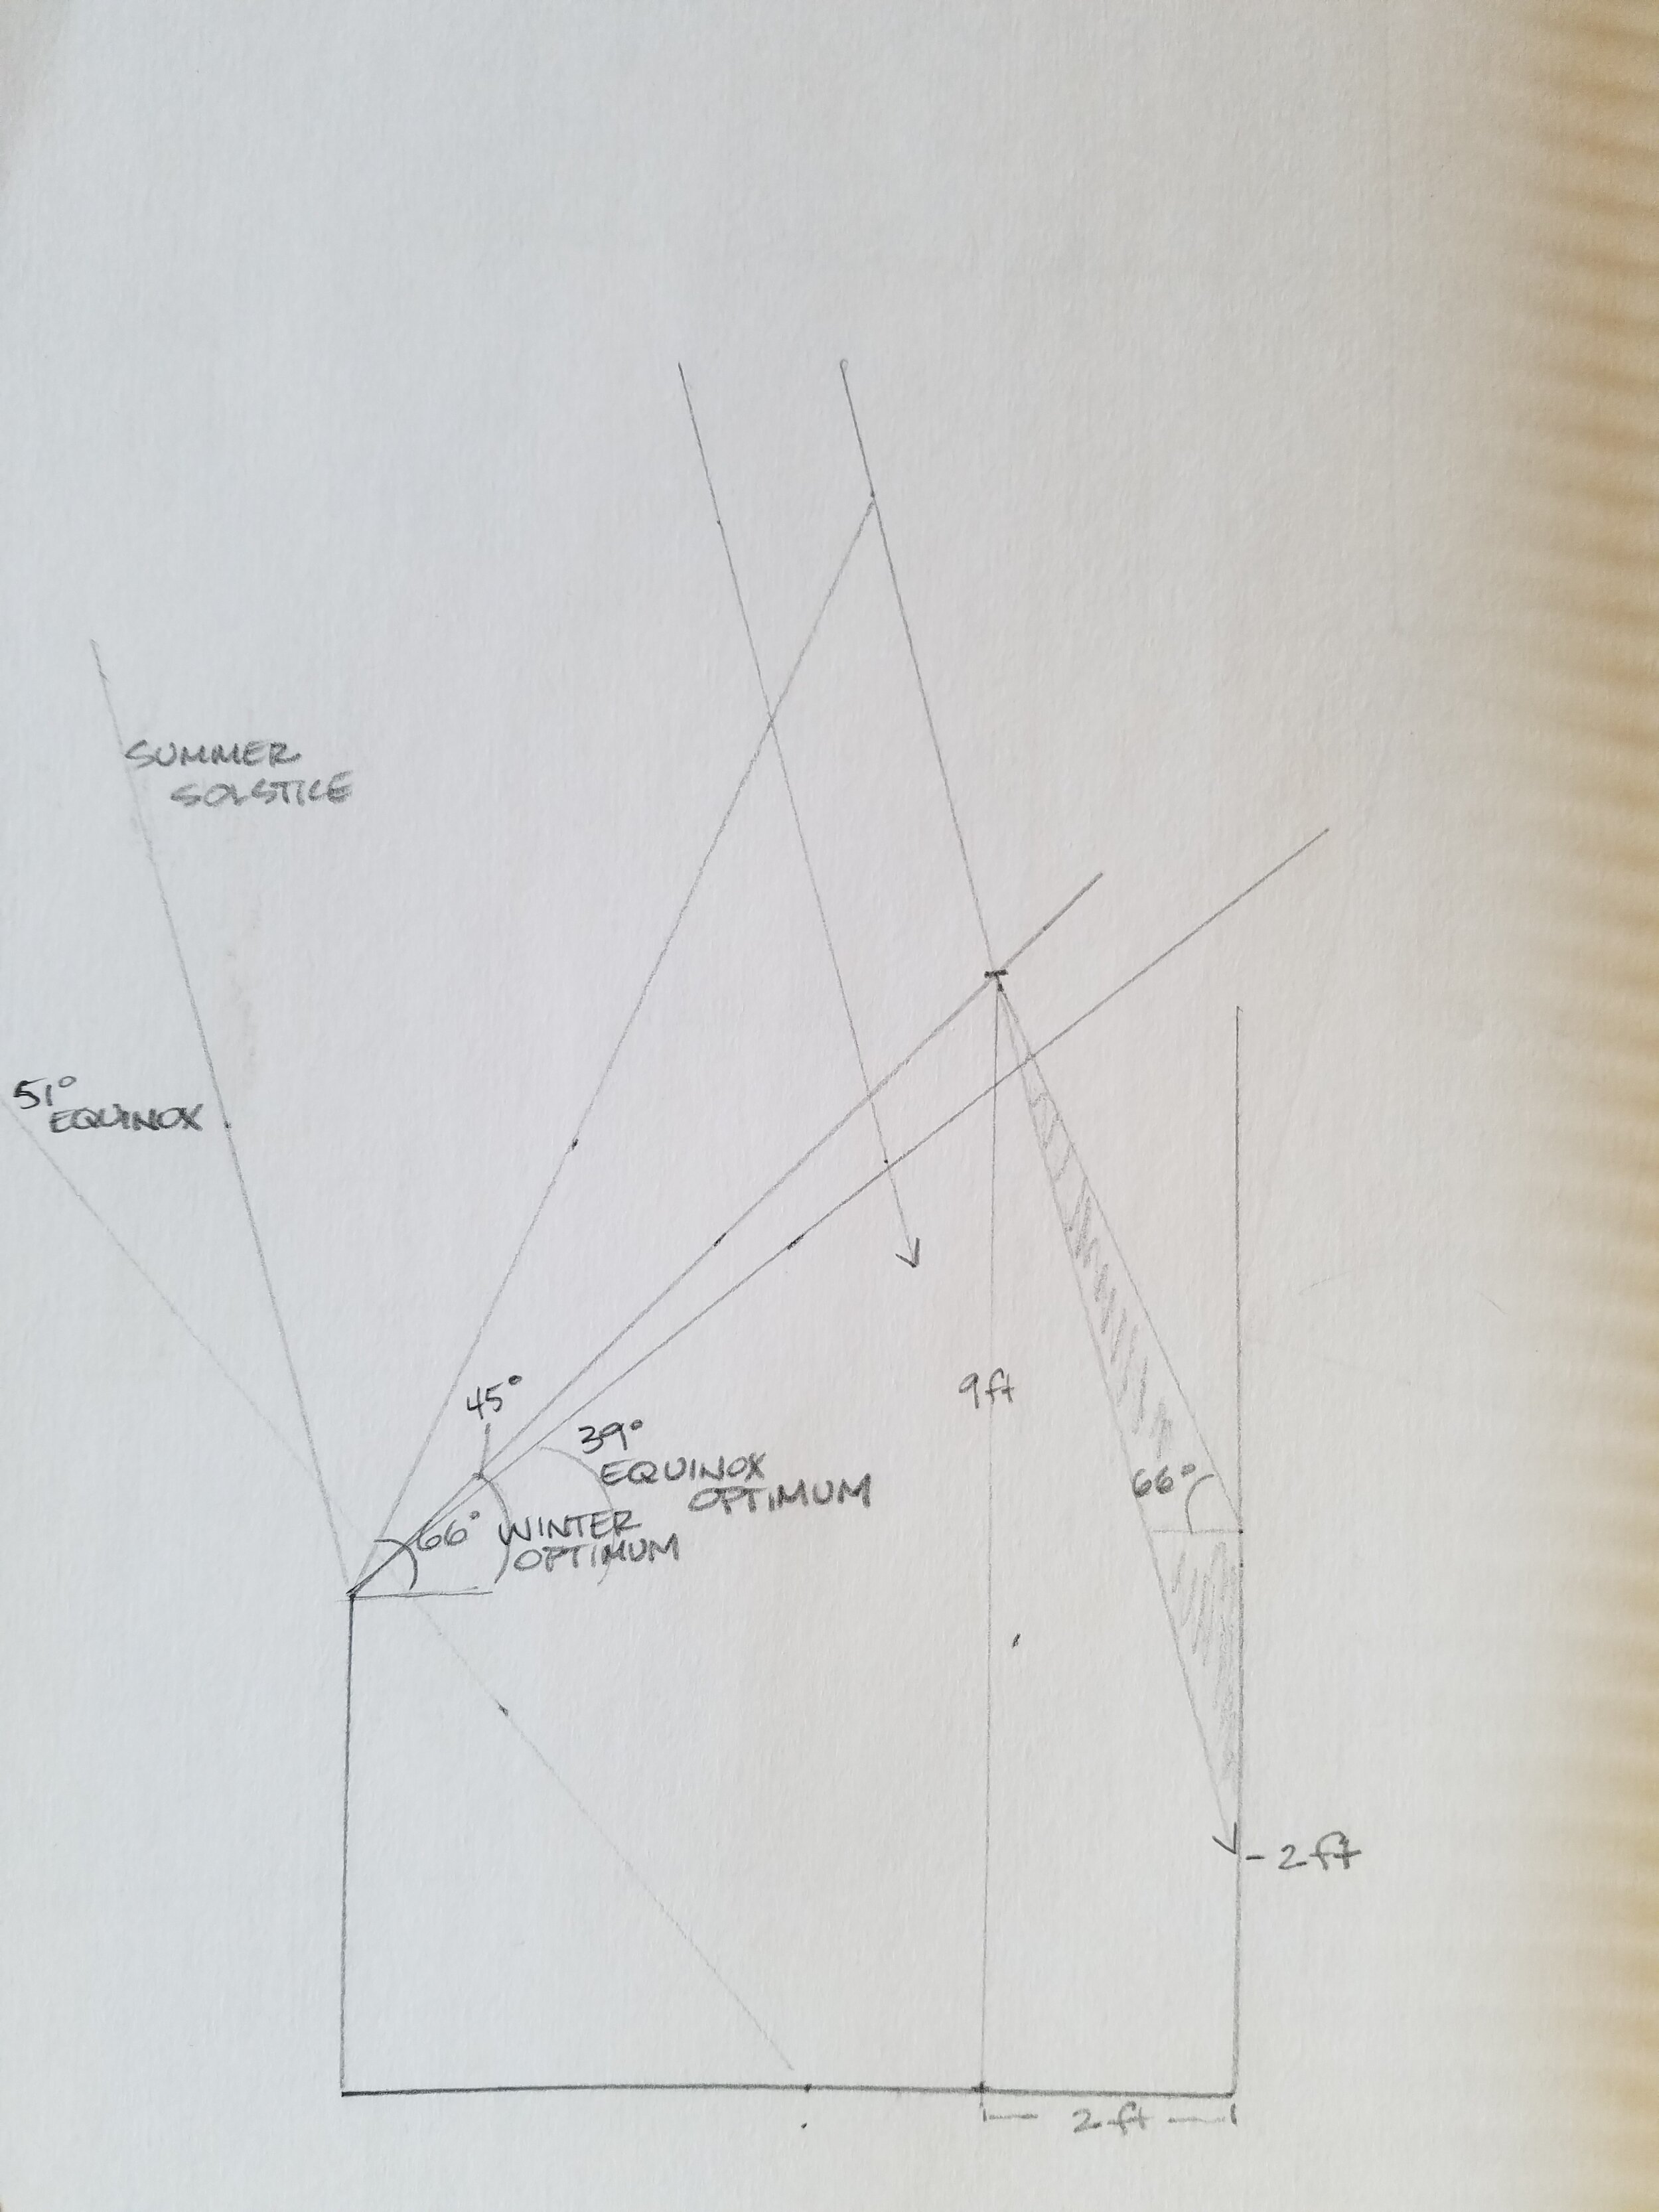
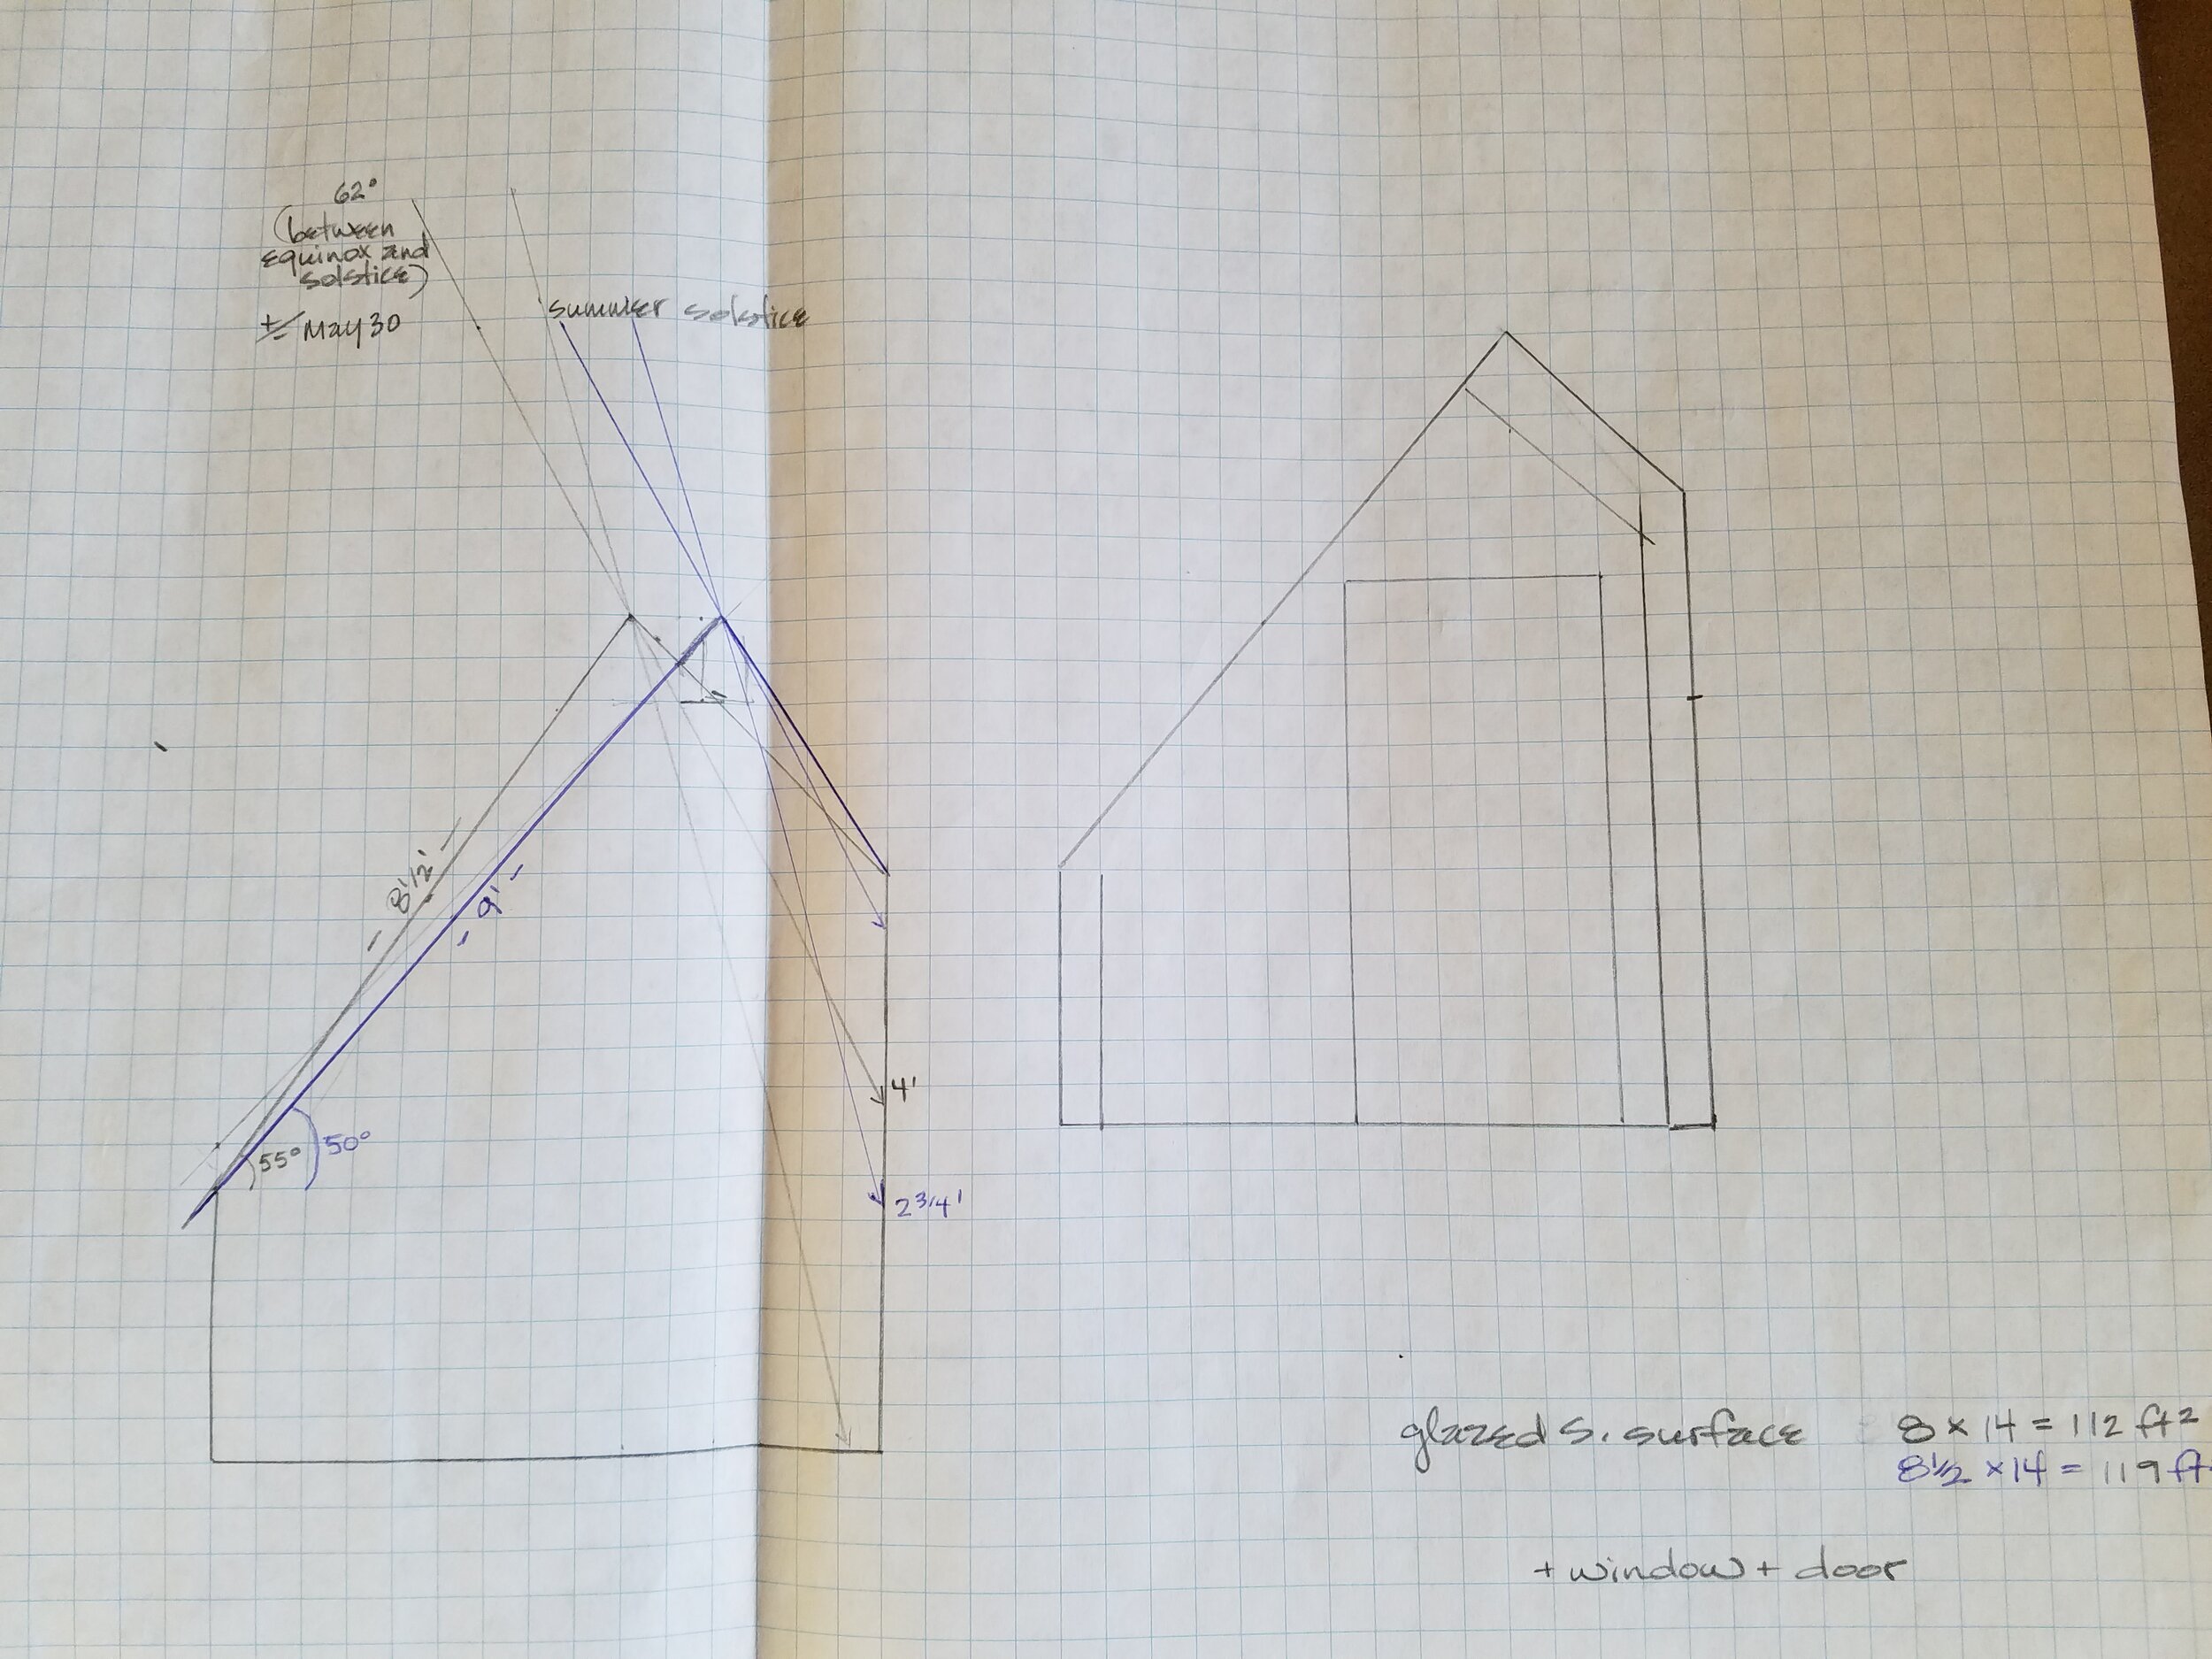
The walls went up quickly at this point, laid out first on plywood to ensure meticulous measurements and a perfect fit for subsequent stages. The angle of our south face took shape and we confirmed it to be 51º from horizontal, as planned. This angle means the glazing will be perpendicular to the angle of the sun (and thus receive maximum solar heat gain) sometime between equinox and winter solstice. We hope this will prove to be about right!
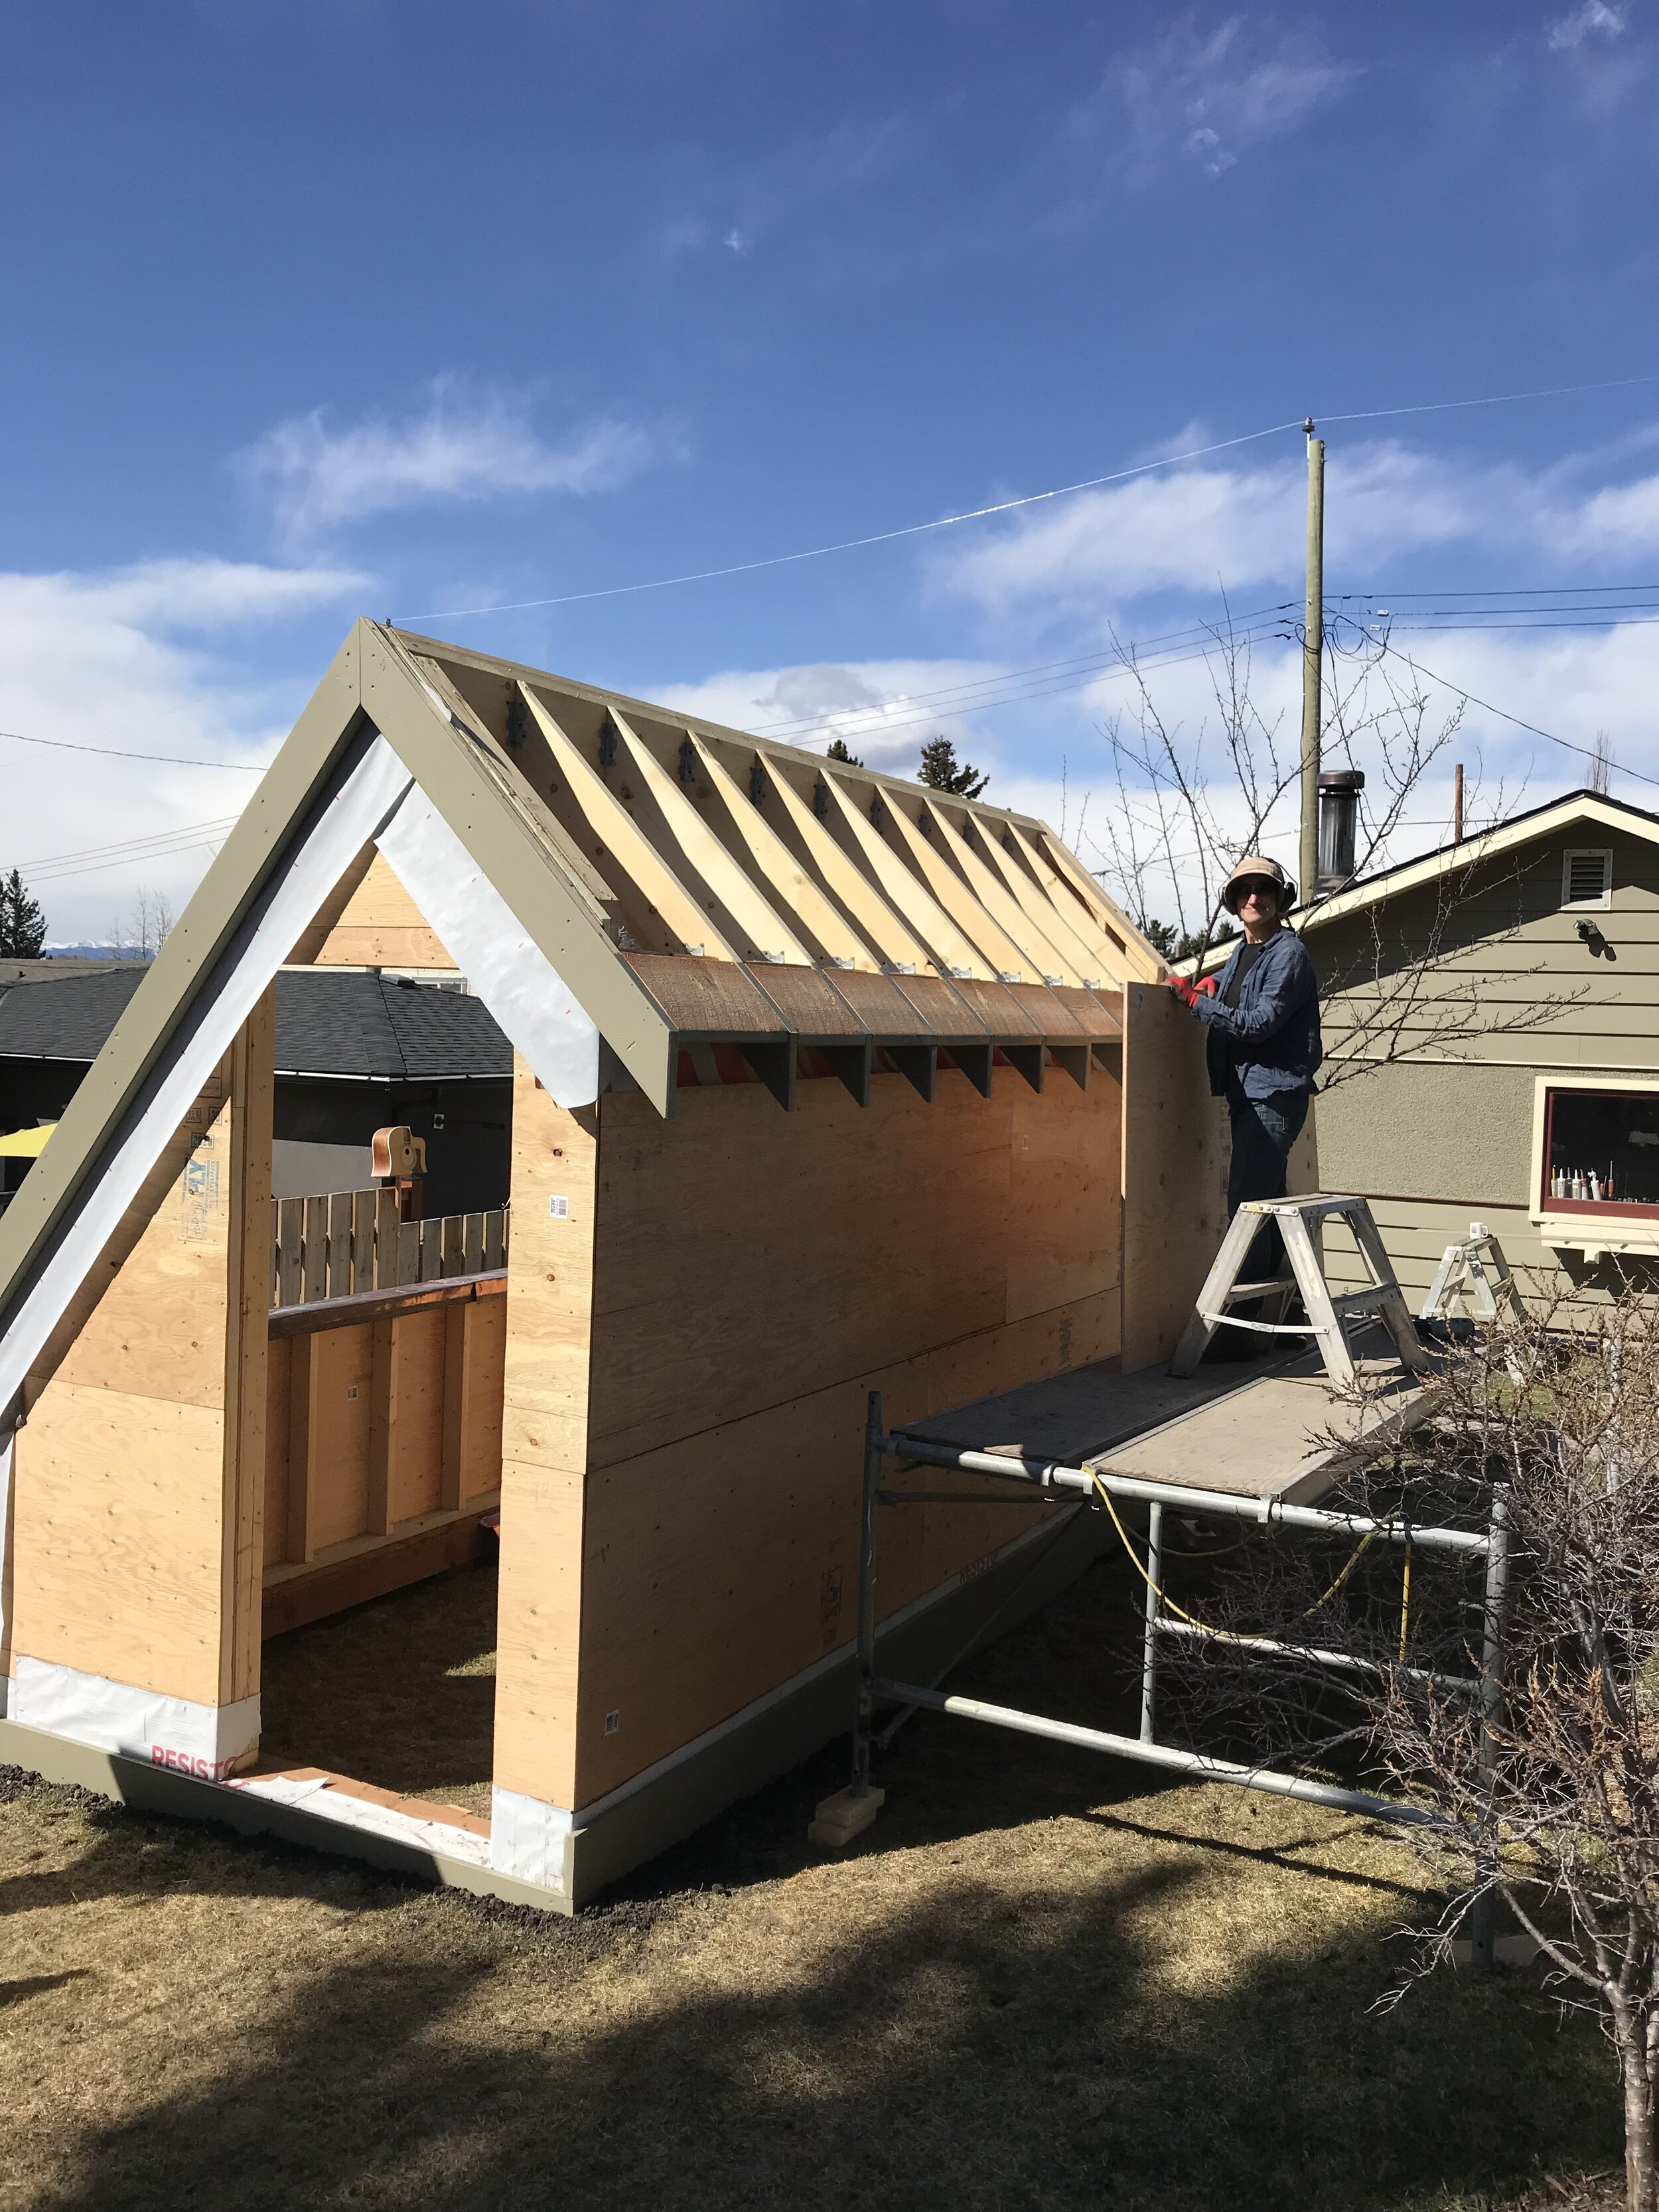
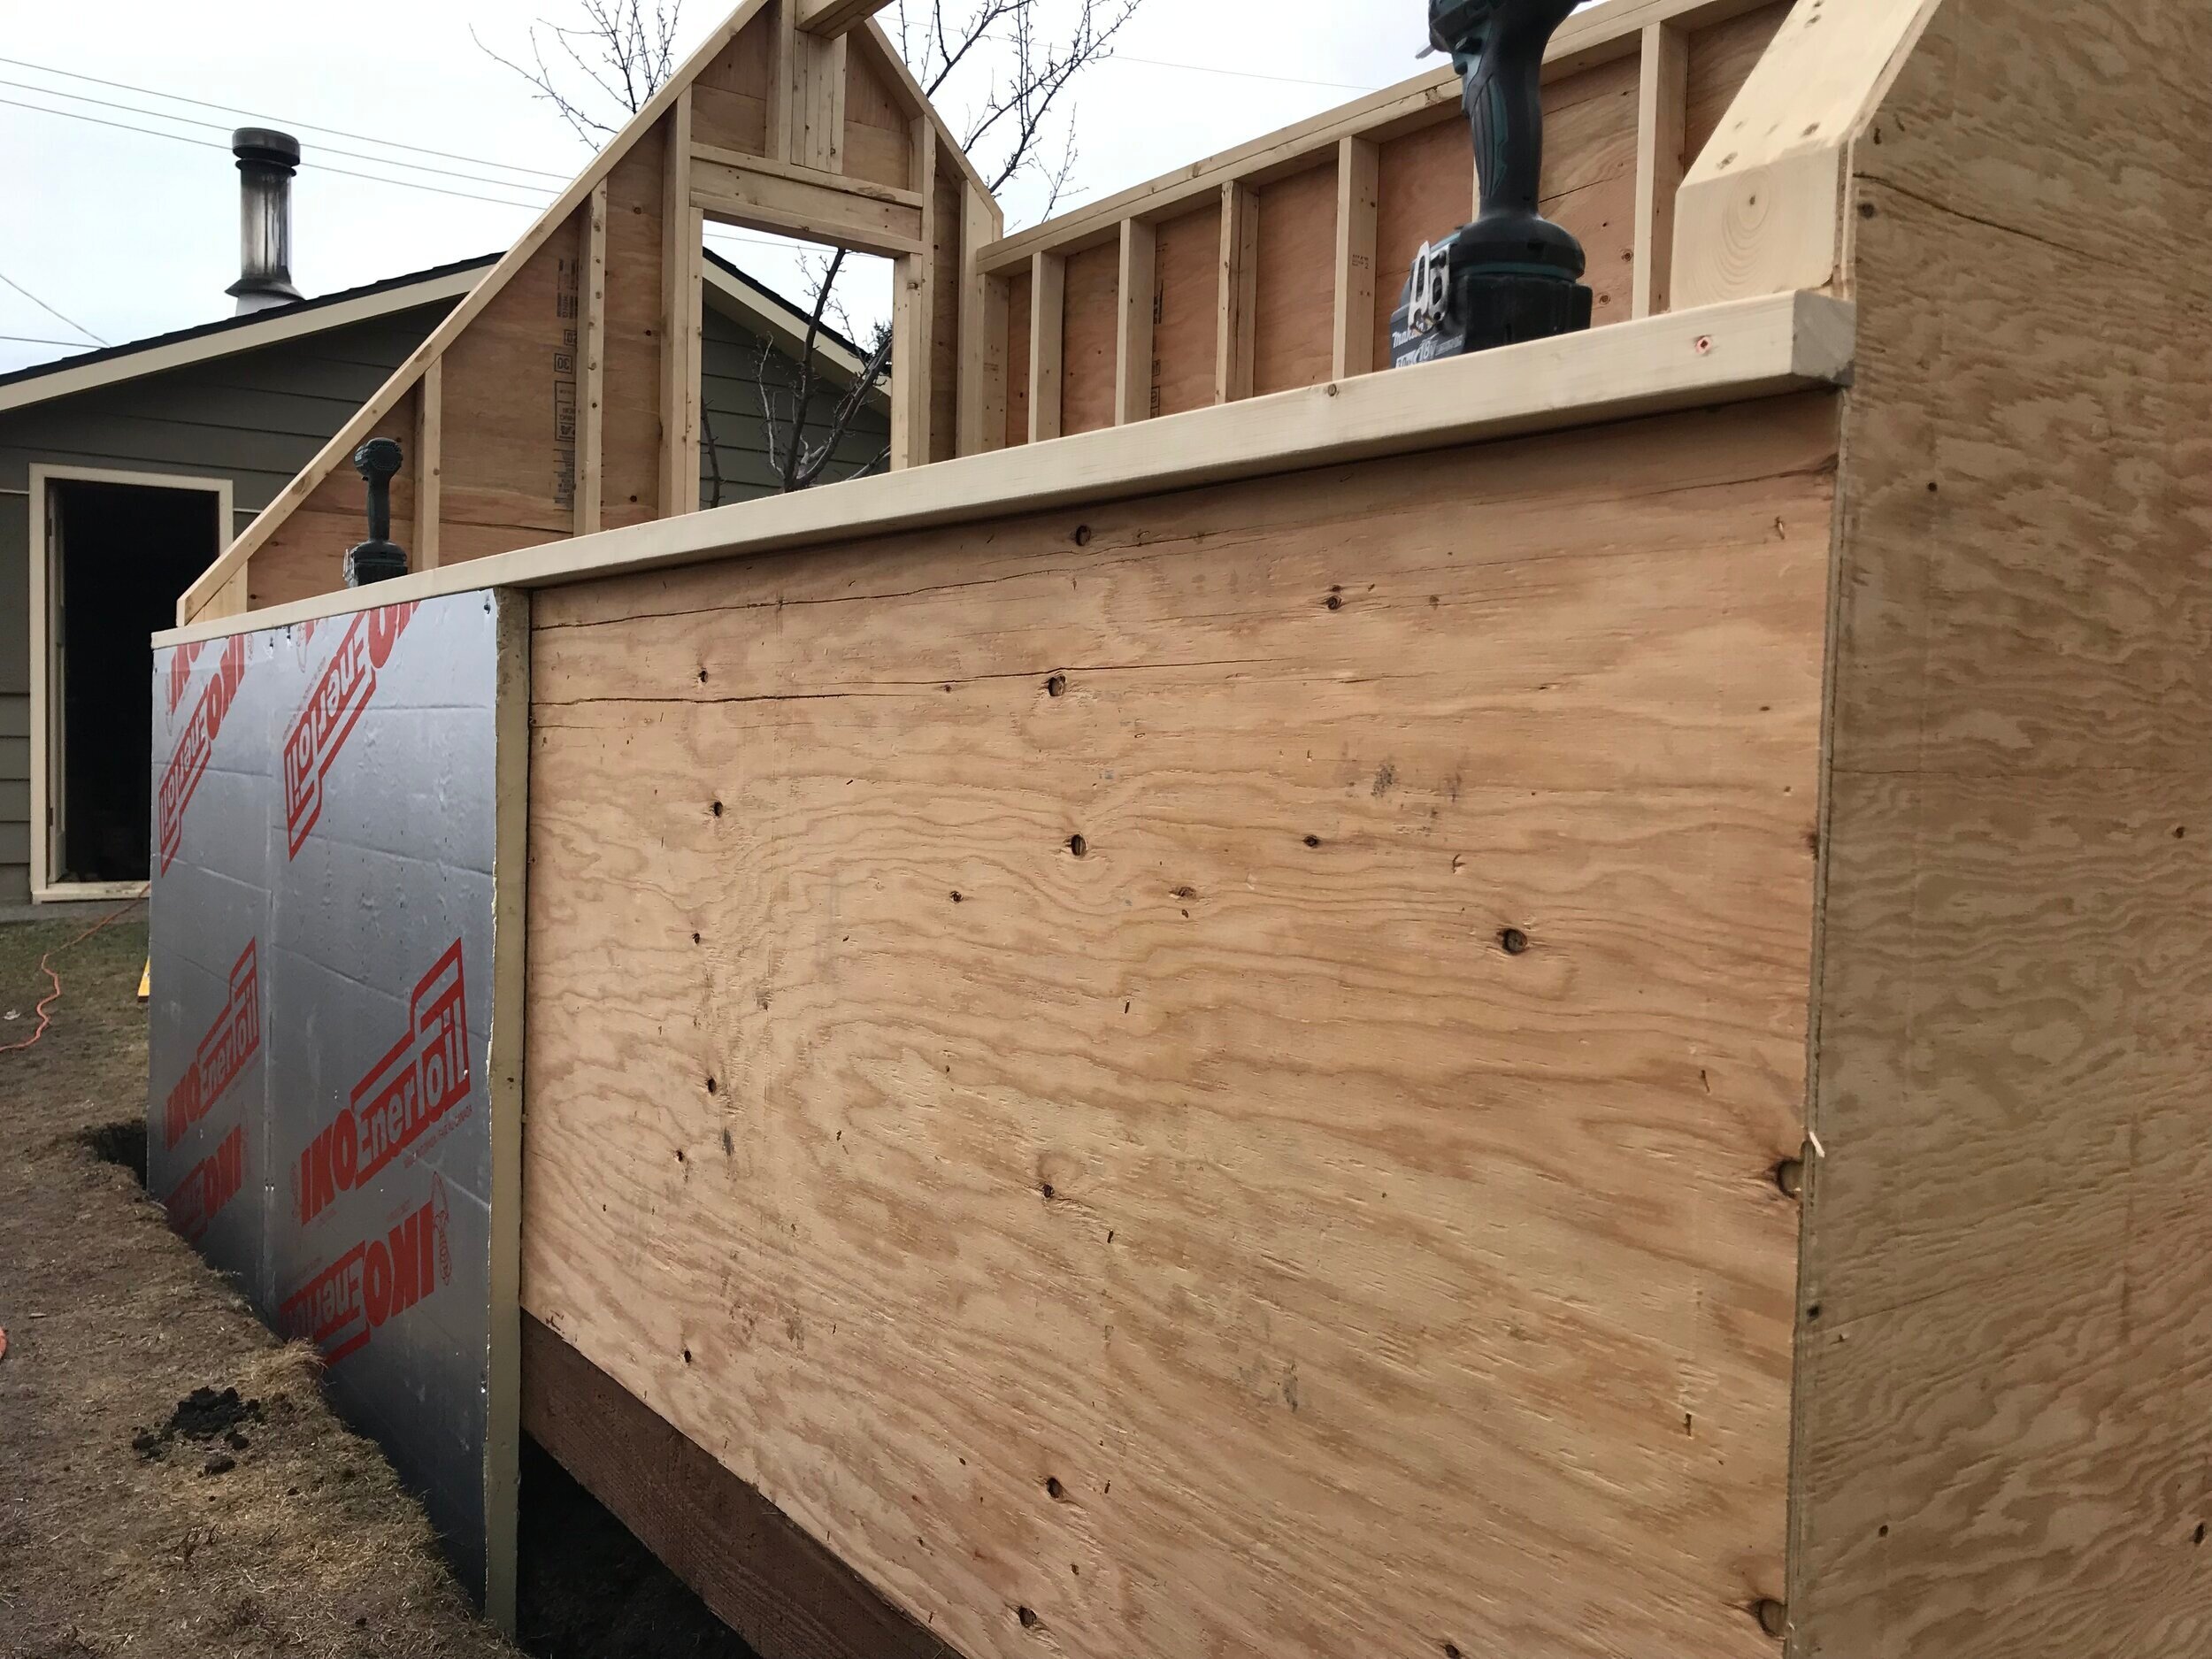
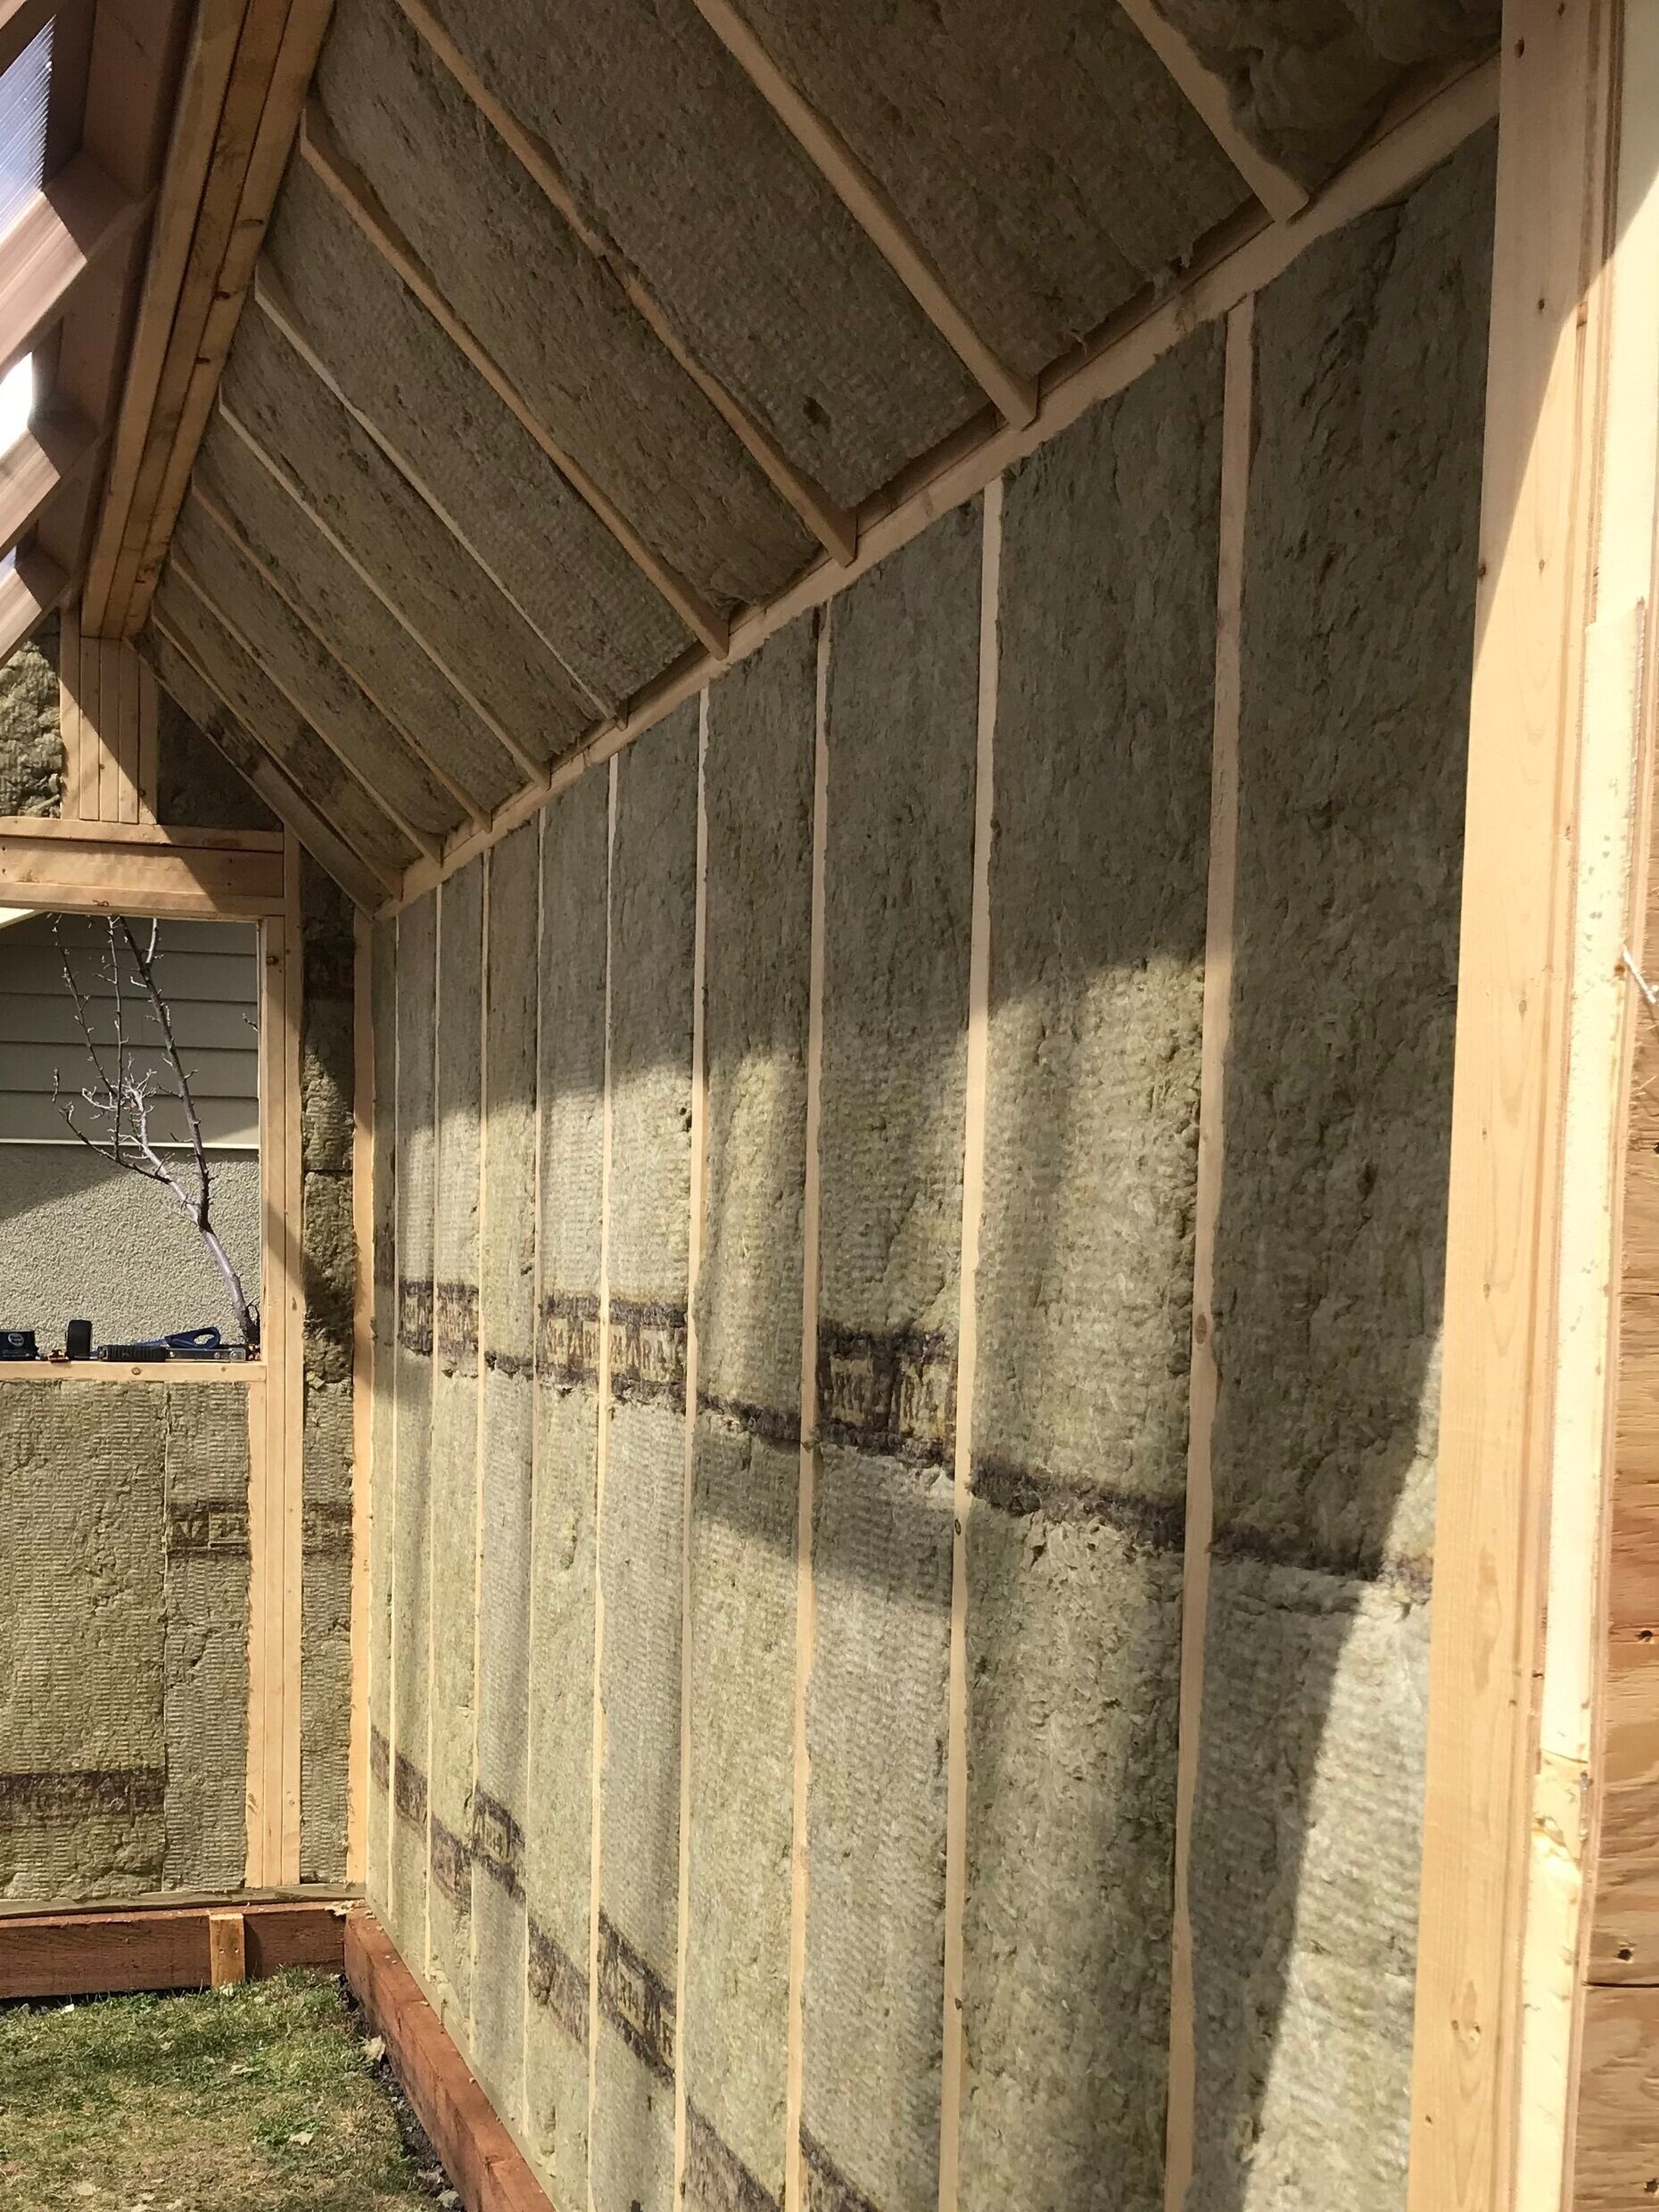
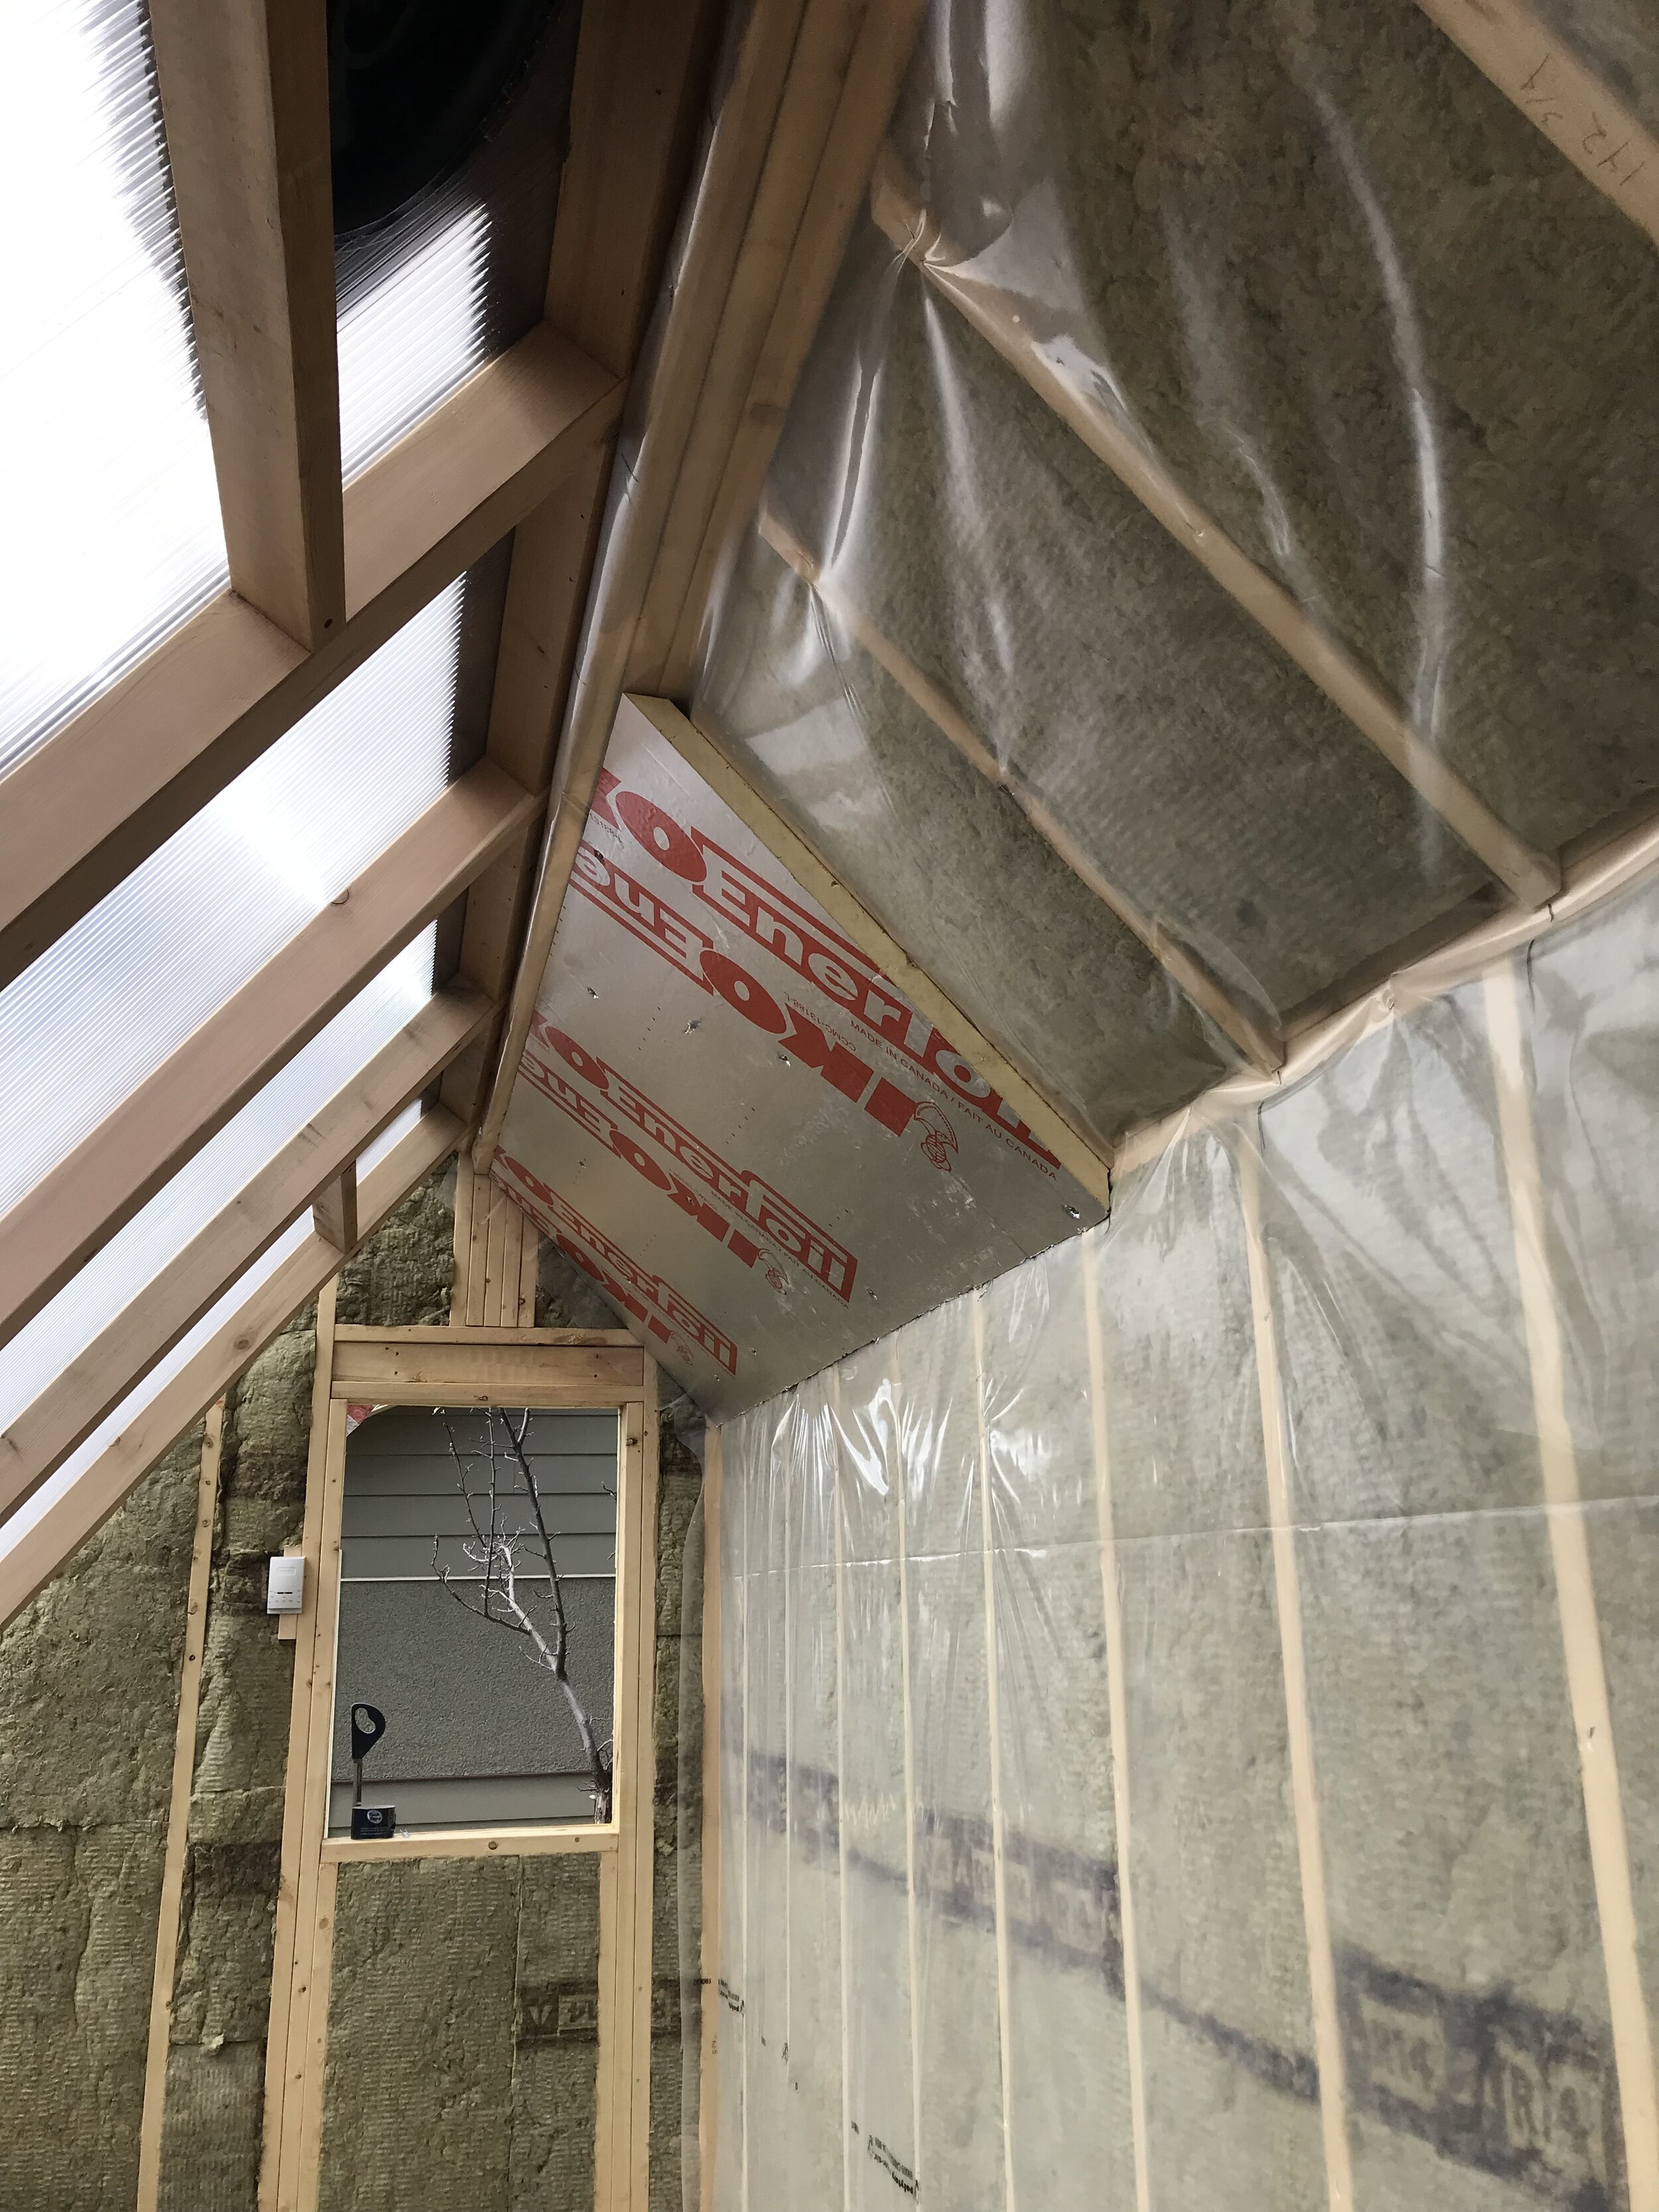
To insulate our walls we chose to use Rockwool on the interior and foil-backed rigid foam (brand name Enerfoil) across the exterior to prevent thermal bridging through the studs. The north roof, although small, is a high point where much of our heat could escape so it received a double layer of Rockwool followed by rigid foam. Neither of these products is particularly “green” yet we chose them for a combination of reasons. Both are resistant to moisture, thus suitable for a greenhouse environment, they both offer good insulative value per inch of thickness and dollar spent, and they are less environmentally problematic than some of their counterparts. They allowed us to achieve good R-value while keeping our wall depth to 6” so we’d be left with adequate growing space inside.
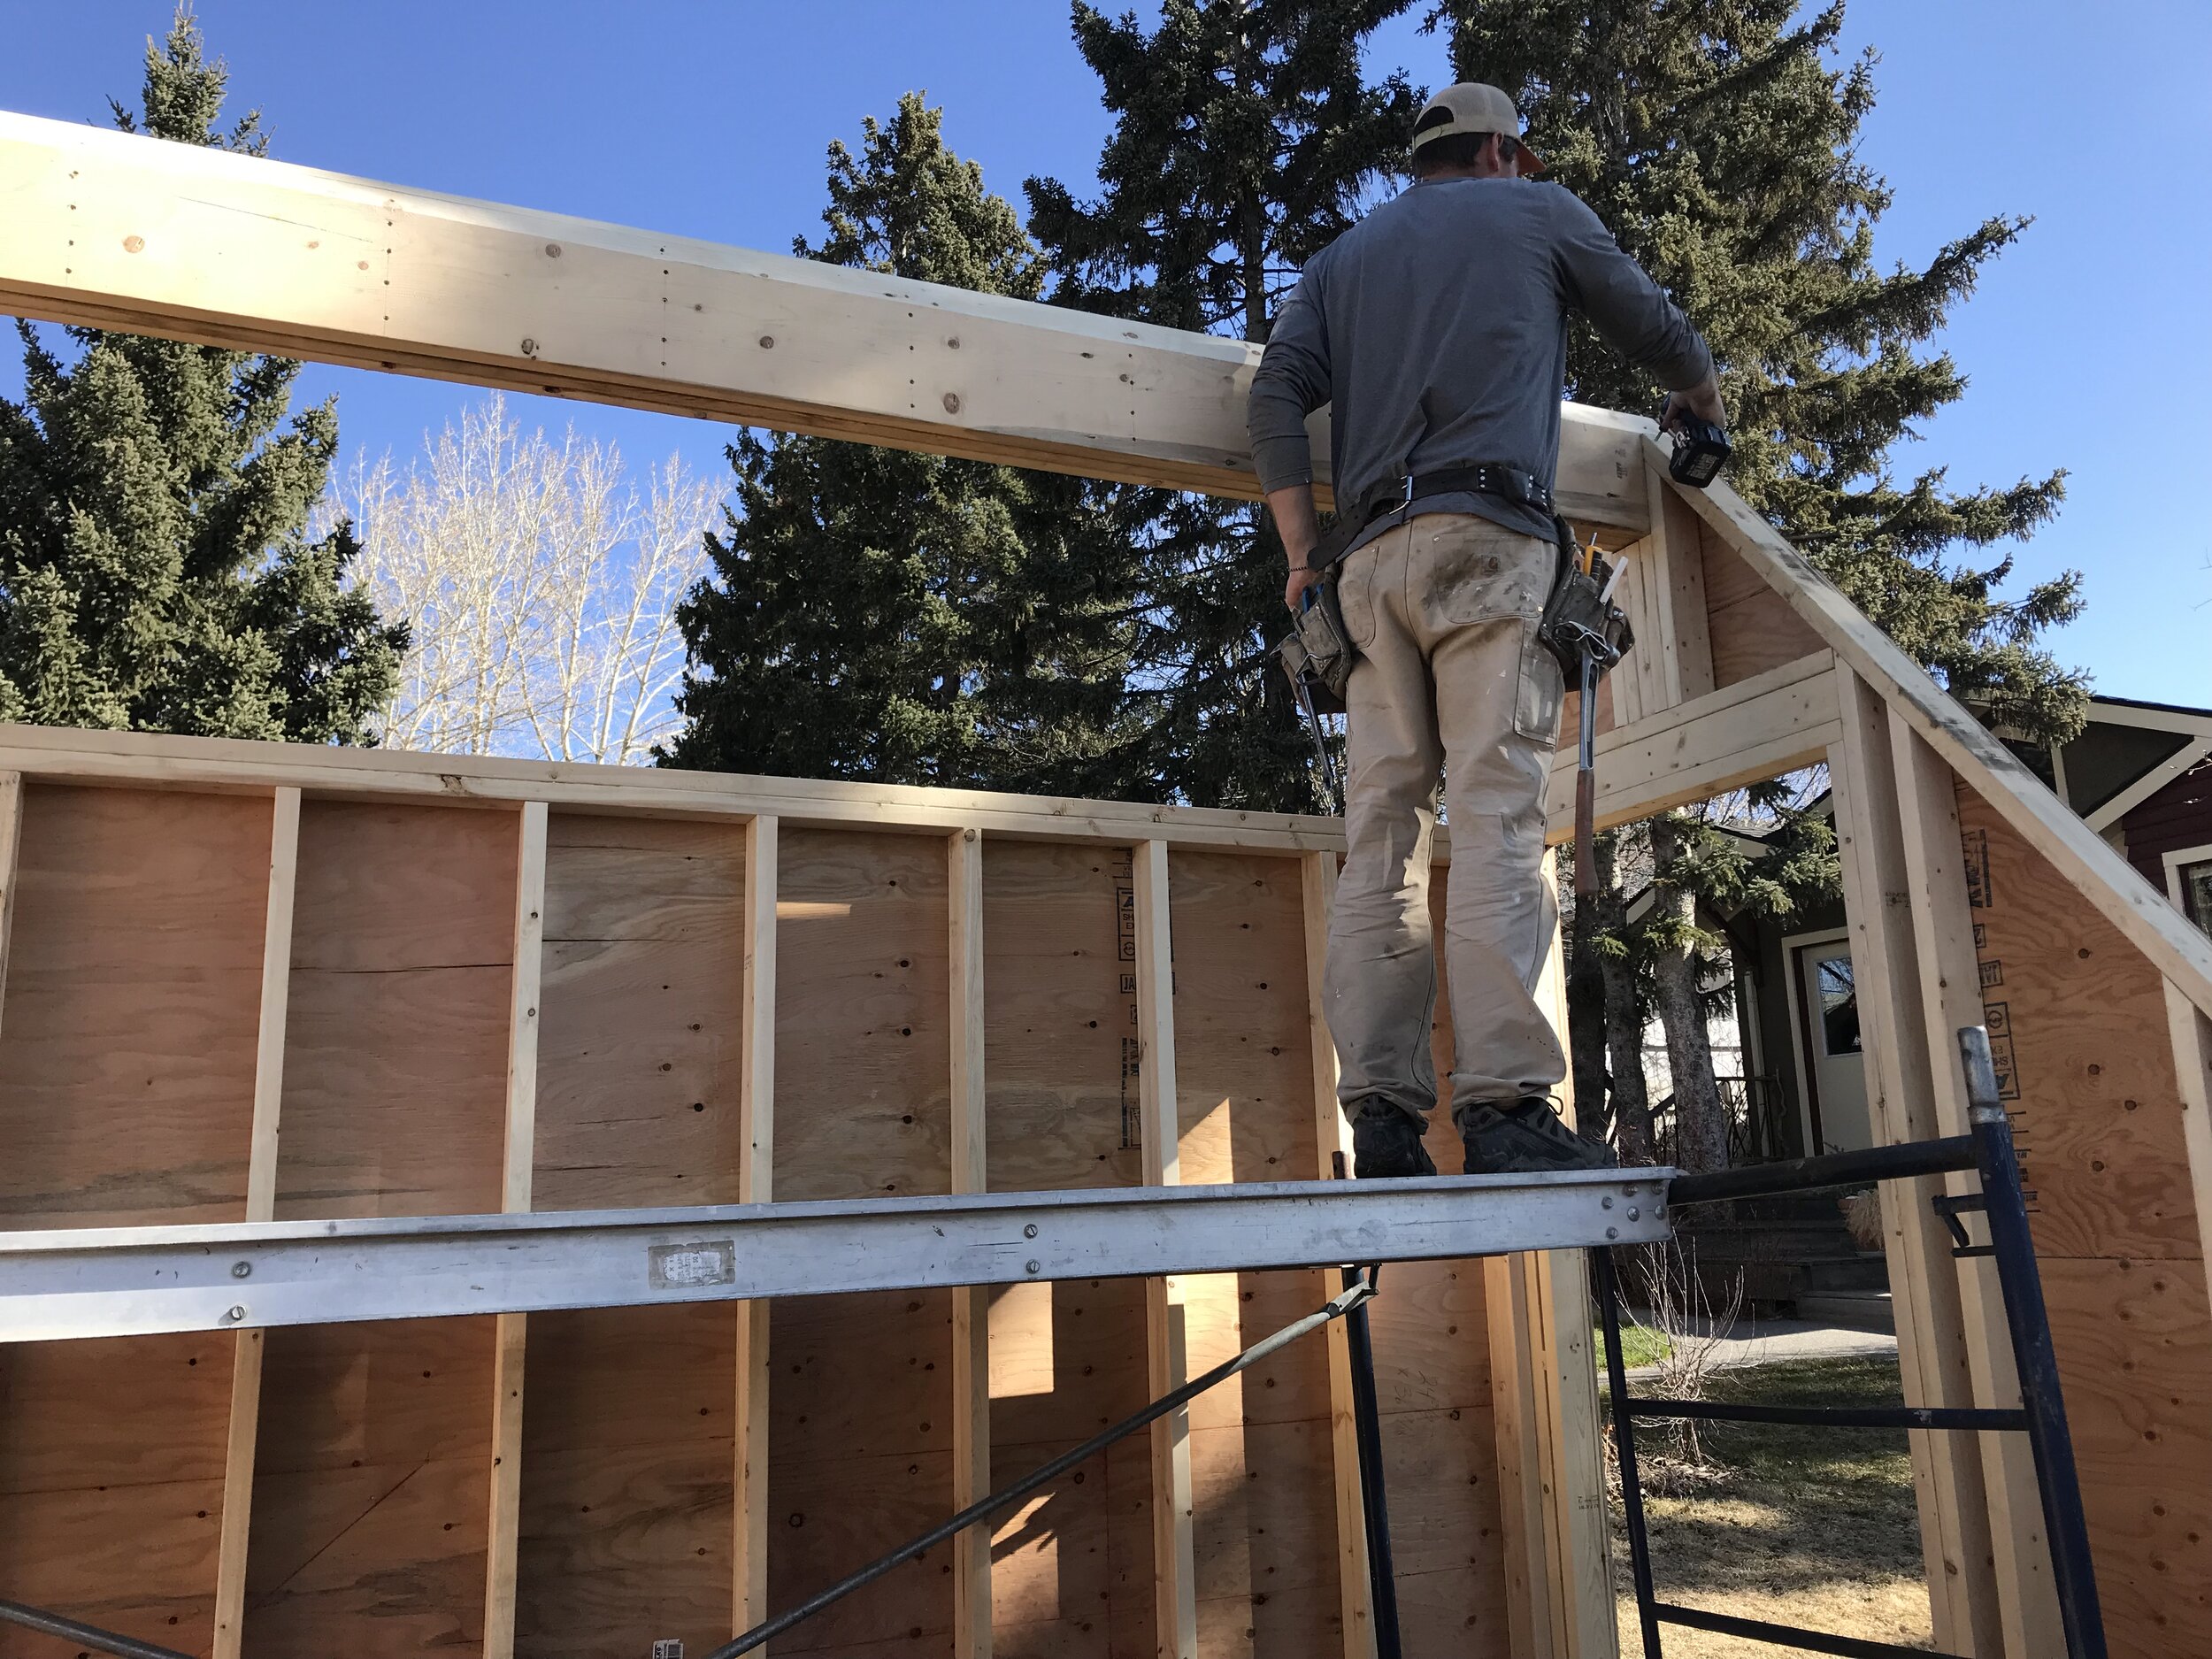
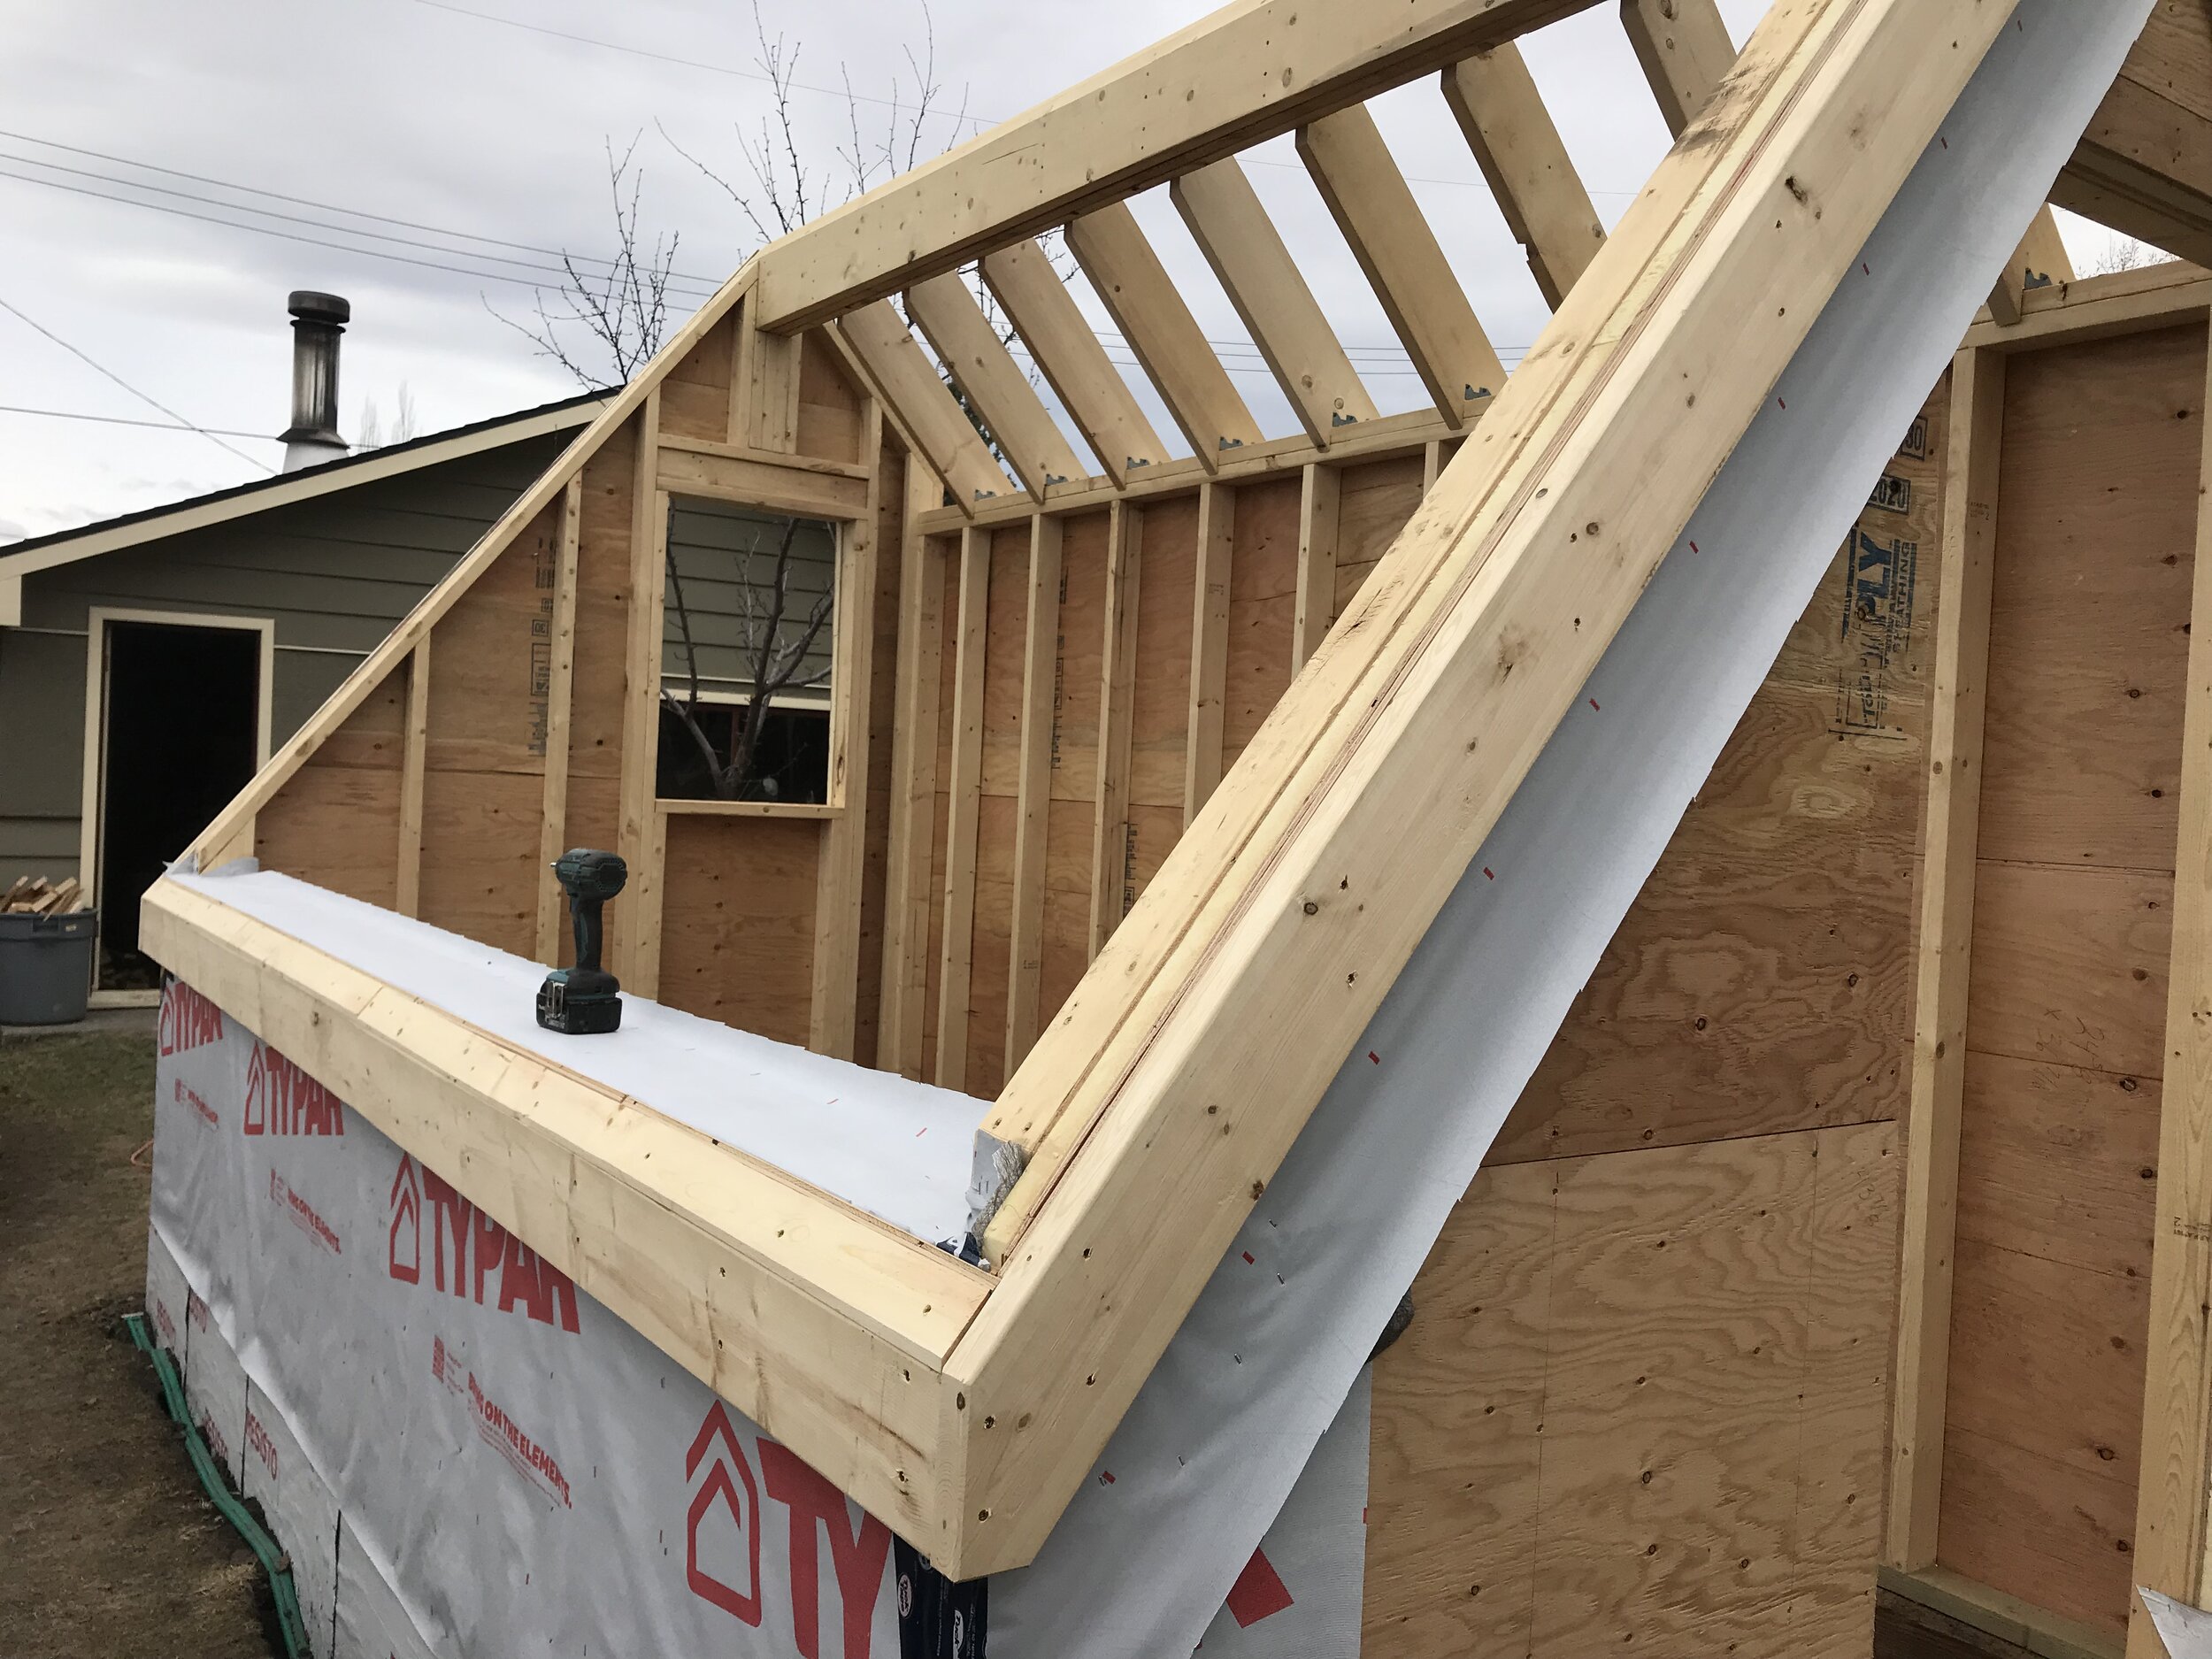
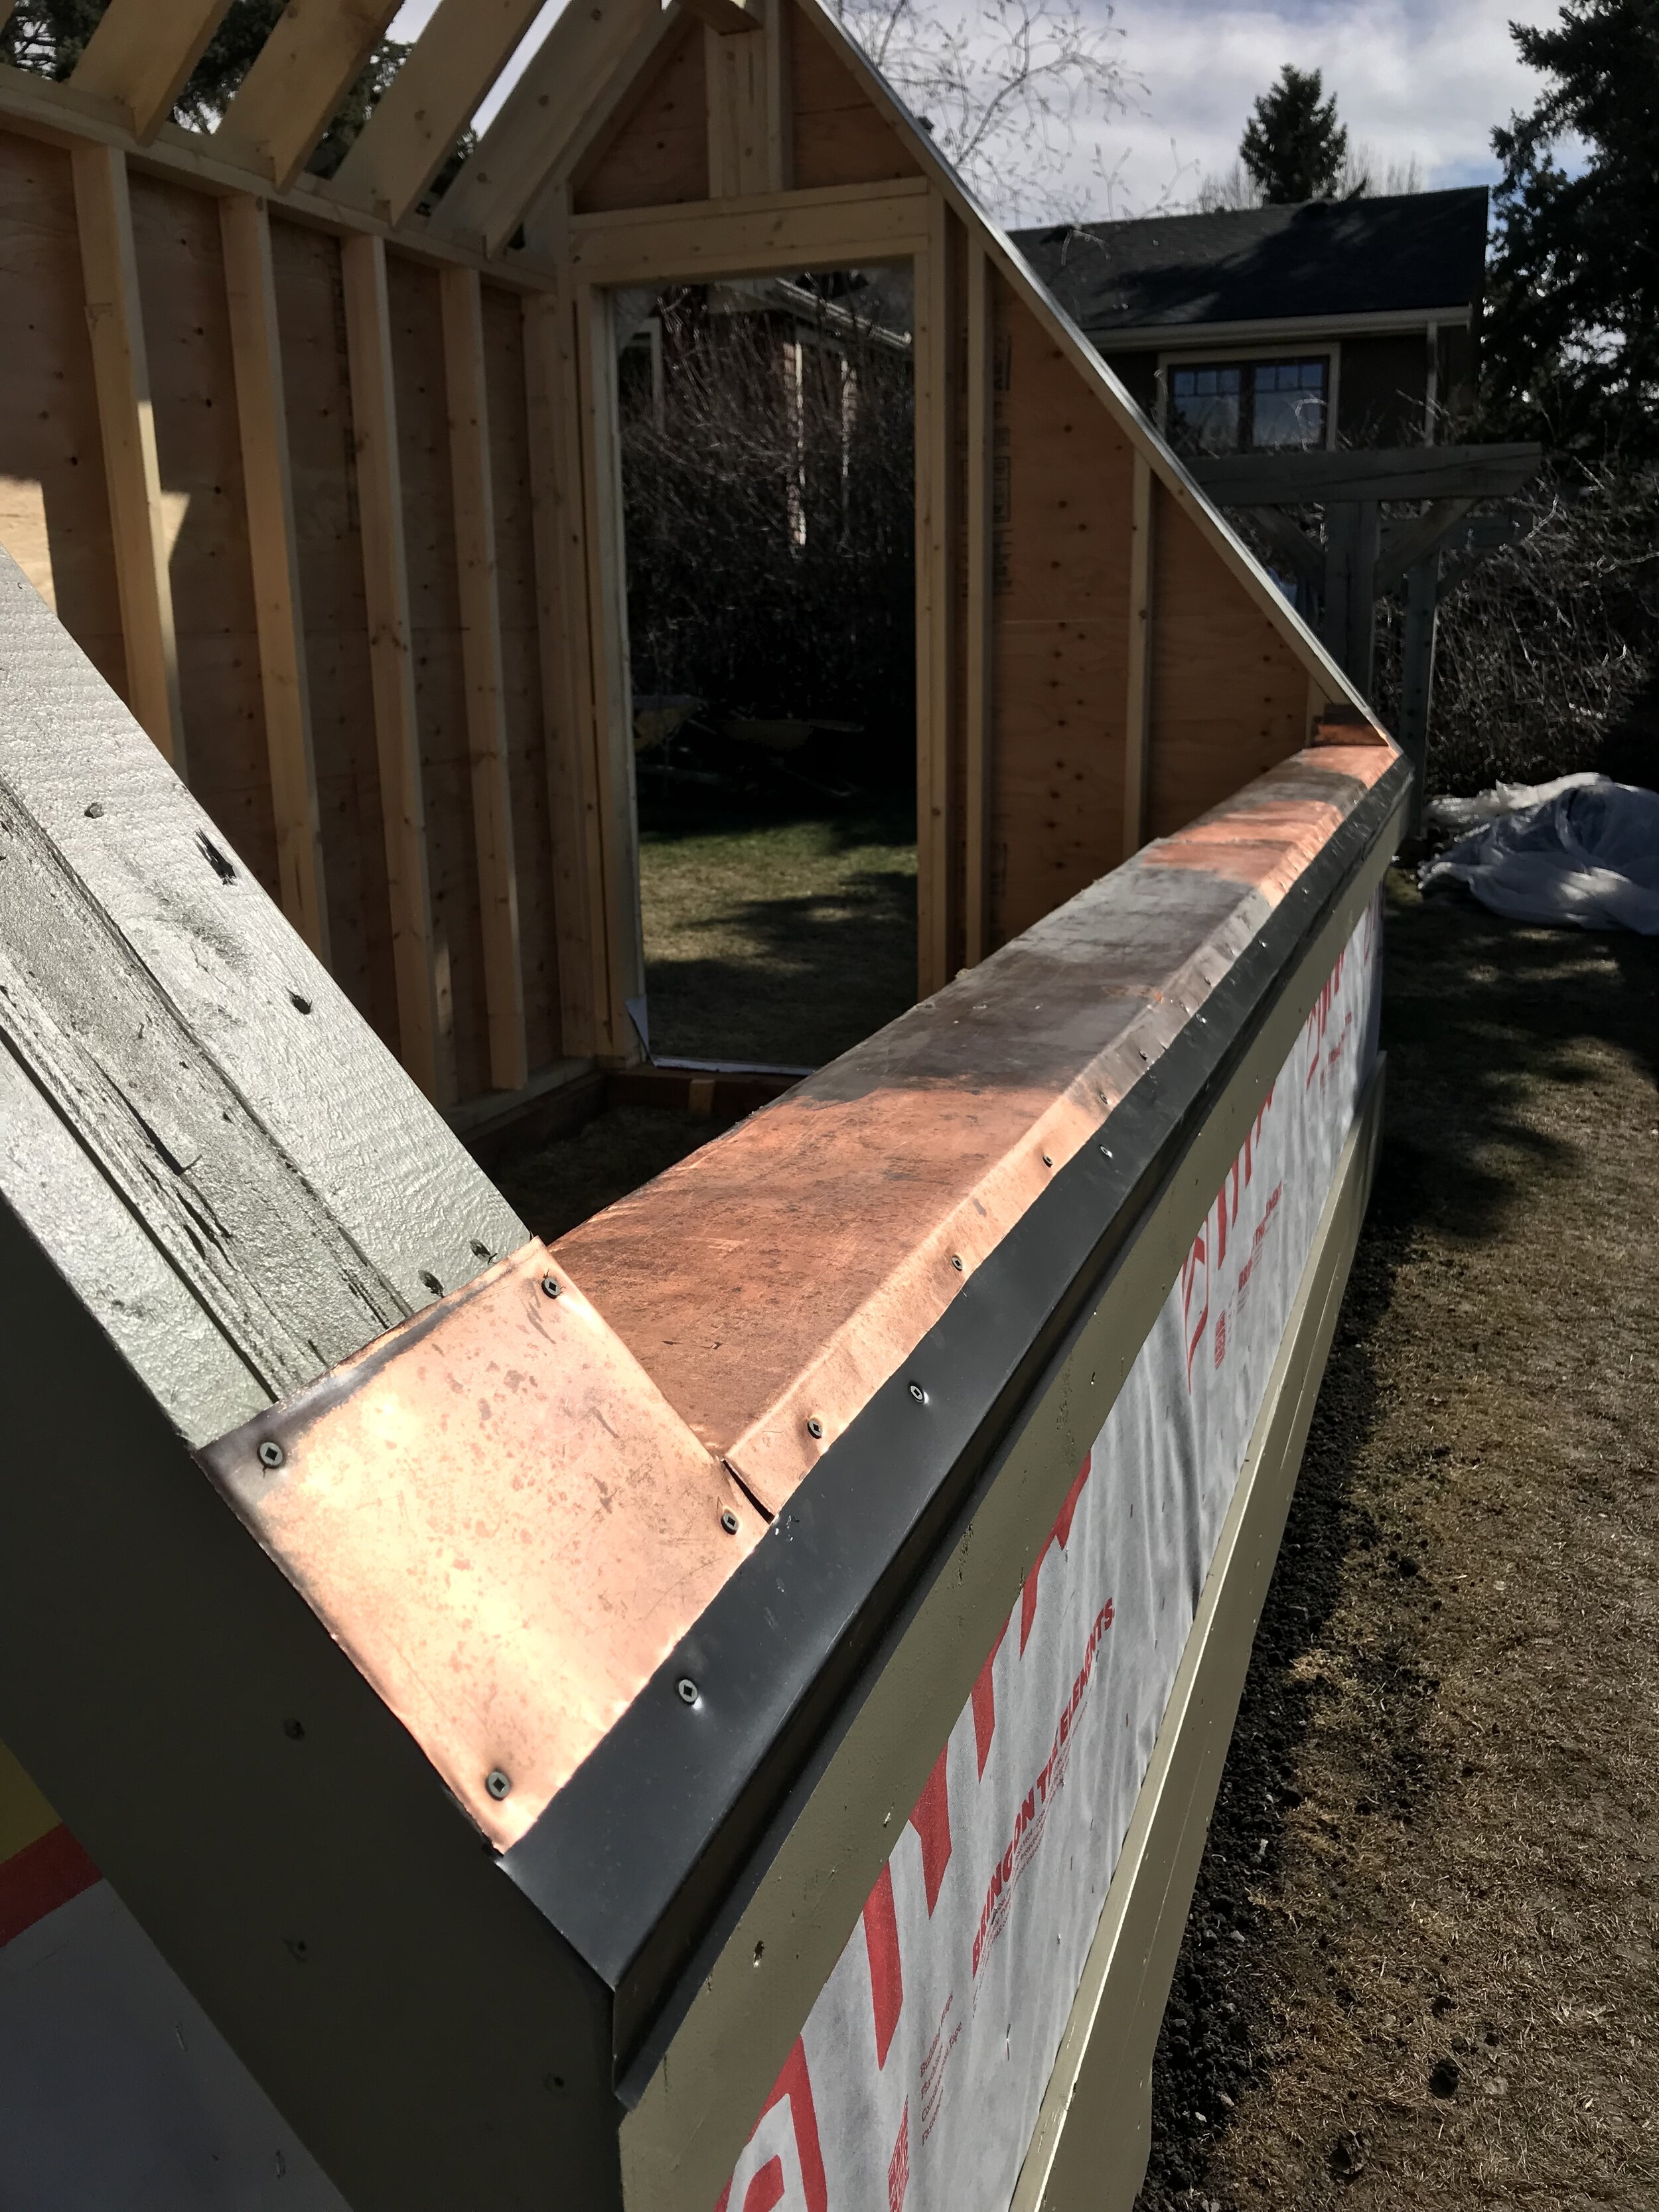
My husband foresaw that we may have a problem with a growing bed filled with heavy, wet soil pushing against our south knee wall and causing it to bow out. So we added an angle brace attached to a north-south floor beam (wrapped in vapour barrier to prevent leaching) to keep it all square. It seemed also that he top of our knee wall may be prone to rot if interior moisture accumulated there so we capped it in copper sheeting we salvaged years ago from a local store reno. And in preparation for the polycarbonate panels and a potential snow load on the south face, we secured cedar 4x4’s as strong, rot-resistant rafters.
I’ve been struck by how much this process has resembled building a small home versus a greenhouse. The detailed carpentry knowledge my husband has, plus his many tools, has been critical in making sure each element will match up with the next and that the end product will look good, really endure, and function as intended. Considering the labour involved and the cost (more about that later!), I’ve found myself questioning why we’re not just tacking some plastic over a frame or joining old windows together for a little “hothouse”. After all, those methods can actually succeed in getting you tomatoes in Cochrane or fending off an unexpected frost. But I’m reminded of what we’re really trying to achieve here - the ability to grow food for a vastly longer period than our climate would normally allow. And to do it without energy-intensive inputs of heat. If we succeed in that, it will be well worth it!
So, onward we go…in the next instalment we should complete the build.
Backyard Greenhouse - Part 1: Setting the Stage
Welcome to a series of blogs about Cultivate Cochrane president Jackie Skrypnek’s backyard greenhouse building process. The intent is to share a realistic account of one couple’s experience to help inspire and inform other community members in their own season-extending, food-producing ventures.

Future site of greenhouse in February
My husband and I have recently embarked on a new little endeavour - building a home-scale passive solar greenhouse. Our existing greenhouse, a ramshackle structure of old rotten windows, is about ready to cave in, plus it’s only ever been capable of keeping a degree or two of frost off the plants inside. We figured it was time to create an effective three-season growing space using passive solar design and to really increase the amount of food we can produce ourselves. Like a microcosm of Cultivate Cochrane’s planned greenhouse hub, but with a maximum congregation capacity of about two people!
Passive solar doesn’t refer to photovoltaic panels; rather it’s a way of efficiently regulating temperature simply through smart design and choice of materials. (For a quick refresher, see our previous blog on the subject). So, design is where our backyard greenhouse project began. For us, a few constraints emerged which helped to quite literally shape what would and wouldn’t be possible for our structure.
One of these was the size of the greenhouse footprint. To avoid the cost and hassle of a municipal building permit, we opted to keep the total area at or below Cochrane’s 107 square foot limit. We really didn’t have more room to play with anyway, given we planned to squeeze it between an existing tree and clothesline. A good rule of thumb for passive solar greenhouses is to shoot for at least a 2:1 length to width ratio so there is plenty of south-facing length to absorb the sun’s light and heat. We settled on 14” x 7.5” for a total footprint of 105 square feet.
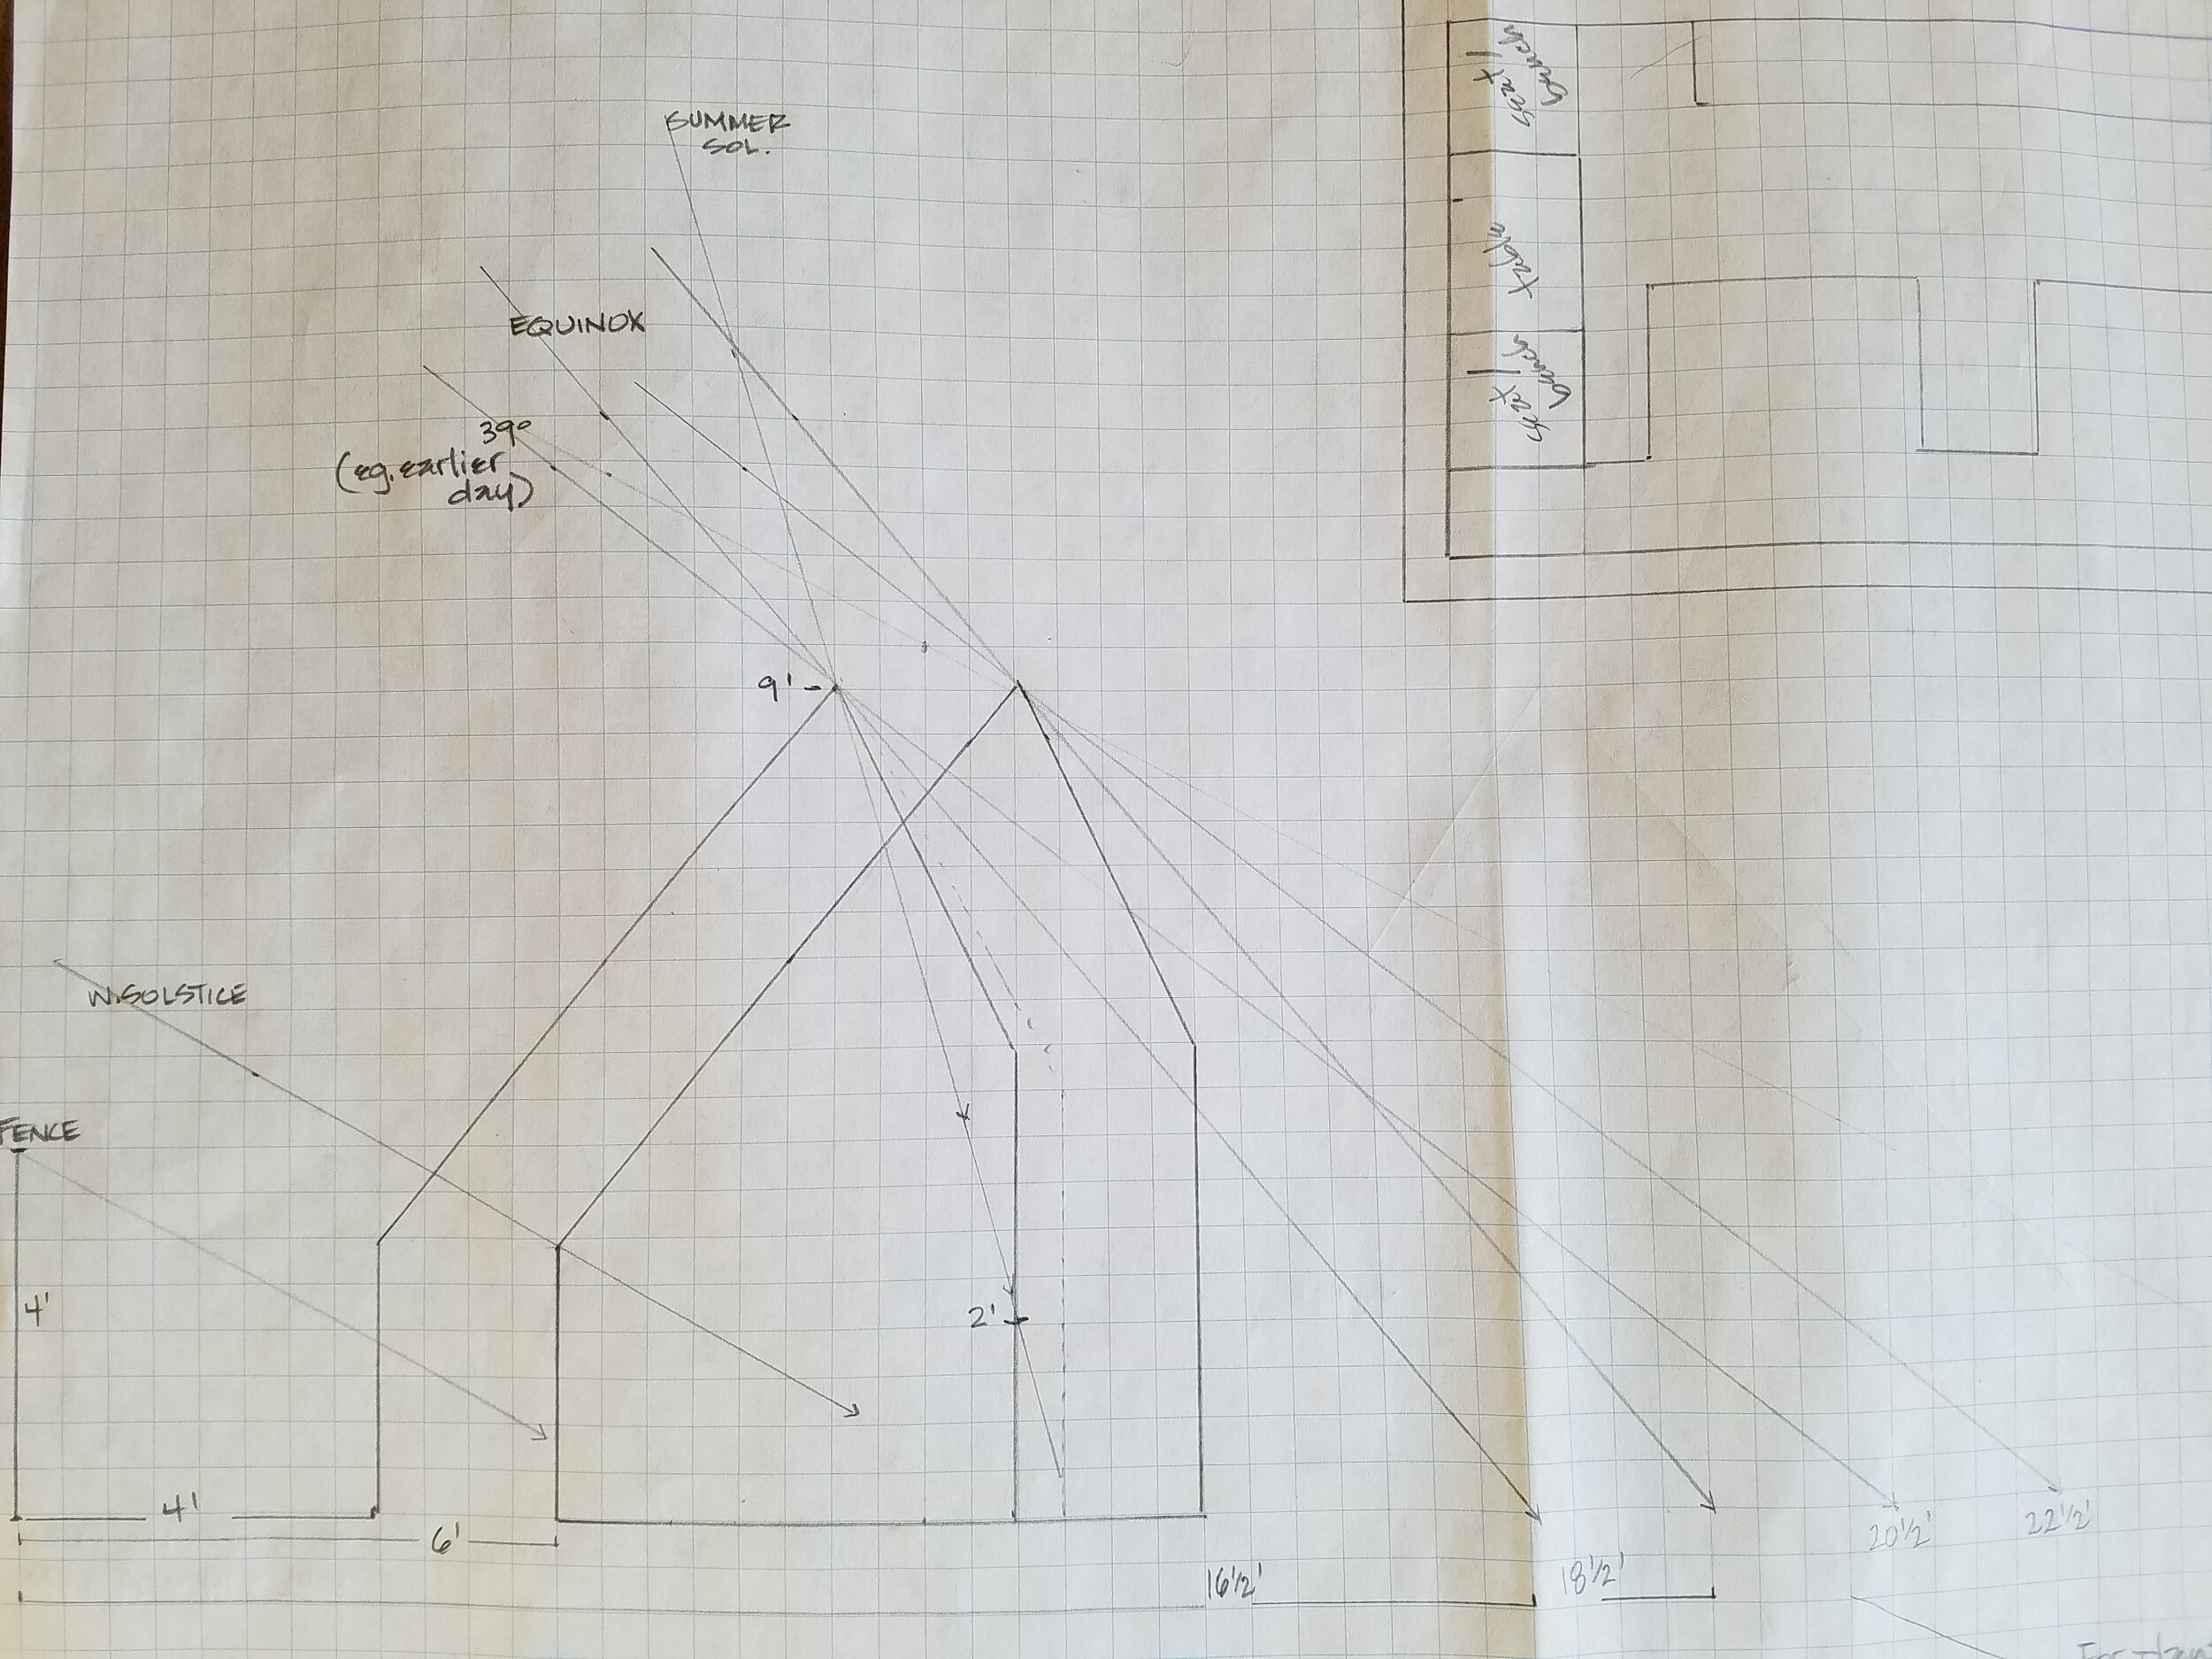
Another constraint was the height. If we went too high, the new greenhouse would cast a shadow on an established patch of perennial food plants including haskaps, sea buckthorn, strawberries, sorrel, lovage, rhubarb, etc. We simply weren’t willing to sacrifice those!
A design emerged through trial and error on graph paper, an attempt to reconcile everything from an effective angle for the south-facing glazing while not overshooting our height limit, wall thicknesses that would be insulative but not eat up too much of the already small footprint, various essential components like ventilation, and even how to get a full-sized door to fit.

With me designing and my carpenter husband reality-checking a few dimensions here and there, by mid-winter we’d come up with a workable plan. Then we just had to wait for the frost to come out of the ground…and wait, and wait! Finally, by last week the soil had thawed and we got to work.
To be continued…in the next instalment, I’ll take you through our first stages of construction.
PASSIVE SOLAR GREENHOUSE DESIGN RESOURCES:
Some basic understanding is needed in order to create an effective design that suits your purposes. These resources offer a good start:
The Year-Round Solar Greenhouse (book) by Lindsey Schiller & Marc Plinke
The Forest Garden Greenhouse (book) by Jerome Osentowski
Verge Permaculture. These are brilliant local Calgary folks who understand what it means to live and grow in Zone 3.
- passive solar greenhouse design course and study packages
- 7 Passive Solar Greenhouse Design Tips (YouTube)
Results are in!!!
We are thrilled to share with you some preliminary results we have received from our Community Support Survey we introduced a couple weeks ago. Your responses have provided great insight and have already directed our course of action for the coming weeks and months. We would love to reach an ideal sample size for the Cochrane Community (approx. 100 responses) and we are already more than half-way there! So please keep the responses coming, and pass this on to others. If you have any questions about the survey, please do not hesitate to get in touch. Stay tuned for online resources in the coming weeks!
To view the results, click here!

Want to add your input? Take the survey!
Adaptation, Resiliency, and Navigating a “New Normal”
What a whirlwind of a month it has been! It goes without saying that the COVID-19 pandemic has changed our lives in pretty dramatic ways. Many of us are working from home, or not at all. Children are completing their schooling via distance learning. These social distancing parameters have turned our homes into the hub of our daily activities, and in many ways, have stretched our capabilities to adapt and adjust.
While riding this wave of general discomfort and uncertainty, it is important to recognize the many opportunities to enhance our ability to adapt and build resiliency within our families and communities. I don’t know about anyone else, but my impulse to garden has never been stronger!
Since January, Cultivate Cochrane has been plugging away at our action plan and are likewise adapting to meet the more immediate needs of our members and the Cochrane community. We recognize this is uncharted territory for all of us, so we would love to hear your insights to help focus our efforts in ways that will be the most useful to you. We have created a survey that will give you a glimpse of some ideas we have, and the chance to provide your own feedback and suggestions. We would love it if you would take a few minutes and fill this survey out!
While our line-up of spring workshops has been put on hold, we won’t leave you in the lurch! Stay tuned to our website and social media platforms (Facebook, Instagram, Twitter ) for resources geared towards food, sustainability, adaptation and resiliency.
We recognize this is a challenging time, no matter which way you spin it. We also recognize this is an opportunity to expand our skills and capabilities and to really come together as a community. We look forward to hearing from you and want you to know we’re here to support you every step of the way!
Here’s our team at our last board meeting - just saying hi and that we’re here for you!

Partnering for Planters
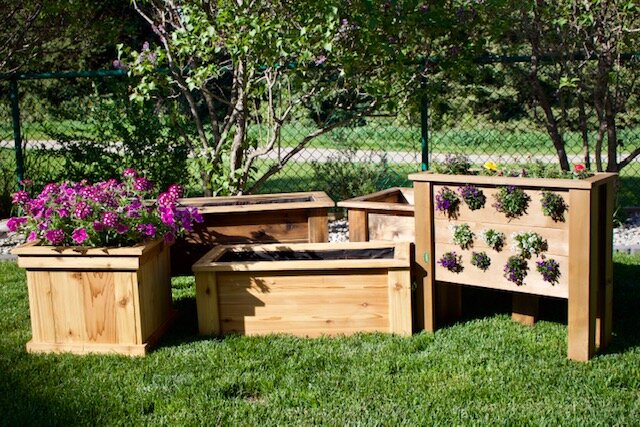
Cultivate Cochrane is happy to announce a new partnership with a small business in town! Mick Gee hand builds a variety of garden planters and unique home accessories for his home-based business Rustic Home & Garden Furnishings. He uses cedar for the planters so they are built to last, and reuses items like wine barrels in some of his other creations. One garden planter we especially love has growing space not only at the top, but also all down one face - we imagine filling the holes with herbs, nasturtiums, and salad greens for a beautiful and edible display!
Mick is really keen on Cultivate Cochrane’s vision (he remembers tomatoes warm off the plant and eaten on the spot with a pinch of salt in his greenhouse back in the UK) and is especially passionate about seeing kids involved in planting and growing. He has generously offered to donate 10% of any purchase made by a Cultivate Cochrane member back to our organization. So, check out Rustic Home & Garden Furnishings and be sure to mention that you’re a member if you place an order - every little bit helps us make our community greenhouse hub a reality!
A Glimpse of the Year Ahead
After a flurry of outreach, meetings and events in 2019, Cultivate Cochrane is poised for our next stage of progress in 2020. With some new members on our board of directors, we’ve laid out a path for the months ahead that will bring us ever closer to the passive solar community greenhouse hub we’ve all been dreaming of. Though strategic plans aren’t always the most inspired reading material, we think ours is actually pretty exciting! Here are the four main objectives we’ve set out to accomplish this year:
CUSTOMERS: Conduct community engagement to determine the top needs of potential greenhouse customers and develop a program and education plan to meet these needs.
FINANCIALS: Develop capital and operations budgets along with fundraising strategies for both.
BUILDING: Secure a site for the greenhouse and customize a design for the building based on site partnerships and identified community needs.
MEMBERSHIP: Grow and retain society membership and develop a mature board of directors.
So we have our work cut out for us! We’ve also had some really promising discussions with leaders in our community about mutually beneficial siting of the greenhouse. It seems the concept of an innovative sunny gathering space where sharing and learning can happen around feeding ourselves is something that resonates with a wide range of community members.
The cost of produce is expected to continue to rise this year, the climate continues to shift, and we continue to have a very short growing season. Plus, the loneliness and disconnect people feel in these modern times seems to persist. So a sustainably-designed community hub where we can increase our ability to grow food locally is an idea whose time has come.
There is much to be done and we invite you to join us. It takes a village to raise a community greenhouse hub!